The following are the print files and installation instructions for the poop bin for Creator 5 and Creator 5 Pro. Please read through the guide before downloading, printing, and installing.
1. File Downloads
Step files:
Hanger.step
Poop Bin (Hanger Version).step
G-code file(PLA):
Hanger_+_Poop_bin_PLA_3h19m.gcode
3MF file(PETG+PLA(support)):
Hanger_+_Poop_bin_petg+pla_3h11m.gcode.3mf
2.Print the downloaded file(s) using your 3D printer.
3. Installation
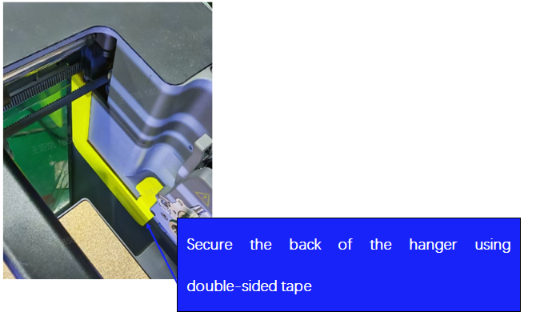
Step 1: Apply double-sided adhesive tape to the contact surface between the hanger and the machine, then secure it to the rear right side of the machine as shown below:
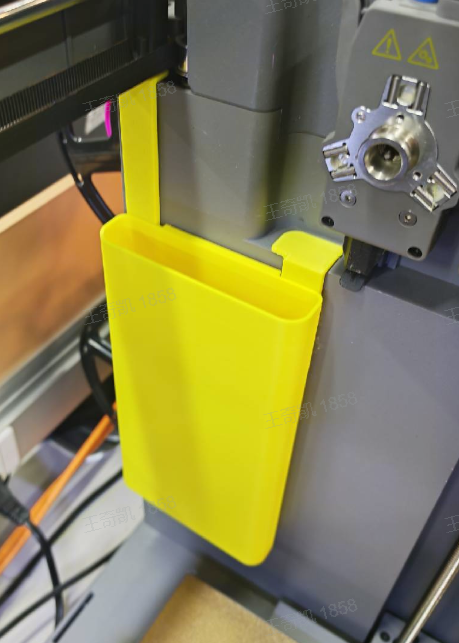
Step 2: Attach the poop bin onto the hanger as shown below.
4. Important Notes:
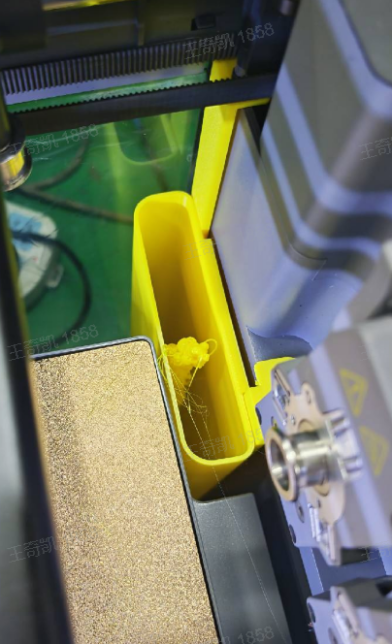
During the filament purging process, purged filament may occasionally stick to the side wall, causing the waste to pile up, as shown below:
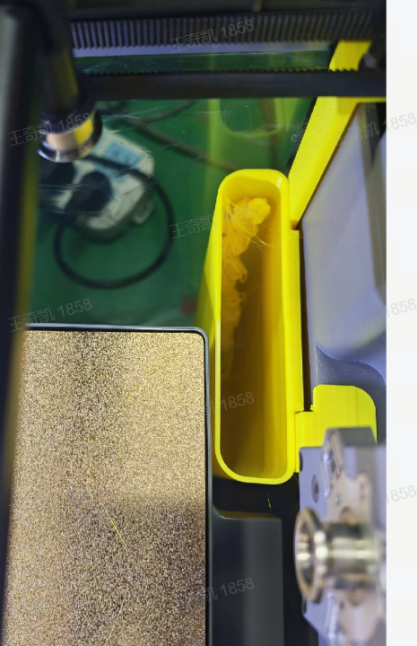
If the pile builds up higher than the top edge of the poop bin, simply push the waste toward the side as shown below. The poop bin can then continue to be used normally.
Recommendation: To prevent build-up, we recommend emptying the poop bin every time you remove a finished print, right before starting your next print job.