Proper preparation before printing helps prevent startup issues caused by oversight, improves first-print success rates, and ensures the printer delivers the print quality it was designed for, resulting in a better first-use experience overall.
Please follow the steps below carefully:
Step 1: Please refer to the User Guide to remove all protective foam, tape, and other packaging materials from inside the printer.
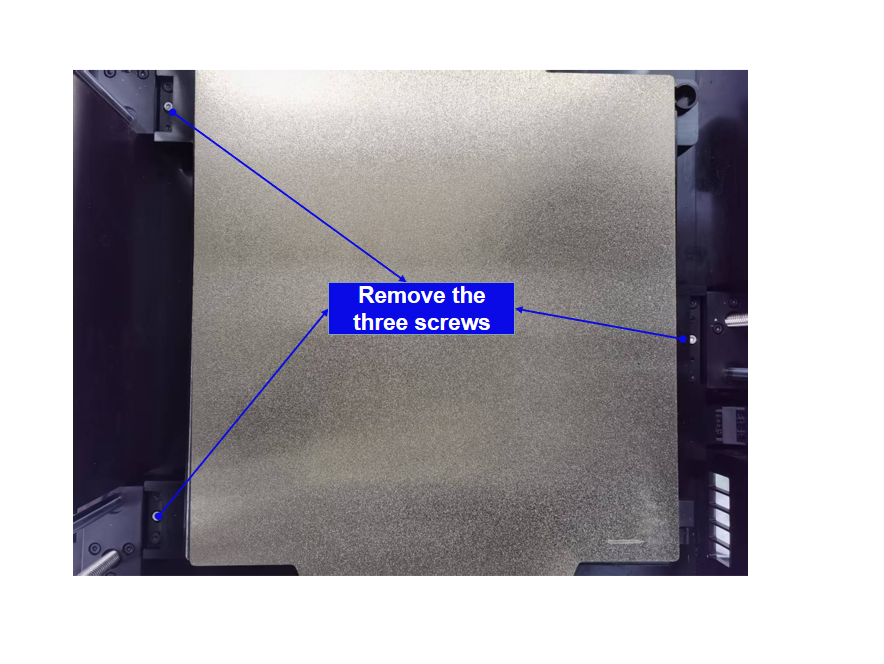
Step 2: Use the included 2.0mm Allen wrench to remove the three screws that secure the bed. This step is critical. Failing to remove them may cause the bed to jam and produce abnormal clicking or grinding noises during startup.
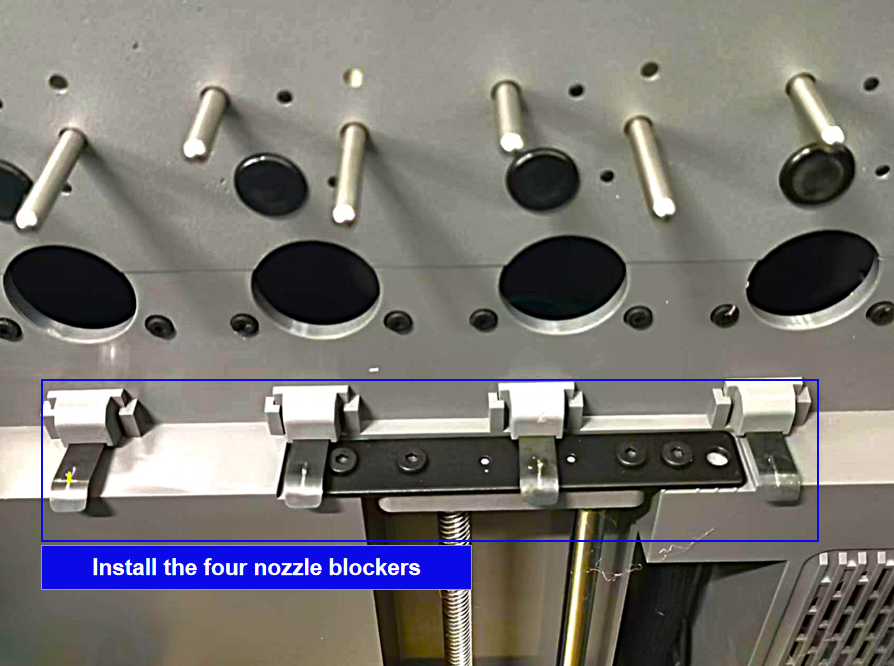
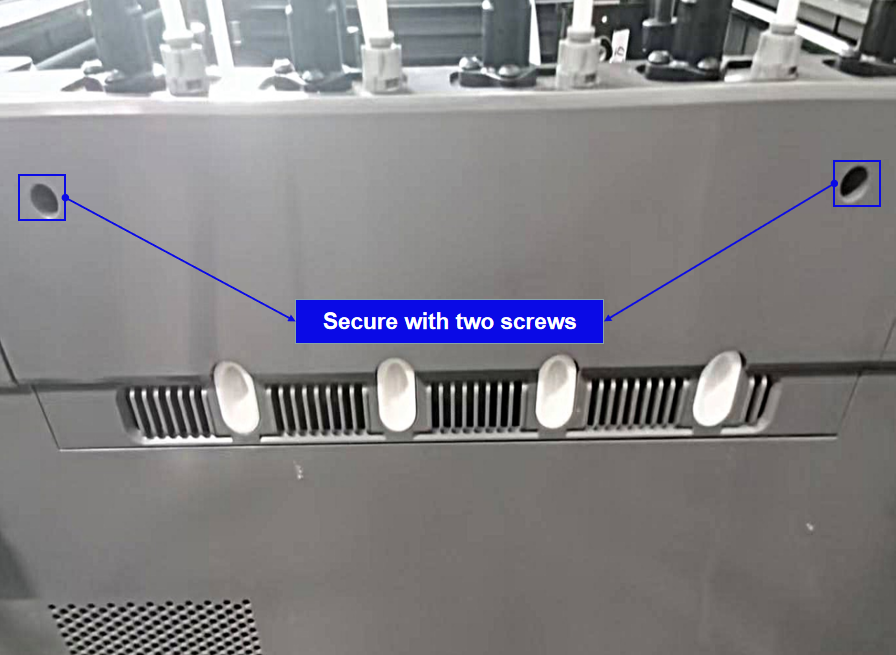
Step 3: Take out the four nozzle blockers and install them in their corresponding positions on the printer as shown below.
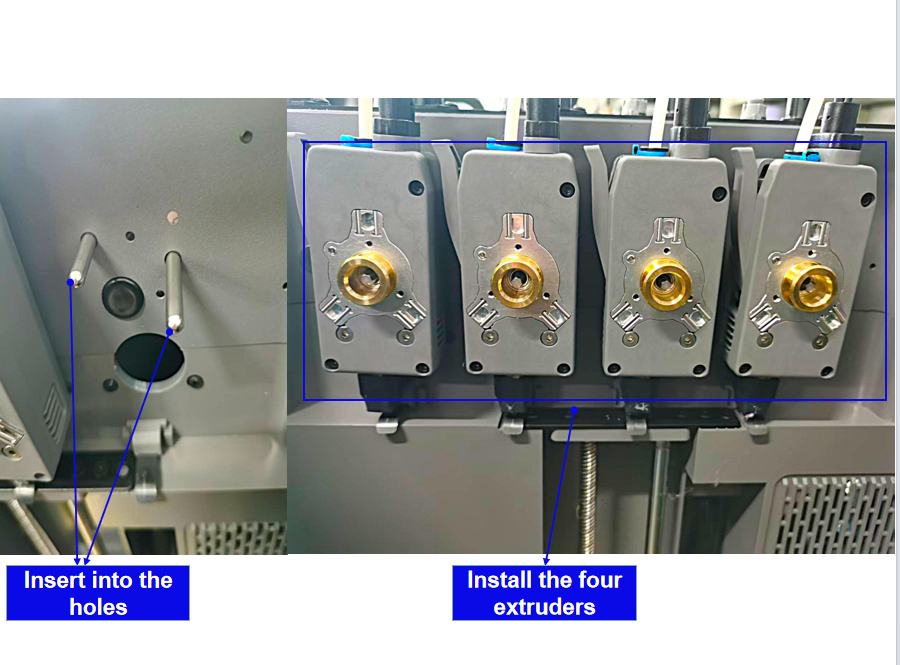
Step 4
- Take out the extruder dock module. First, secure the four extruders onto the dock as shown.
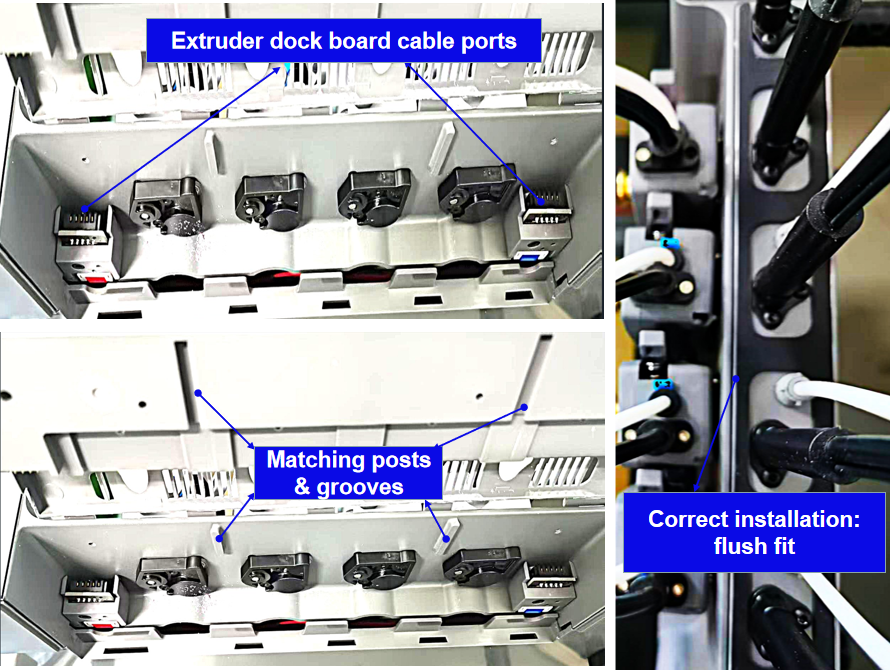
- Then, install the extruder dock onto its designated position on the right side of the printer. Align the two raised posts on the printer with the grooves of the filament feed assembly. Slide it downward along the posts and push it fully into place as shown.
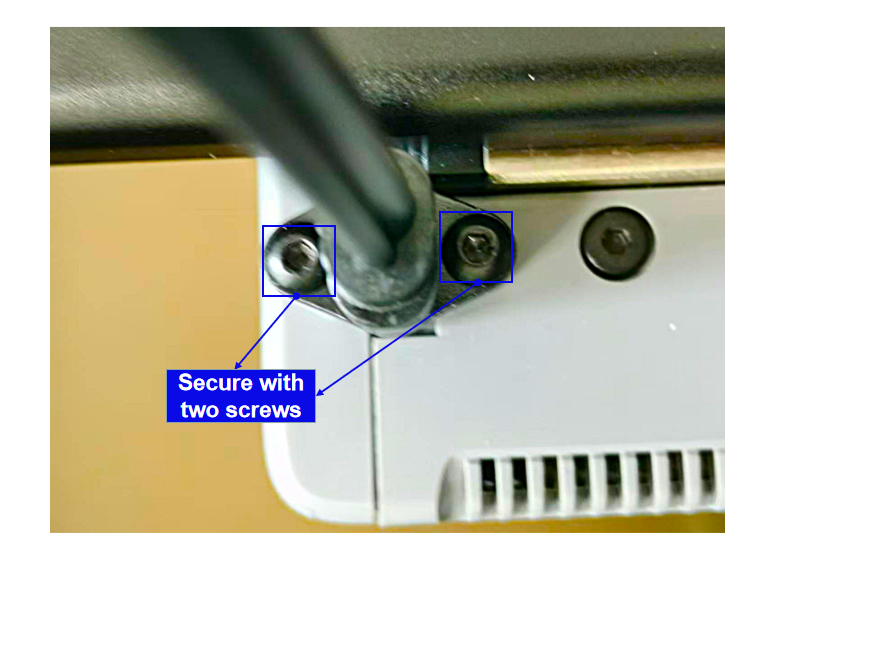
- Next, secure the filament feed assembly using the two M3×16 screws.
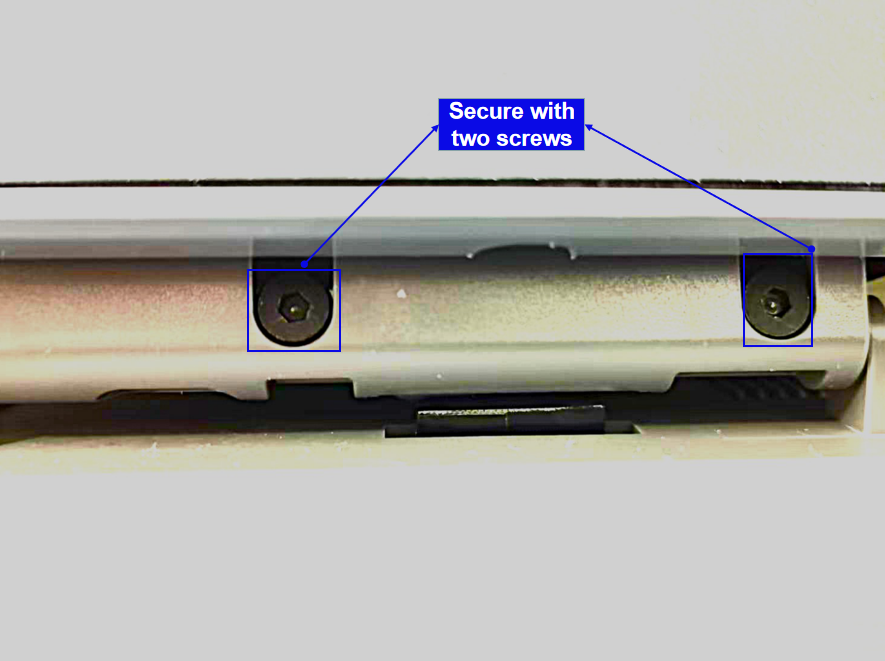
- Finally, connect the extruder bus cable to its corresponding port on the extruder mount, and secure it with two screws as shown.
Step 5: Take out the display screen, install it in its designated position, and secure it with two M3×6 screws as shown.
Step 6: Remove the PEI plate from the bed. Check the magnetic sticker for any foreign objects and clean it if necessary.
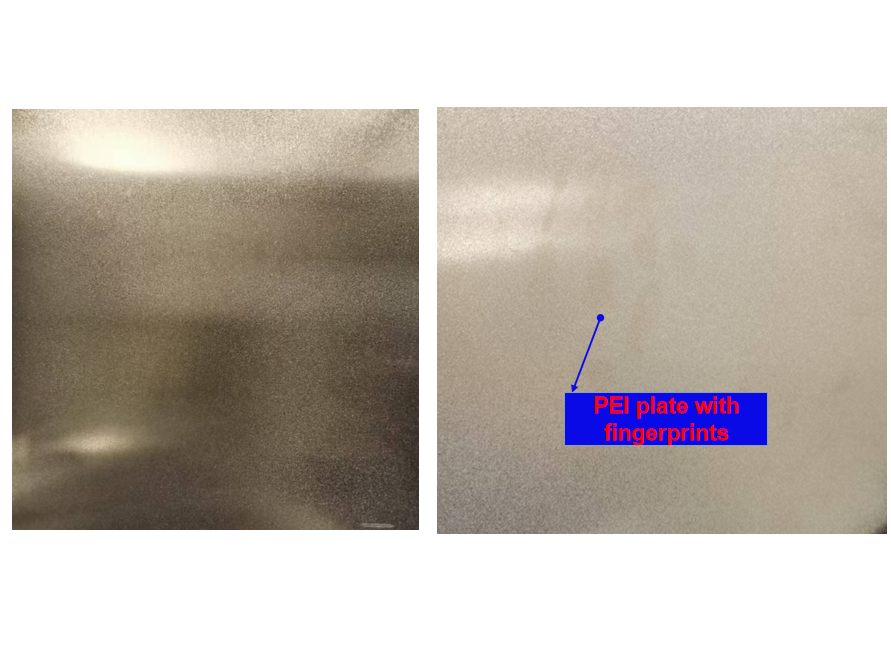
Step 7: Inspect the entire surface of the removed PEI plate for dirt or fingerprints (as shown). If present, clean it using alcohol or dishwashing detergent.
Step 8: Plug in the power cord and turn on the printer. Once the device starts up, follow the on-screen startup wizard to complete printer configuration, network connection, and calibration.
After completing the above steps, your device is ready for printing.