The printer supports Wi-Fi and LAN connections. From the Home screen, go to ⚙️ > Network to open the Network Settings screen.
¶ Connect to a Wi-Fi Network
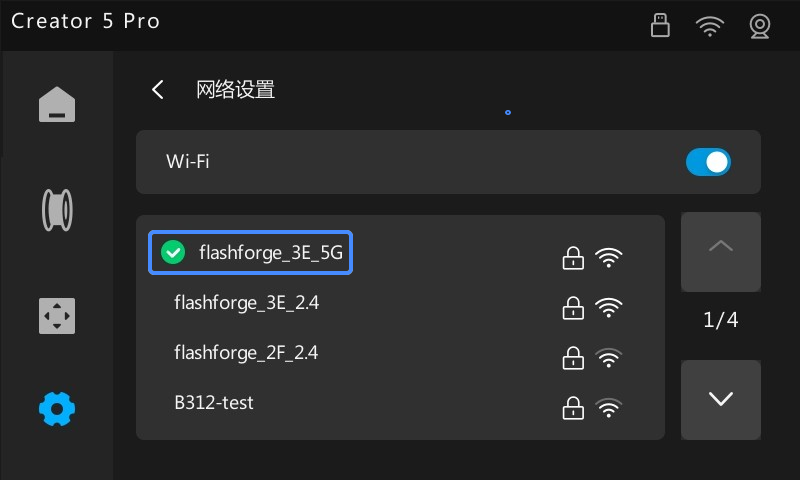
Follow these steps to connect to a Wi-Fi network:
- Turn on Wi-Fi to scan for available networks.
- Select the desired Wi-Fi network.
- Enter the password if prompted.
- A green checkmark indicates a successful connection.
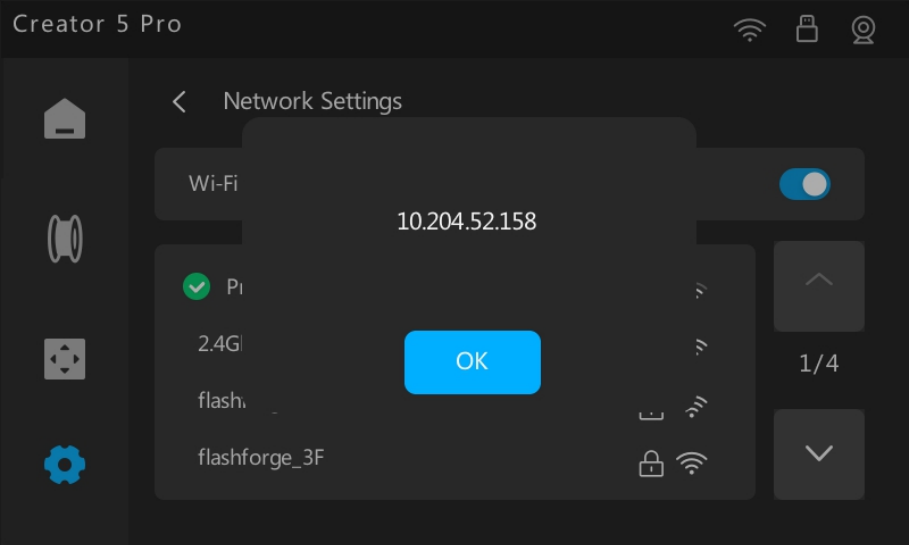
Tap the connected network to view the assigned IP address.
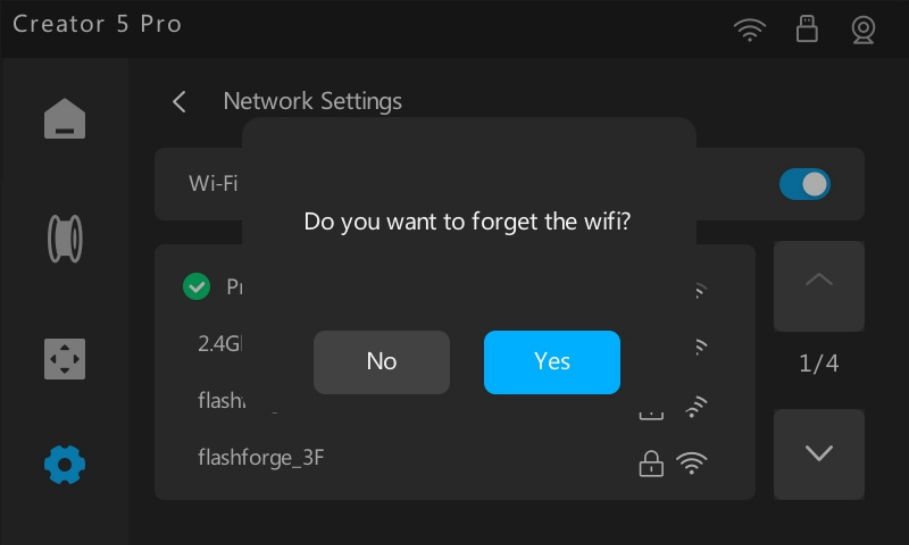
Tap and hold the connected network to forget it.
Switching to a new network clears the previous Wi-Fi password.
¶ Manual IP Configuration
The printer supports manually configuring a static IPv4 address to maintain a fixed network identity on the LAN, preventing connection drops caused by automatic IP address changes.
Follow these steps to configure a static IP:
- From the Home screen, go to ⚙️ > Network > Static IP.
- Enter the following parameters:
- IP Address: Enter a unique IPv4 address for the printer (must match your local subnet).
- Subnet Mask: The subnet mask of your local network (typically 255.255.255.0).
- Gateway: The IP address of your router.
- DNS: The DNS server address (public options like 8.8.8.8 or 114.114.114.114 can be used).
- Toggle on Configure IPv4 to enable static IP mode. The entered settings will automatically save and take effect.
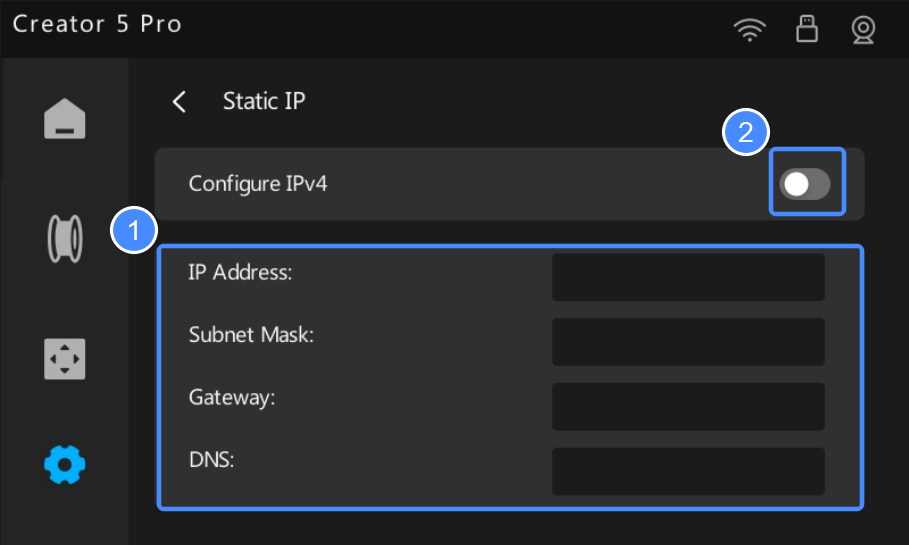
Ensure the entered IP address is not in use by another device on your network to avoid IP conflicts.
Toggling off "Configure IPv4" switches the printer to automatic DHCP mode. Saved static IP settings are retained and can be reused when toggled back on.
¶ LAN Only Mode
LAN Only Mode limits printer discovery, access, and control to your local network. Internet connectivity and cloud services are disabled, and print files transfer exclusively over the LAN to ensure data privacy.
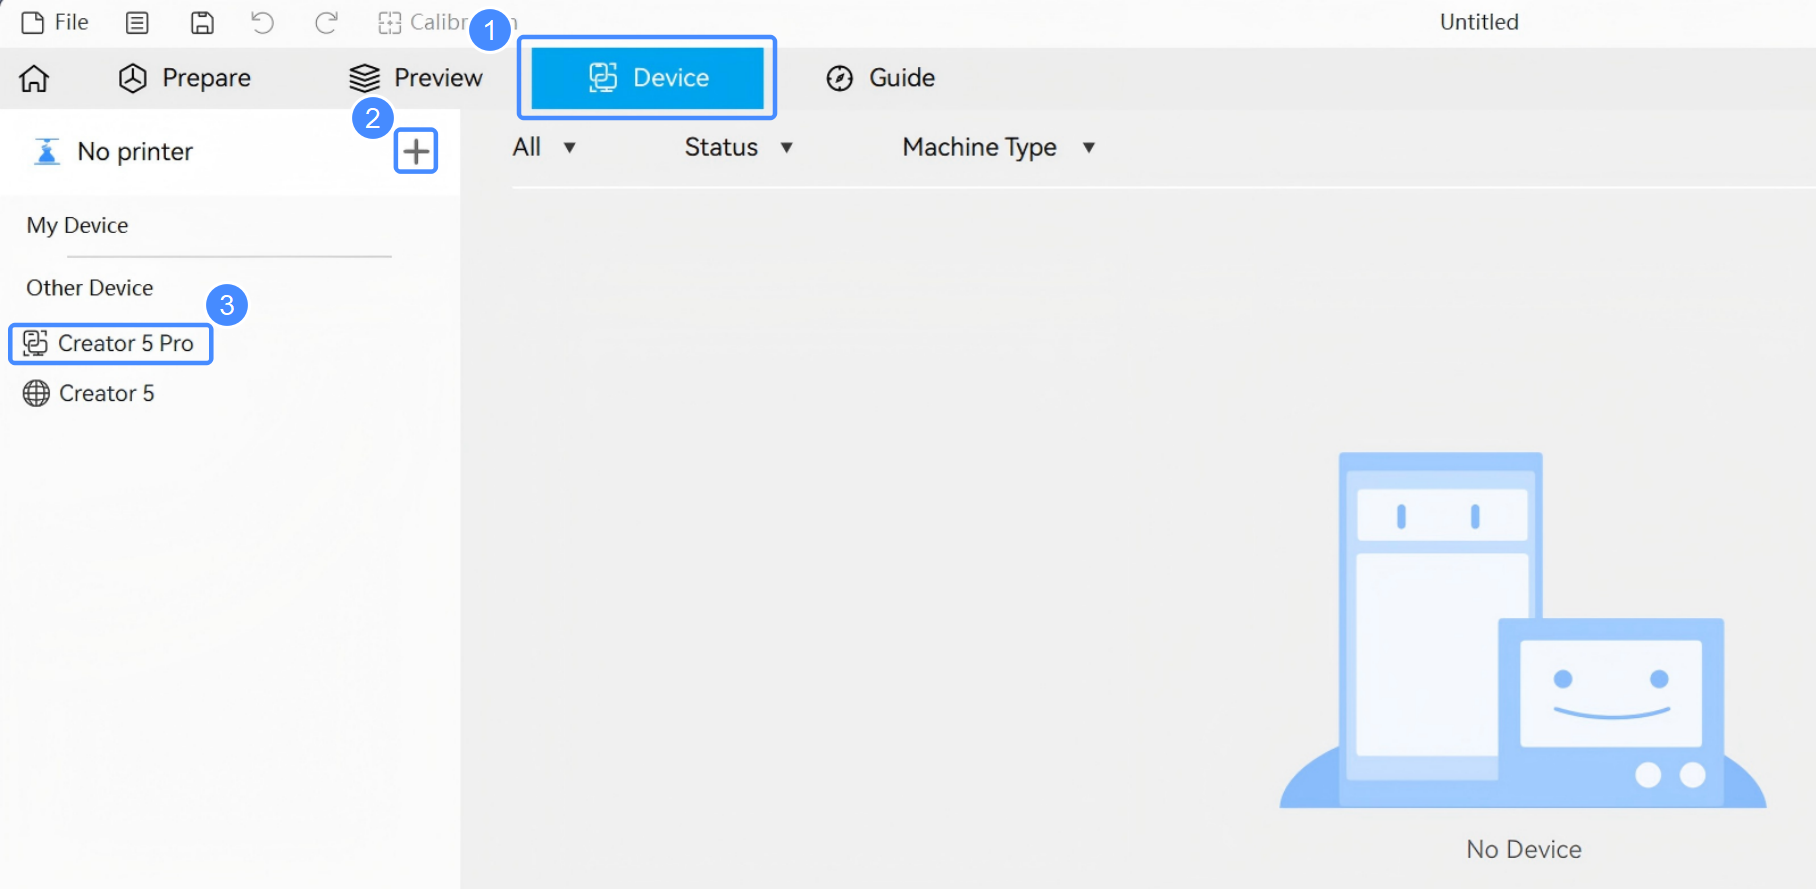
Follow these steps to enable LAN Only Mode and add the printer to Flash Studio Desktop:
- Ensure your computer and printer are on the same local network.
If your printer is using its default name, we recommend renaming it under ⚙️ > Basic Settings > Device Name. Unique names prevent duplicate conflicts and help you locate the correct device quickly when multiple printers of the same model are on the network.
- From the Home screen, go to ⚙️ > Network > LAN Only. Toggle on LAN Only Mode.
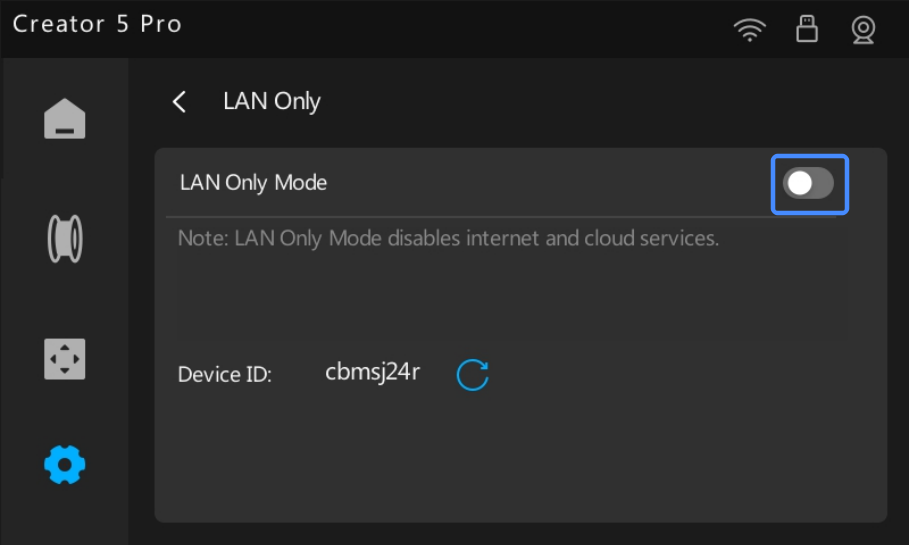
- Note the Device ID displayed on the screen.
- In Flash Studio Desktop, click Device > +.
- The Other Devices section lists all visible printers on your network. Depending on their network settings, one of two icons will appear before the device name:
 :Add this device via the internet (cloud).
 :Add this device via LAN. LAN Only Mode is enabled, requiring a device verification code.
Select a device marked with.
- Enter the previously noted device ID (the access code) in the prompt and click ✔️.
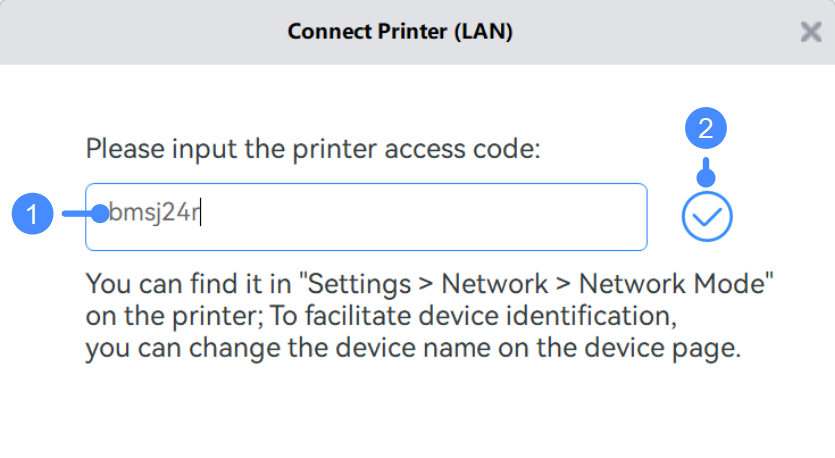
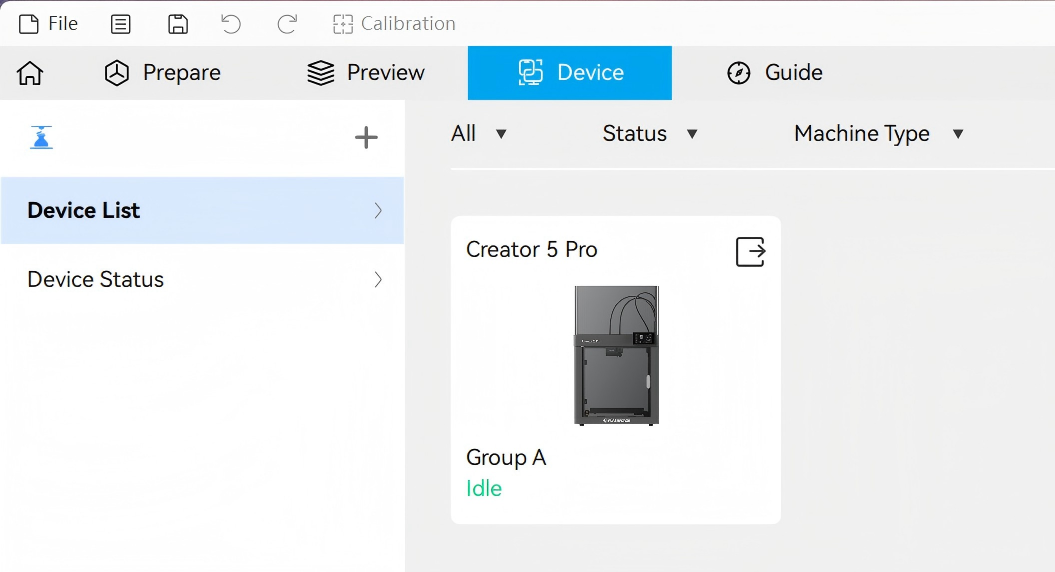
- Once connected, the printer will appear in the Device List.