¶ 1. Filament Guide Tube Clogged.
Issue: During filament change, the filament cannot pass through the filament guide tube.
Cause 1: Uneven (inclined) surface of the filament end, making it get stuck at the filament detection position
Solution: Rotate the filament or trim the filament end, and then re-feed the filament.
Cause 2: Filament breaks off in the filament guide tube.
Solution: Remove the broken filament remained in the filament guide tube.
¶ 2. Filament Extrusion Issue.
Issue: 1. Under-extrusion; 2. No filament extrusion.
Cause:
1. Filament tangles;
2. Mismatched parameter settings;
3. Nozzle clogged;
4. Extruder clogged
Solution:
Step 1: Check if filament is tangled on the spool.
Step 2: Ensure the setting temperature of the nozzle matches the setting temperature of the current filament, and then perform filament loading. If no extrusion, remove the filament guide tube on the top of the extruder, hold the filament by hand, and push it downward to clear the blockage.
Step 3: If the above steps don't work, use the provided unclogging pin tool to clear the nozzle.
Step 4: If the above steps don't work, replace the nozzle.
Step 5: If the above steps still don't solve the problem, check for extruder blockage.
¶ 3. No Extrusion on the First Yayer.
Cause: Distance too close.
Solution: Re-level.
¶ 4. Model Not Sticking to the Build Plate.
Cause:
1. Build plate damaged or severe wear, resulting in an uneven surface;
2. Oil stains on the build plate;
3. Improper distance after leveling;
4. Incorrect parameter settings
Solution:
Solution 1:
Step 1: Clean the build plate surface by removing the oil stains and filament residues.
Step 2: Clean the nozzle by removing the residues.
Step 3: Apply a thin layer of glue evenly across the entire build surface; The glue is provided with the machine, as shown below.
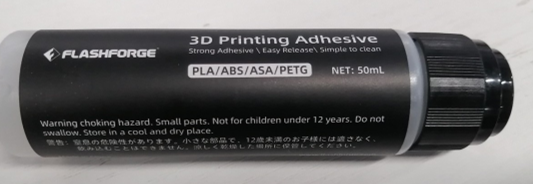
Step 4: Re-level and perform a test print. If the issue persists, please proceed to Solution 2.
Solution 2
Step 1: Update the firmware, enable leveling before printing, and conduct a test print.
Step 2: If Step 1 doesn't work, slightly increase the bed temperature by 5-10℃ based on the corresponding filament. For example, for PLA filament, set the bed temperature to 55-60℃; for ABS filament, set the bed temperature to 110℃.
Step 3: If the above steps don't work, manually raise the bed by 0.05-0.1mm during the first layer printing to reduce the distance between the nozzle and bed, thus improving adhesion.
Step 4: If the above steps still don't solve the problem, please copy logs to a USB flash drive and contact customer support.
¶ 5. Nozzle Scraping Against the Built Plate.
Issues: After automatic leveling, the extruder is too close to the bed when printing the first layer, causing the nozzle to scrape against the build plate.
Cause: Filament residues at the nozzle tip or uncleared print bed.
Solution:
Step 1: Clean the nozzle and bed by removing the residues.
Step 2: Restart the printer and perform automatic leveling again.
Step 3: If the above steps don't work, consider checking for firmware updates. Upgrade the firmware if a new version is available and retry.
Step 4: If the above steps still don't solve the problem, please copy logs to a USB flash drive and contact customer support.
¶ 6. No Filament Extruded During Filament Loading.
Issue: During filament loading, there is no filament extrusion or filament cannot be fed downward.
Cause: 1. Improper extruder installation; 2. Mismatched parameter settings; 3. Nozzle clogged; 4. Extruder clogged.
Solution:
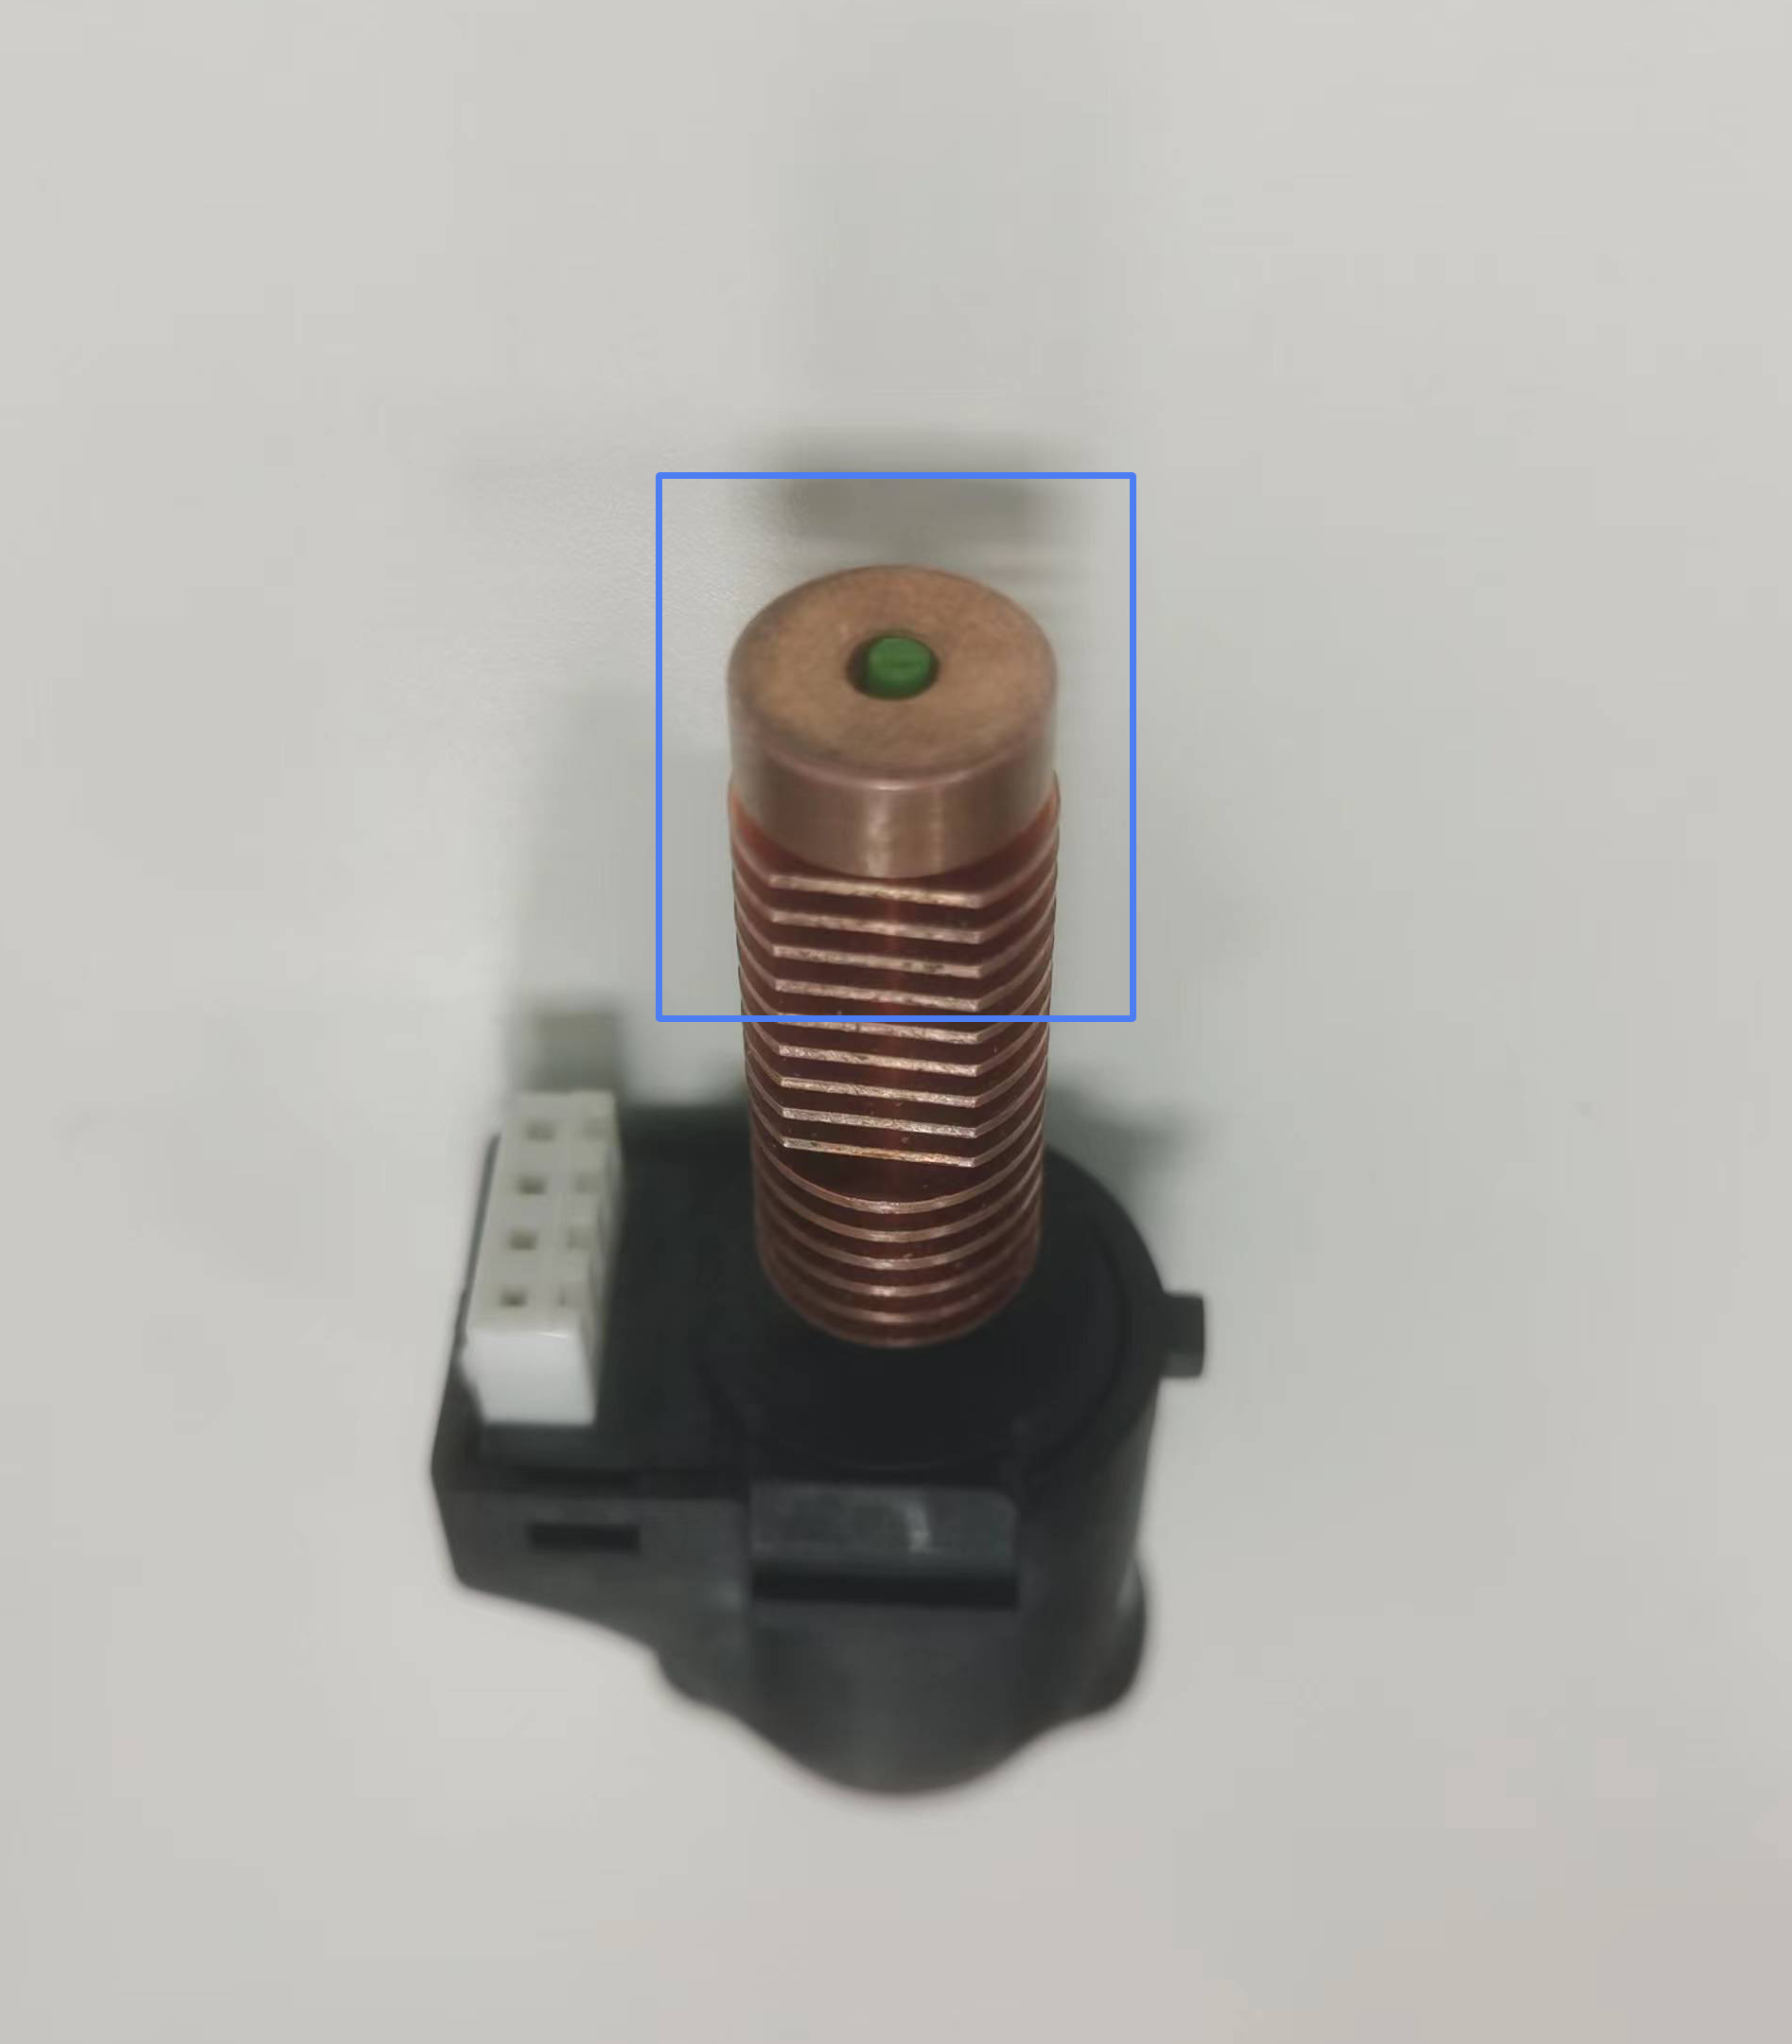
Step 2: Ensure the setting temperature of the nozzle matches the setting temperature of the current filament, and then perform filament loading. If no extrusion, remove the filament guide tube on the top of the extruder, hold the filament by hand, and push it downward to clear the blockage.
Step 3: If the above steps don't work, use the provided unclogging pin tool to clear the nozzle.
Step 4: If the above steps don't work, replace the nozzle.
Step 5: If the above steps still don't solve the problem, check for extruder blockage.
¶ 7. Extruder Clogged.
Issue: 1. No filament extrusion during printing;2. No filament extrusion during filament change (a creaking sound is produced when manually loading filament).
Cause: Extruder got clogged or the filament feeding gear of the extruder was slipping. Below is the position of the extruder.
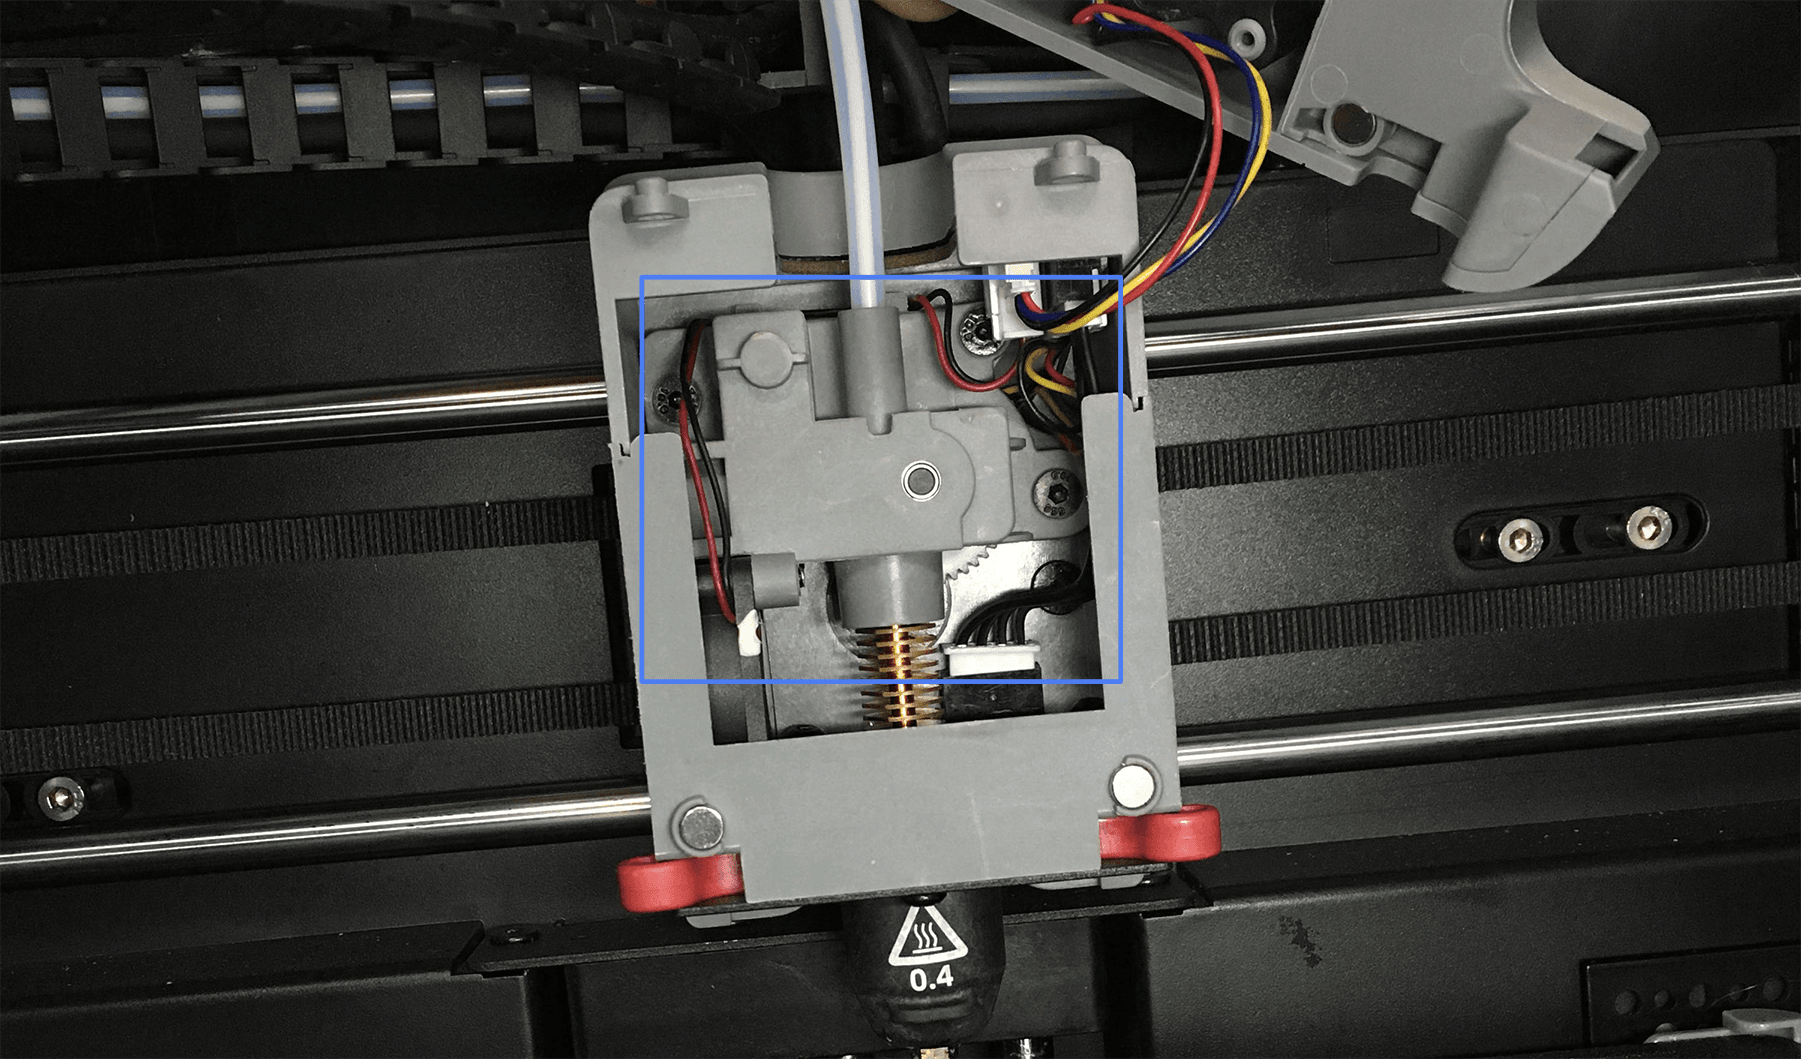
Solution: Check for extruder blockage and clear the feeding gear of the extruder. For how to disassemble and fix the extruder, you can refer to this video on Youtube:
¶ 8.Unclog the Nozzle using a Cold Pull
Adventurer 5M/Adventurer 5M Pro may encounter issues with inconsistent filament extrusion or no filament extrusion during printing. This section provides solutions for clearing nozzle clogs when printing with PLA under these two situations.
- Solution to Inconsistent Extrusion During Printing
Inconsistent extrusion refers to occasional prints with under-extrusion or lots of fuzz. When loading filament, the extrusion may appear weak or thinner than normal. The following steps outline how to address this type of clog.
Note: Please wear heat-resistant gloves before proceeding to avoid burns from high temperatures.
1. On the main interface, select [ ] for loading.
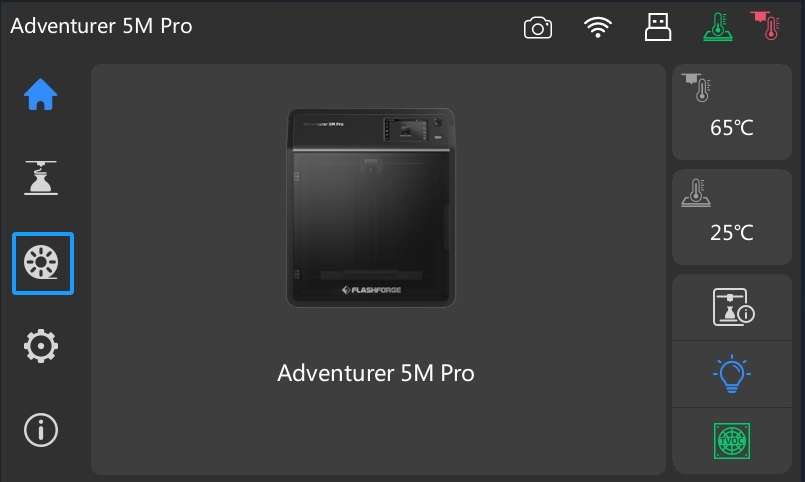
2.On the loading interface, choose the material you want to clean from the nozzle. In this case, select [PLA]. Then, click [Load] to proceed.
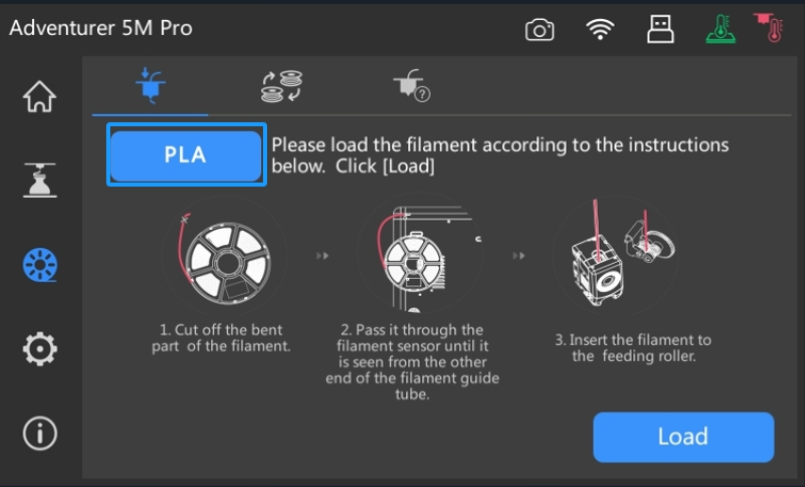
3. The system will begin heating. Once the heating process is completed, filament feeding will start.
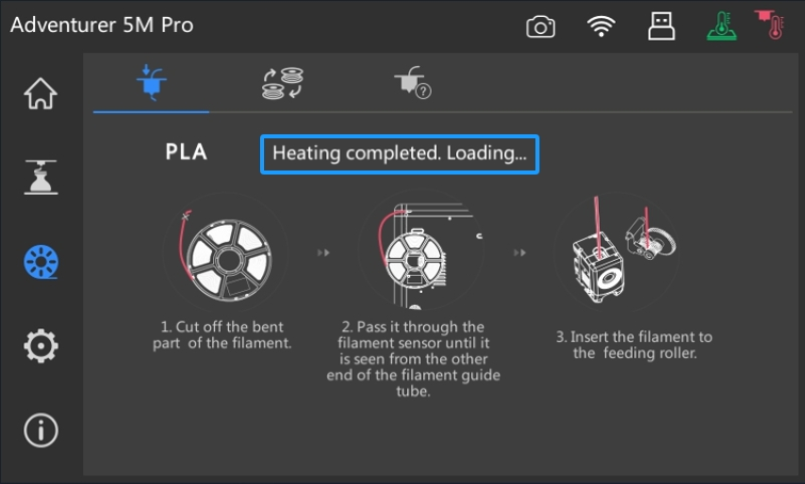
4. After feeding starts, allow it to extrude filament for 3-5 seconds. Then, cut the filament from the top of the extruder.
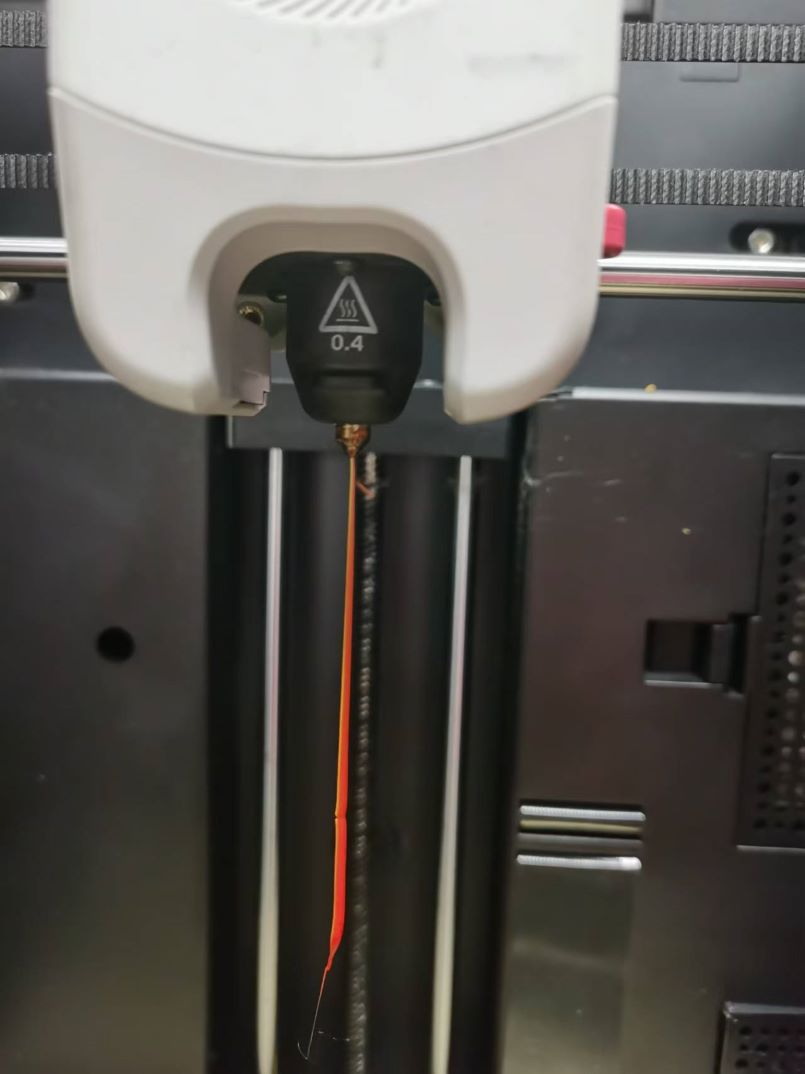
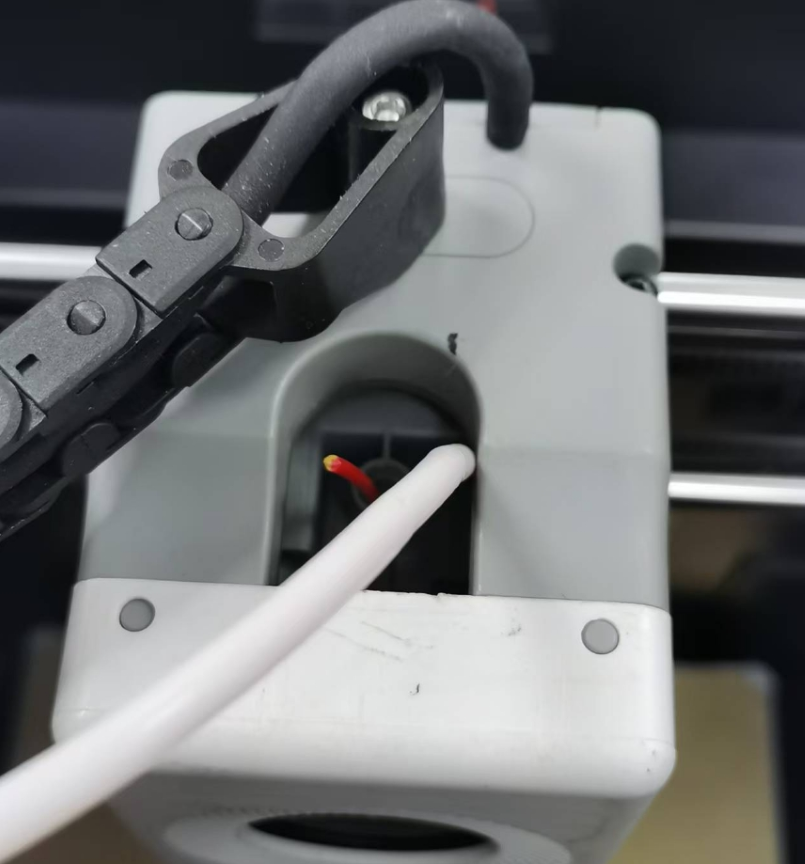
5. Wait for the system to finish the loading process.
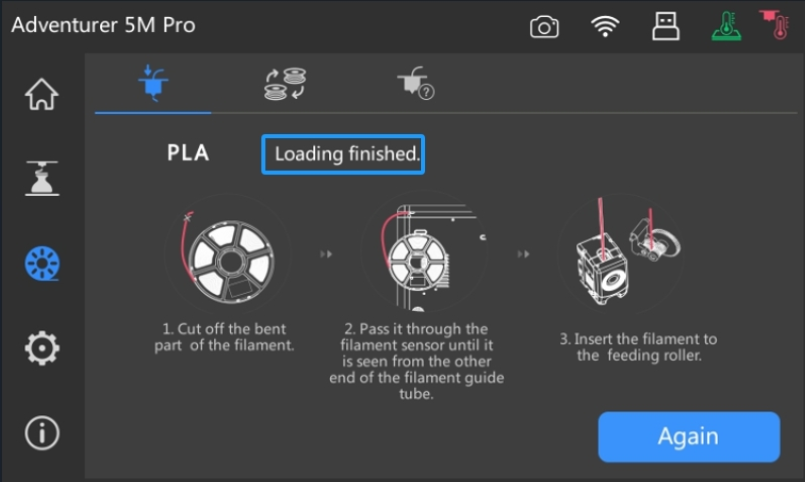
6. After loading is completed, return to the main interface.
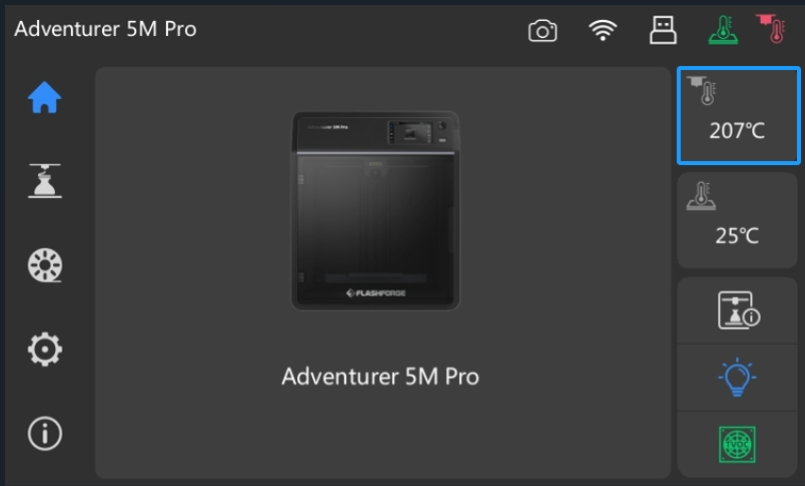
7. Wait for the extruder to cool down.
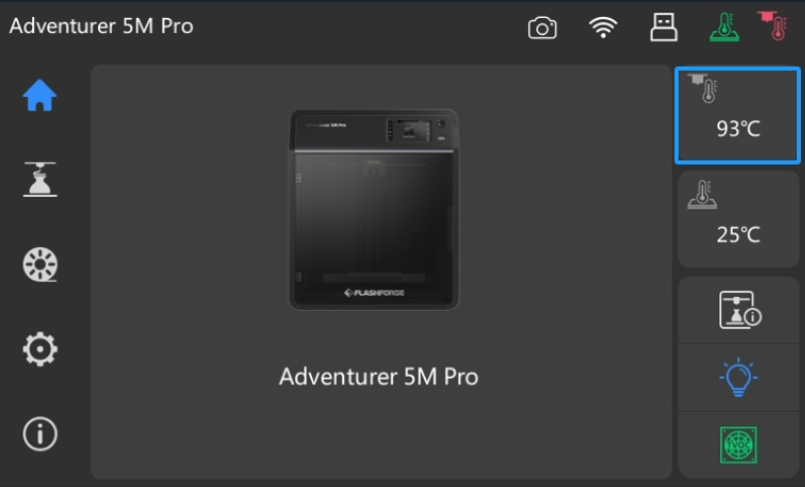
8. Once the extruder temperature drops to 90-95°C, turn off the printer (for Adventurer 5M Pro, press the front button; for Adventurer 5M, switch off the rear power switch).
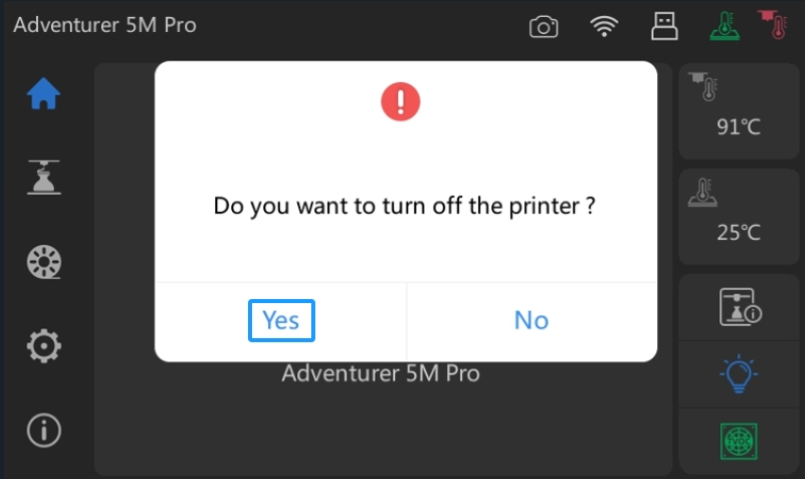
9. After powering off, quickly remove the extruder from the printer.
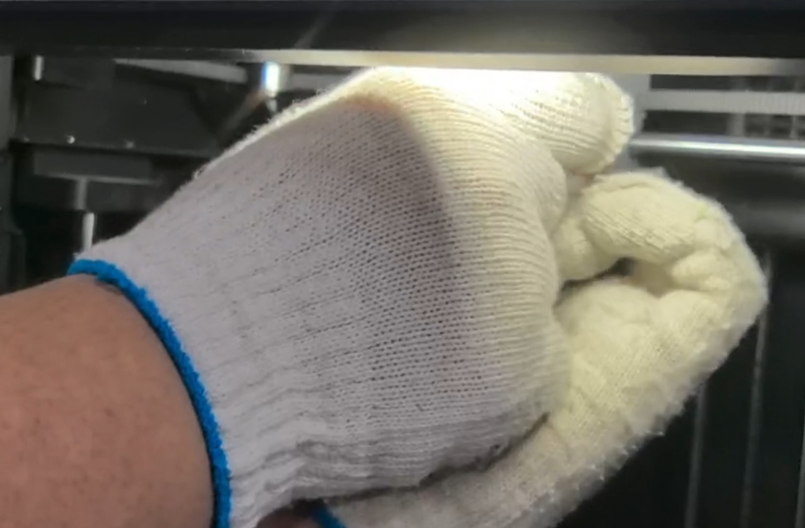
10. Carefully and slowly pull the filament out from the extruder at a constant speed until all the filament is removed.
Note: If it's difficult to pull out the filament by hand, you can use needle-nose pliers or other tools for assistance.
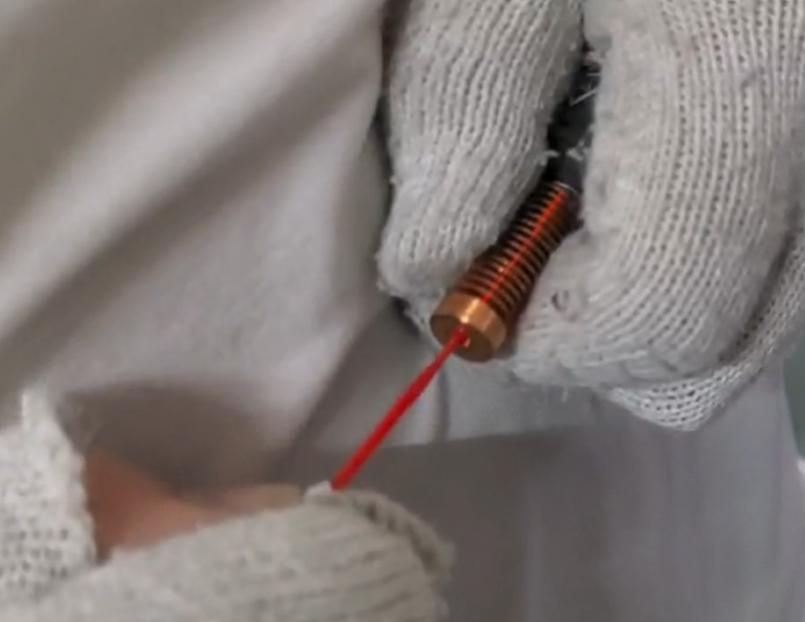
11. The front end of the removed filament should have a 120-degree rounded head with a pointed tip, as shown below. The blue arrow indicates debris removed from the nozzle.
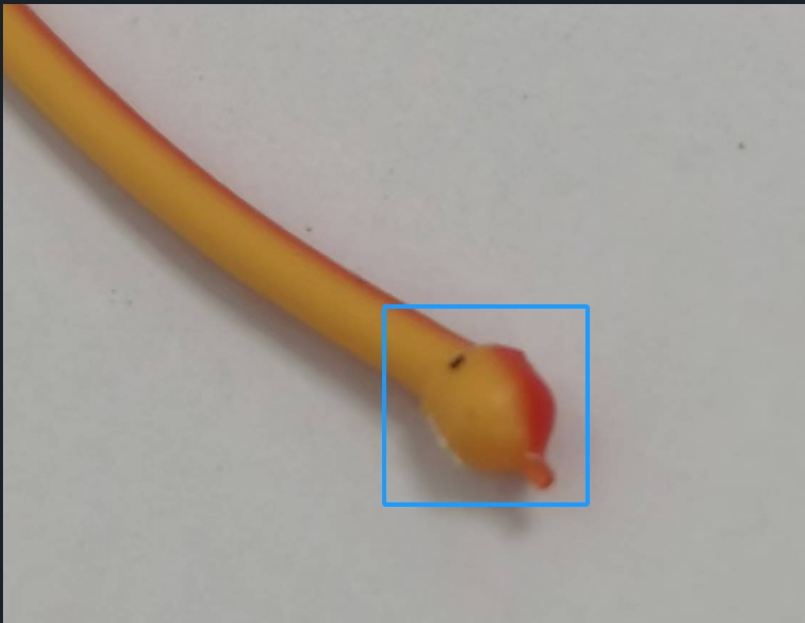
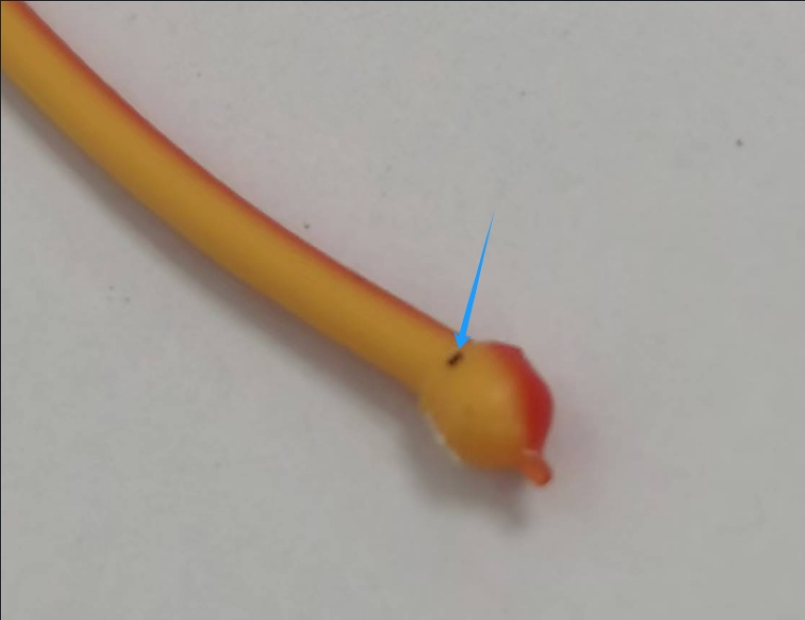
12. If the filament breaks during removal or if it is not completely removed, repeat steps 2-10.
- Solution to a Fully Clogged Nozzle
This situation occurs when it fails to extrude filament both during printing and loading. To address this, follow these steps:
Note: Please wear heat-resistant gloves before proceeding to avoid burns from high temperatures.
1. While the extruder is at room temperature, cut the filament from the top of the extruder, as shown below.

2. Turn off the printer, and remove the extruder along with the cut filament from the extruder assembly.

3. After removing the extruder, cut the filament attached to it, leaving about 1 cm above the red heatsink.
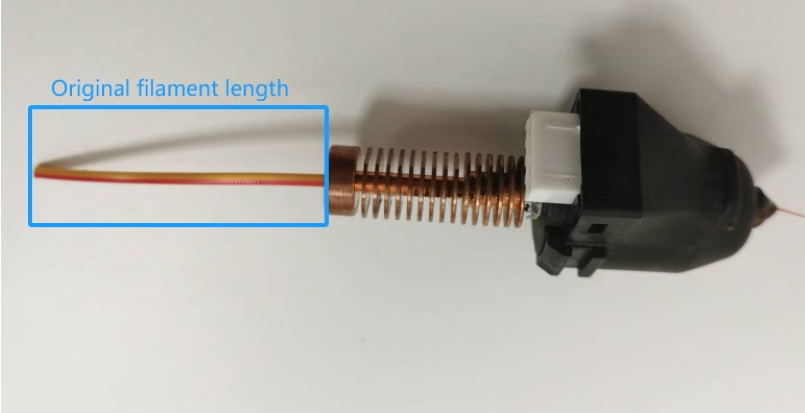
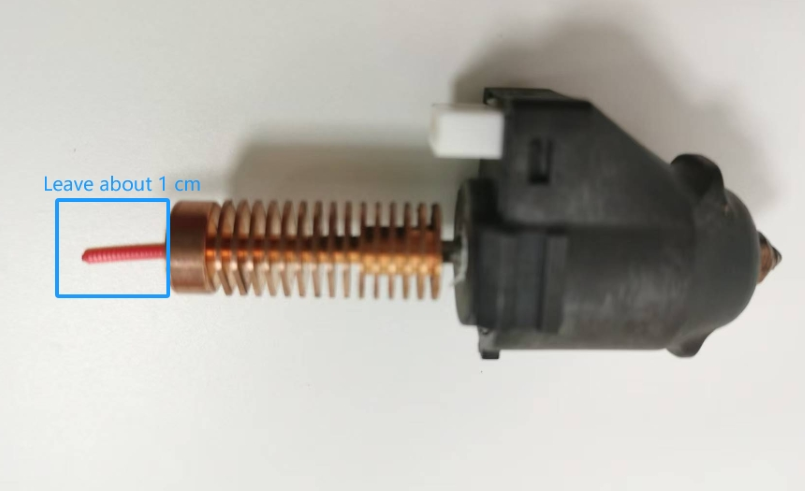
4. Reinstall the extruder onto the printer, power it on, and access the main interface.
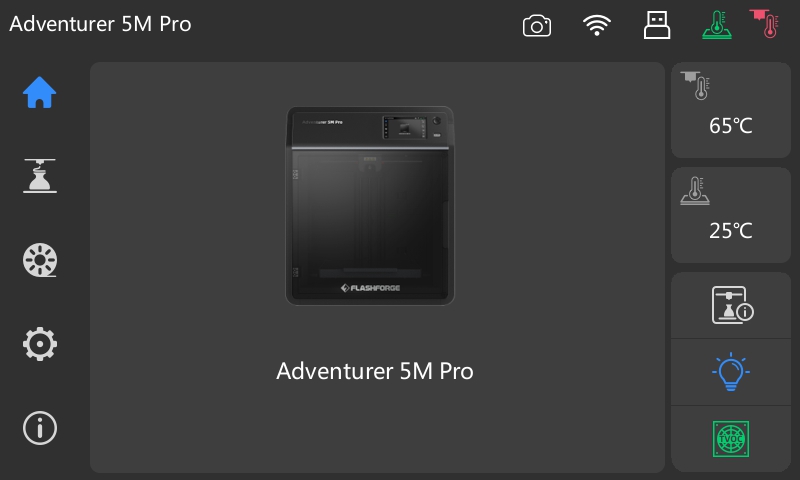
5. Set the extruder temperature to 100°C, and then click [Ok] to start heating.
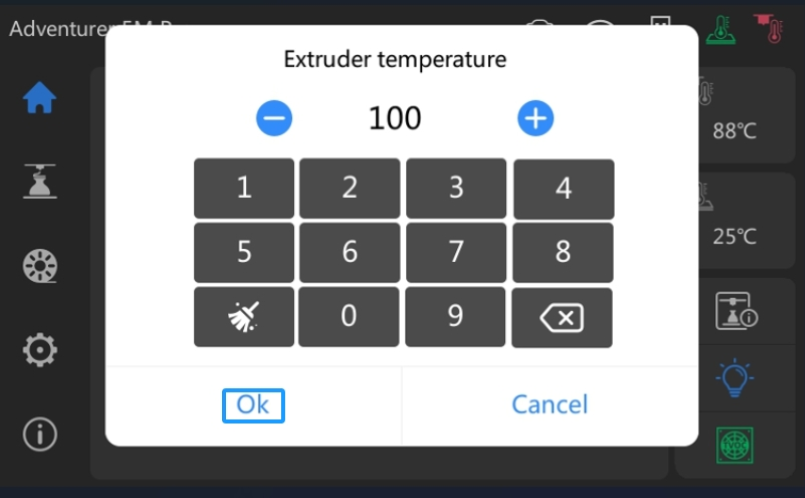
6. The extruder will heat up until it reaches 100°C.
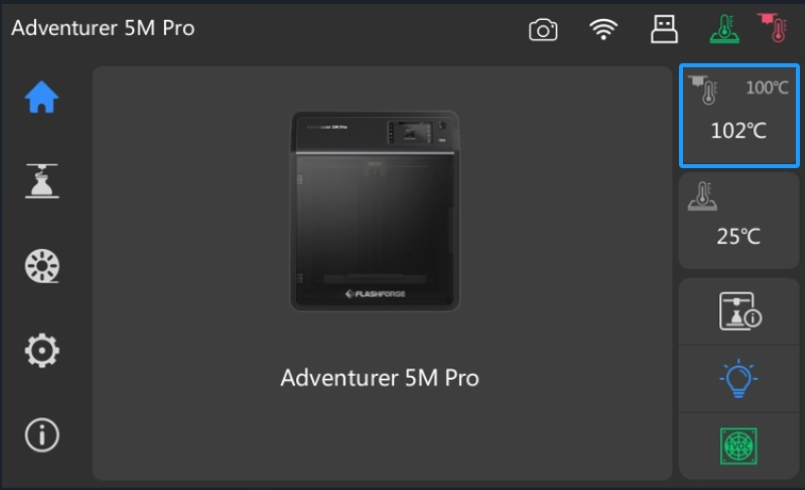
7. When the temperature reaches 100°C, set the target temperature to 0°C and click [Ok] to stop heating.
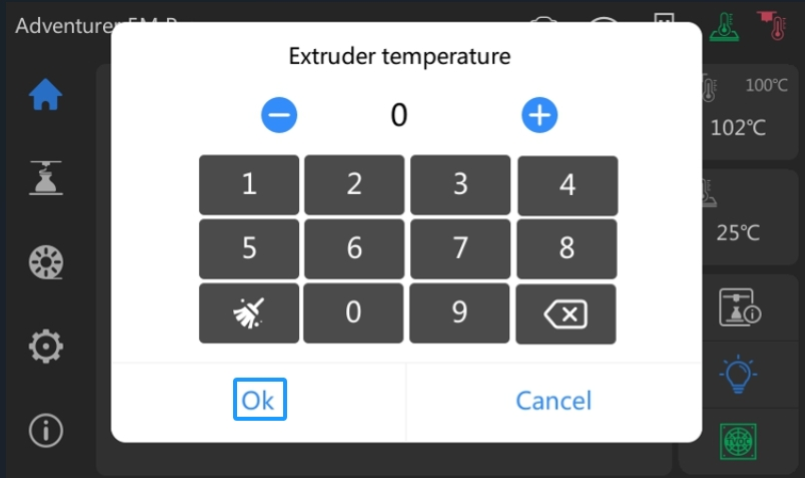
8. Once the extruder temperature drops to 90-95°C, turn off the printer (for Adventurer 5M Pro, press the front button; for Adventurer 5M, switch off the rear power switch).
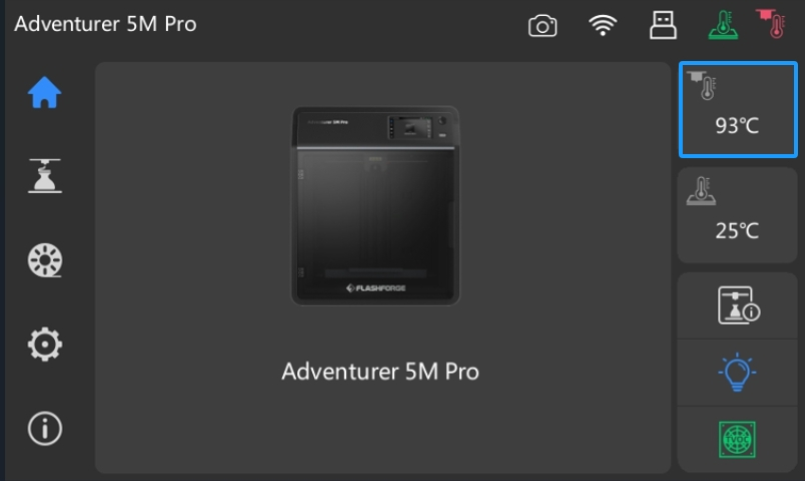
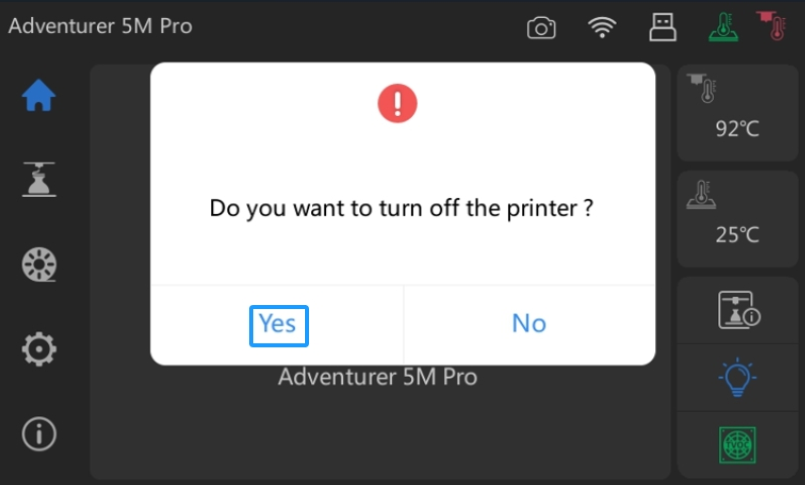
9. After powering off, quickly remove the extruder from the printer.

10. Carefully and slowly pull the filament out from the extruder at a constant speed until all the filament is removed.
Note: If it's difficult to pull out the filament by hand, you can use needle-nose pliers or other tools for assistance.

11. The front end of the removed filament should have a 120-degree rounded head with a pointed tip, as shown below. The blue arrow indicates debris removed from the nozzle.

