Once the printer is connected to the internet, you can connect it to the FlashCloud and send print files from the cloud to the printer.
¶ Step1: Connect to FlashCloud
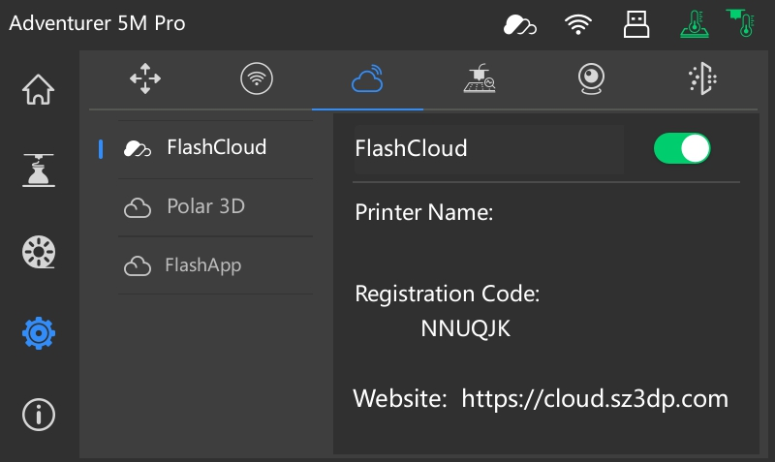
1. On the FlashCloud interface, turn on the FlashCloud switch, and you will obtain a registration code.
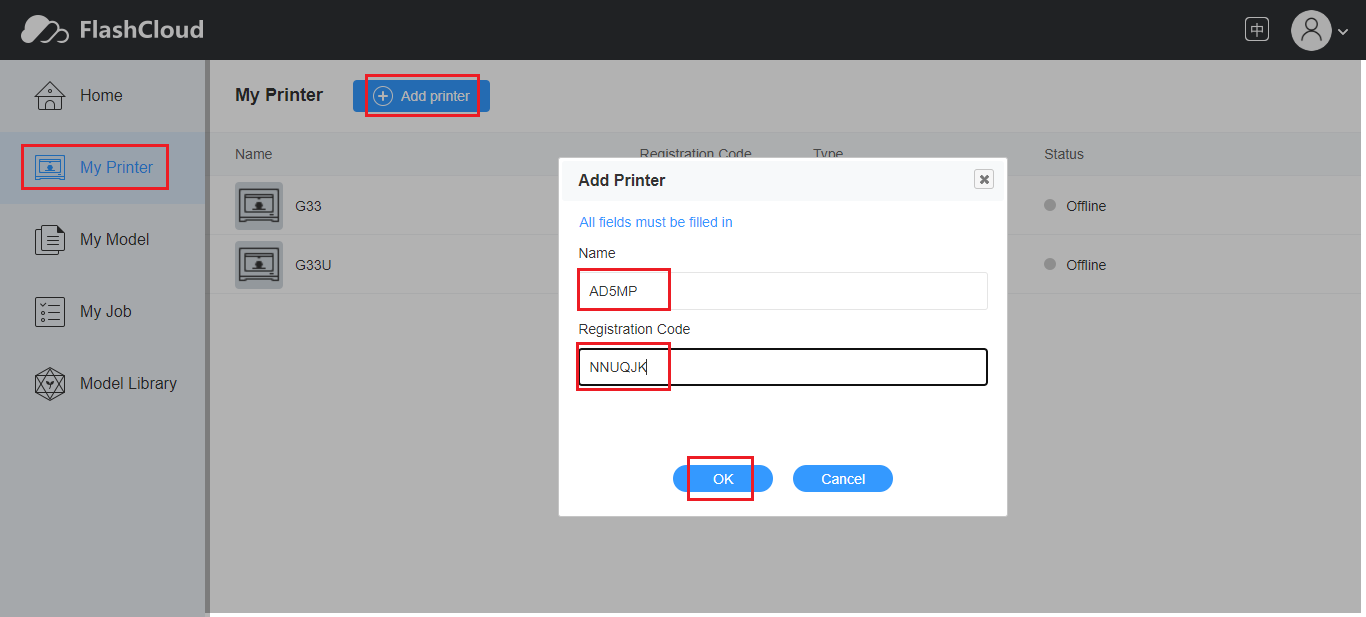
2. Open the FlashCloud official website at https://cloud.sz3dp.com/ and log in as instructed.
In the [My Printer] menu, click [Add Printer]. Enter the registration code obtained above, along with a customized printer name. After a successful connection, the customized printer name will appear on the printer.
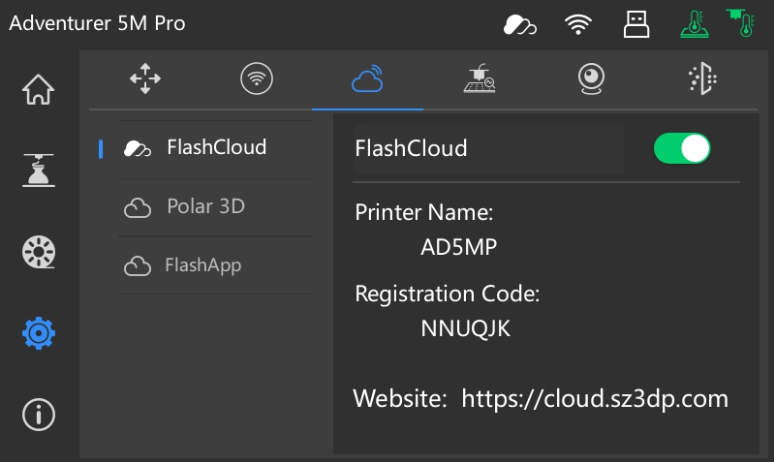
Once added successfully, the printer name will be displayed.
¶ Step2: Send Files
1. Choose a model from [Model Library] (Figure 1) or upload a model via [My Model] (Figure 2).
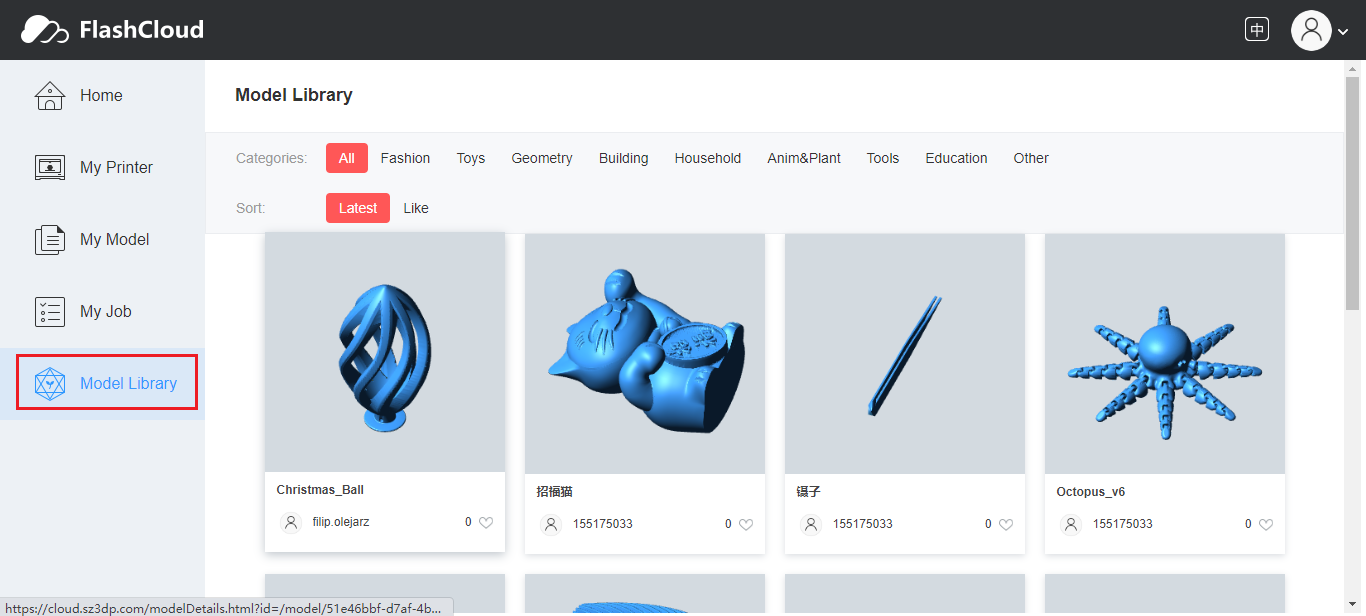
Figure 1
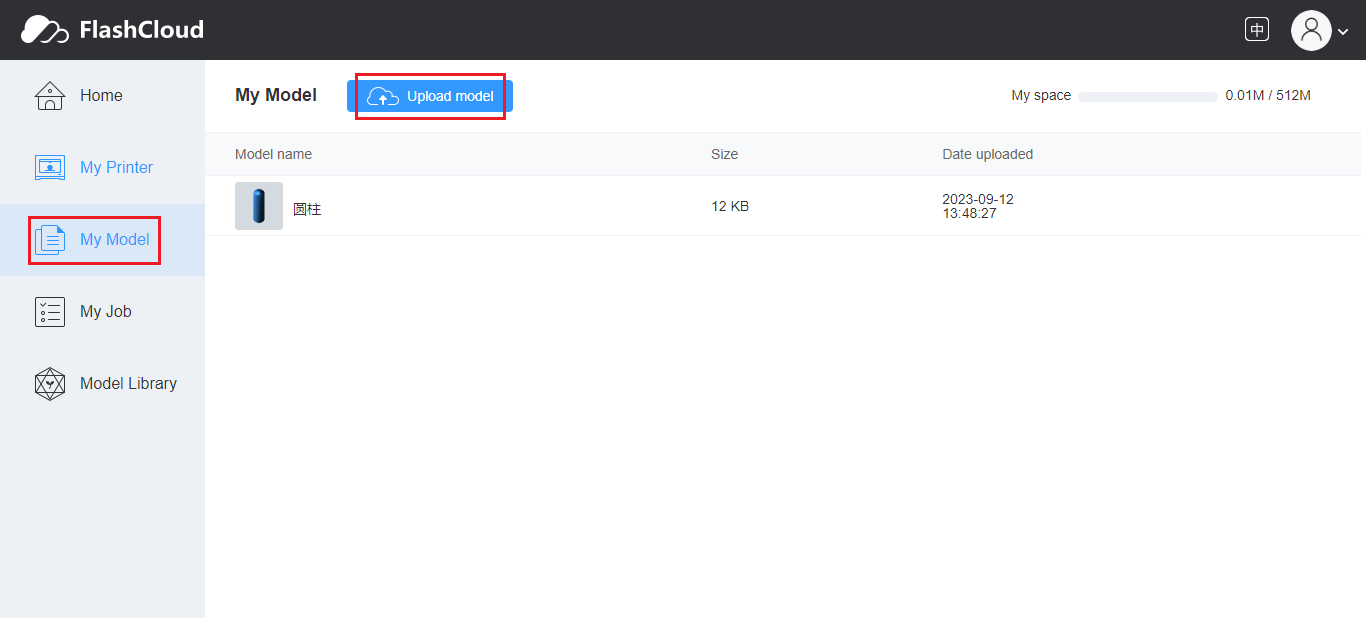
Figure 2
2. Slice the selected model.
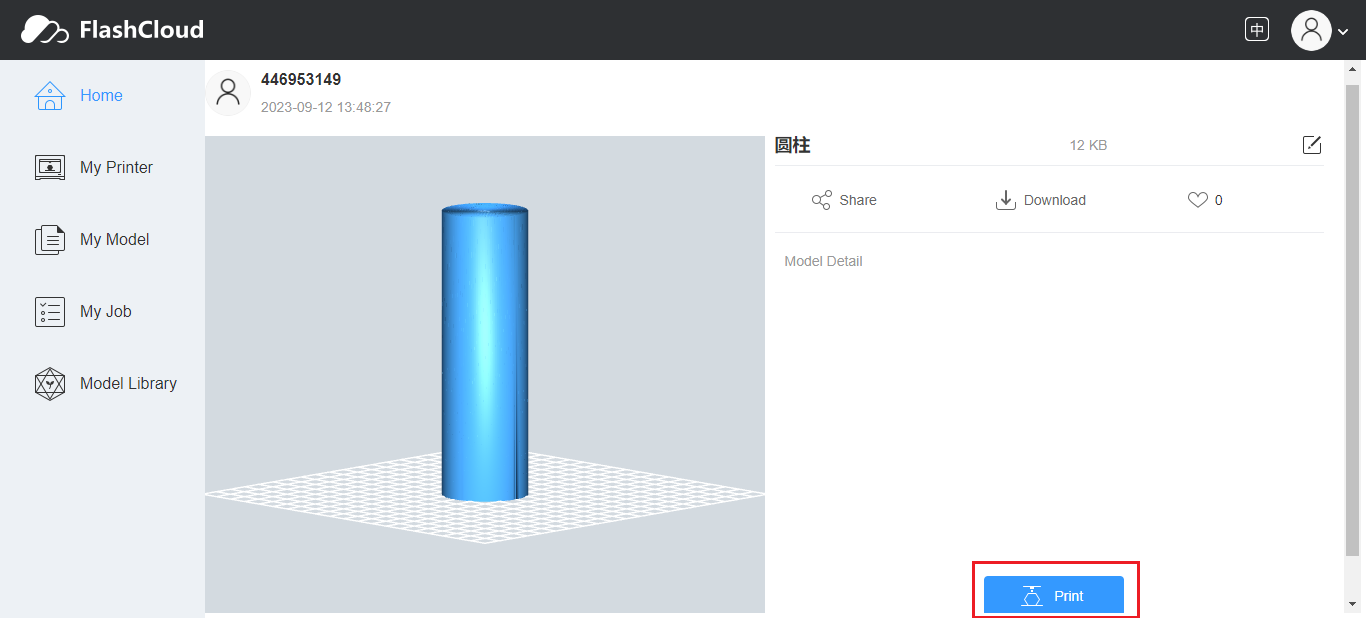
Click [Print] to enter the model slicing interface.
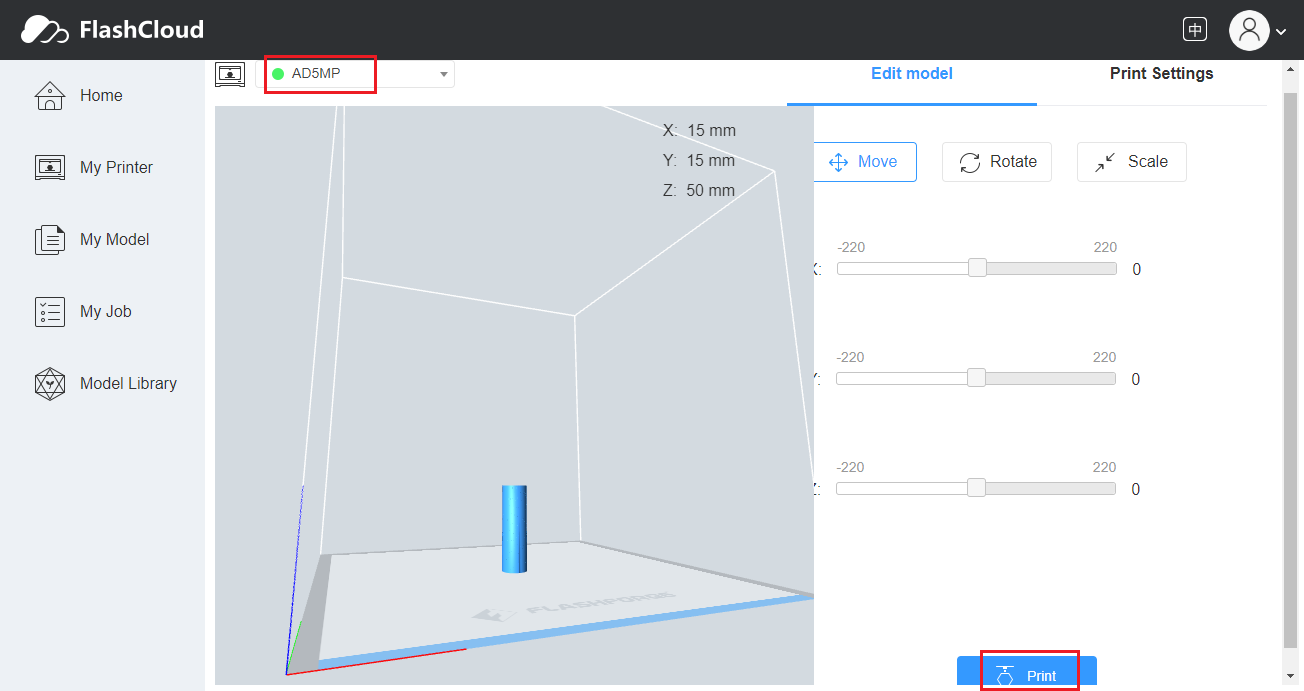
In the top-left drop-down menu, select the correct printer.
Adjust the model size and other parameters, and then click [Print] to complete slicing.
3. Send the sliced model to the printer.
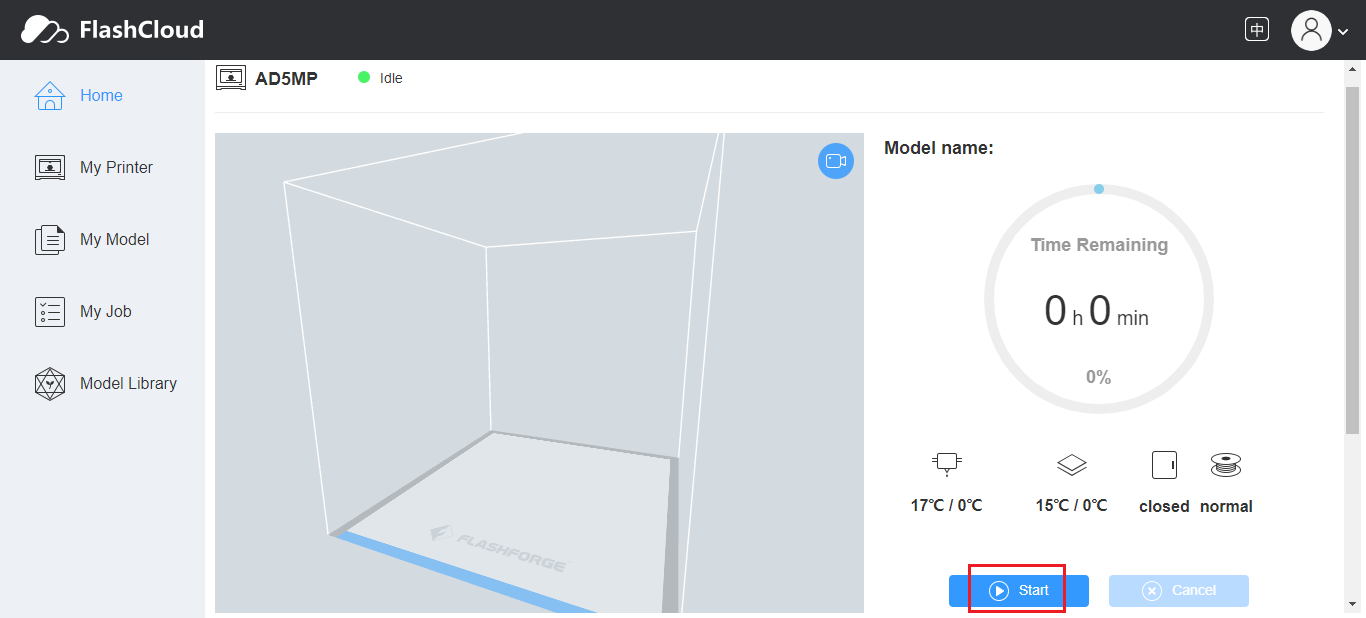
Click [Start] to send the sliced model to the printer.
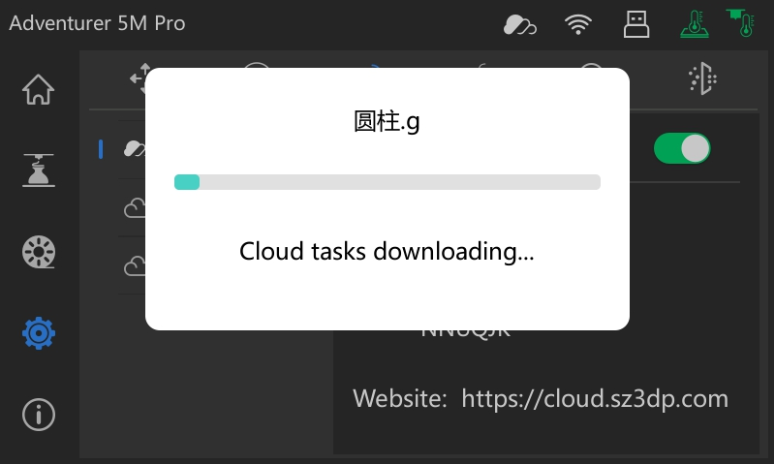
File transfer via FlashCloud in progress