¶ 1. Filament Extrusion Issue.
Issue: 1. Under-extrusion; 2. No filament extrusion.
Cause:
1. Filament tangles;
2. Mismatched parameter settings;
3. Nozzle clogged;
4. Extruder clogged
Solution:
Step 1: Check if filament is tangled on the spool.
Step 2: Ensure the setting temperature of the nozzle matches the setting temperature of the current filament, and then perform filament loading. If no extrusion, remove the filament guide tube on the top of the extruder, hold the filament by hand, and push it downward to clear the blockage.
Step 3: If the above steps don't work, use the provided unclogging pin tool to clear the nozzle.
Step 4: If the above steps don't work, replace the nozzle.
Step 5: If the above steps still don't solve the problem, check for extruder blockage.
¶ 2. No Extrusion on the First Yayer.
Cause: Distance too close.
Solution: Re-level.
¶ 3. Model Not Sticking to the Build Plate.
Cause:
1. Build plate damaged or severe wear, resulting in an uneven surface;
2. Oil stains on the build plate;
3. Improper distance after leveling;
4. Incorrect parameter settings
Solution:
Solution 1:
Step 1: Clean the build plate surface by removing the oil stains and filament residues.
Step 2: Clean the nozzle by removing the residues.
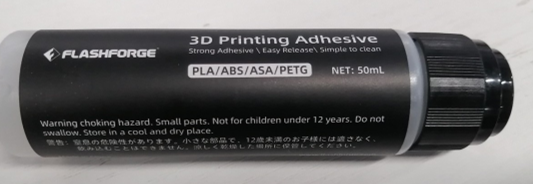
Step 3: Apply a thin layer of glue evenly across the entire build surface; The glue is provided with the machine, as shown below.
Step 4: Re-level and perform a test print. If the issue persists, please proceed to Solution 2.
Solution 2
Step 1: Update the firmware, enable leveling before printing, and conduct a test print.
Step 2: If Step 1 doesn't work, slightly increase the bed temperature by 5-10℃ based on the corresponding filament. For example, for PLA filament, set the bed temperature to 55-60℃; for ABS filament, set the bed temperature to 110℃.
Step 3: If the above steps don't work, manually raise the bed by 0.05-0.1mm during the first layer printing to reduce the distance between the nozzle and bed, thus improving adhesion.
Step 4: If the above steps still don't solve the problem, please copy logs to a USB flash drive and contact customer support.
¶ 4. Nozzle Scraping Against the Built Plate.
Issues: After automatic leveling, the extruder is too close to the bed when printing the first layer, causing the nozzle to scrape against the build plate.
Cause: Filament residues at the nozzle tip or uncleared print bed.
Solution:
Step 1: Clean the nozzle and bed by removing the residues.
Step 2: Restart the printer and perform automatic leveling again.
Step 3: If the above steps don't work, consider checking for firmware updates. Upgrade the firmware if a new version is available and retry.
Step 4: If the above steps still don't solve the problem, please copy logs to a USB flash drive and contact customer support.
¶ 5. IFS Module Unable to Load Filament Automatically
Description: When inserting the filament into the IFS module's filament inlet, it fails to load the filament automatically.
Cause 1: The filament has not been inserted deep enough to trigger the sensor.
Solution: Reinsert the filament until the display shows "Filament auto-loading, please wait...". The filament should be automatically pulled in.
Cause 2: The IFS sensor is malfunctioning and cannot be triggered.
Solution: Check that the IFS cable is properly connected to both the printer and its corresponding port. If the connection is correct, inspect the wiring and sensor for any issues on the specific filament channel.
Cause 3: Residual filament remains in the channel.
Solution: Remove the guide tube for the corresponding channel in the 4-in-1 unit and clear out any remaining filament. Refer to the maintenance section's "Replacement of 4-in-1 channel and guide tube" video for instructions on removing the guide tube.
¶ 6. No Filament Extrusion During Loading
Description: When loading filament, no filament is extruded from the nozzle, and the filament cannot feed downward.
Cause 1: Nozzle clogged.
Solution:
- Try loading filament again at a temperature 20°C higher than the clogging filament. While loading, manually push the filament downwards to assist.
- If the above method fails, use the provided unclogging pin tool to clean the nozzle. Refer to the maintenance section's "Nozzle unclogging" video for detailed instructions.
- If the issue persists, please replace the nozzle.
Cause 2: Extruder clogged.
Solution:
- Clean the extruder.
- If cleaning the extruder does not resolve the issue, please replace the extruder.
Cause 3: Extruder board or extruder motor issue.
Solution: This issue is usually caused by the motor reversing or rotating abnormally. First, replace the extruder board. If the problem persists, then replace the extruder motor.