Step into the unboxing journey of AD5X
¶ Step 1: Unboxing and Removal
Open the box, and remove the top foam, Quick Start Guide, and After-sales Service Card.

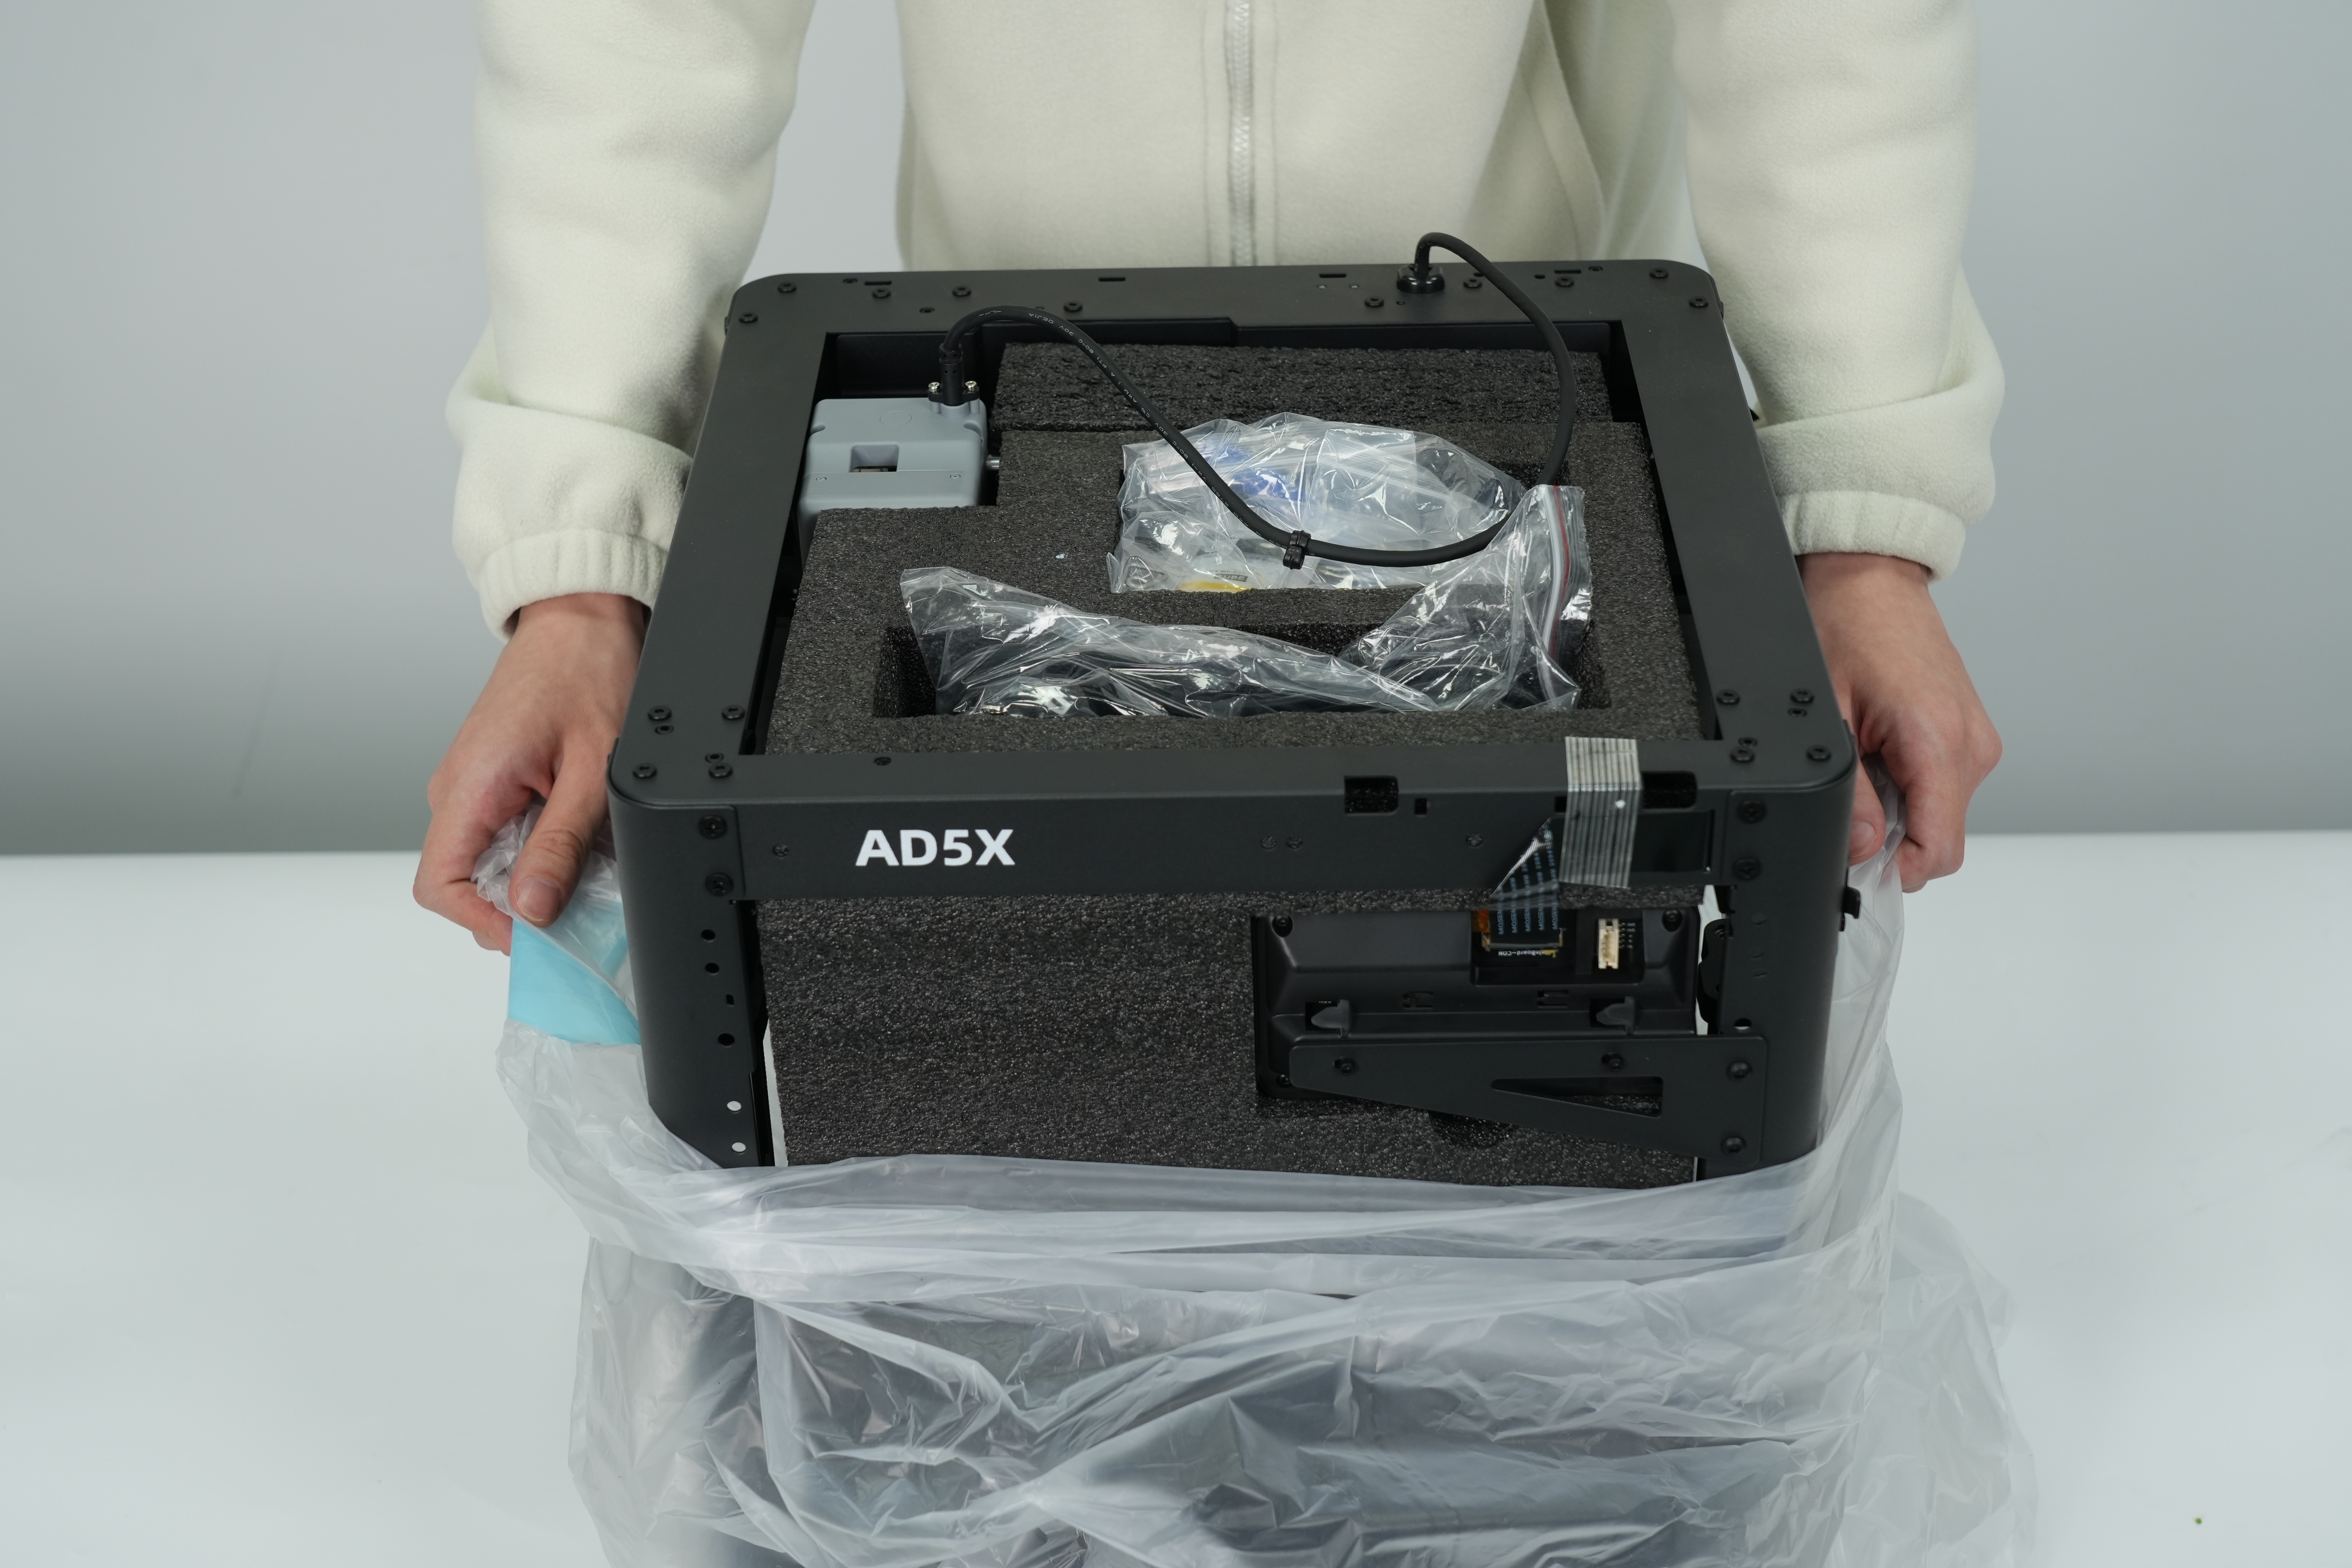
¶ Step 2: Remove the Printer
Take out the printer, place it on a level workspace, and remove the packaging bags and tapes.
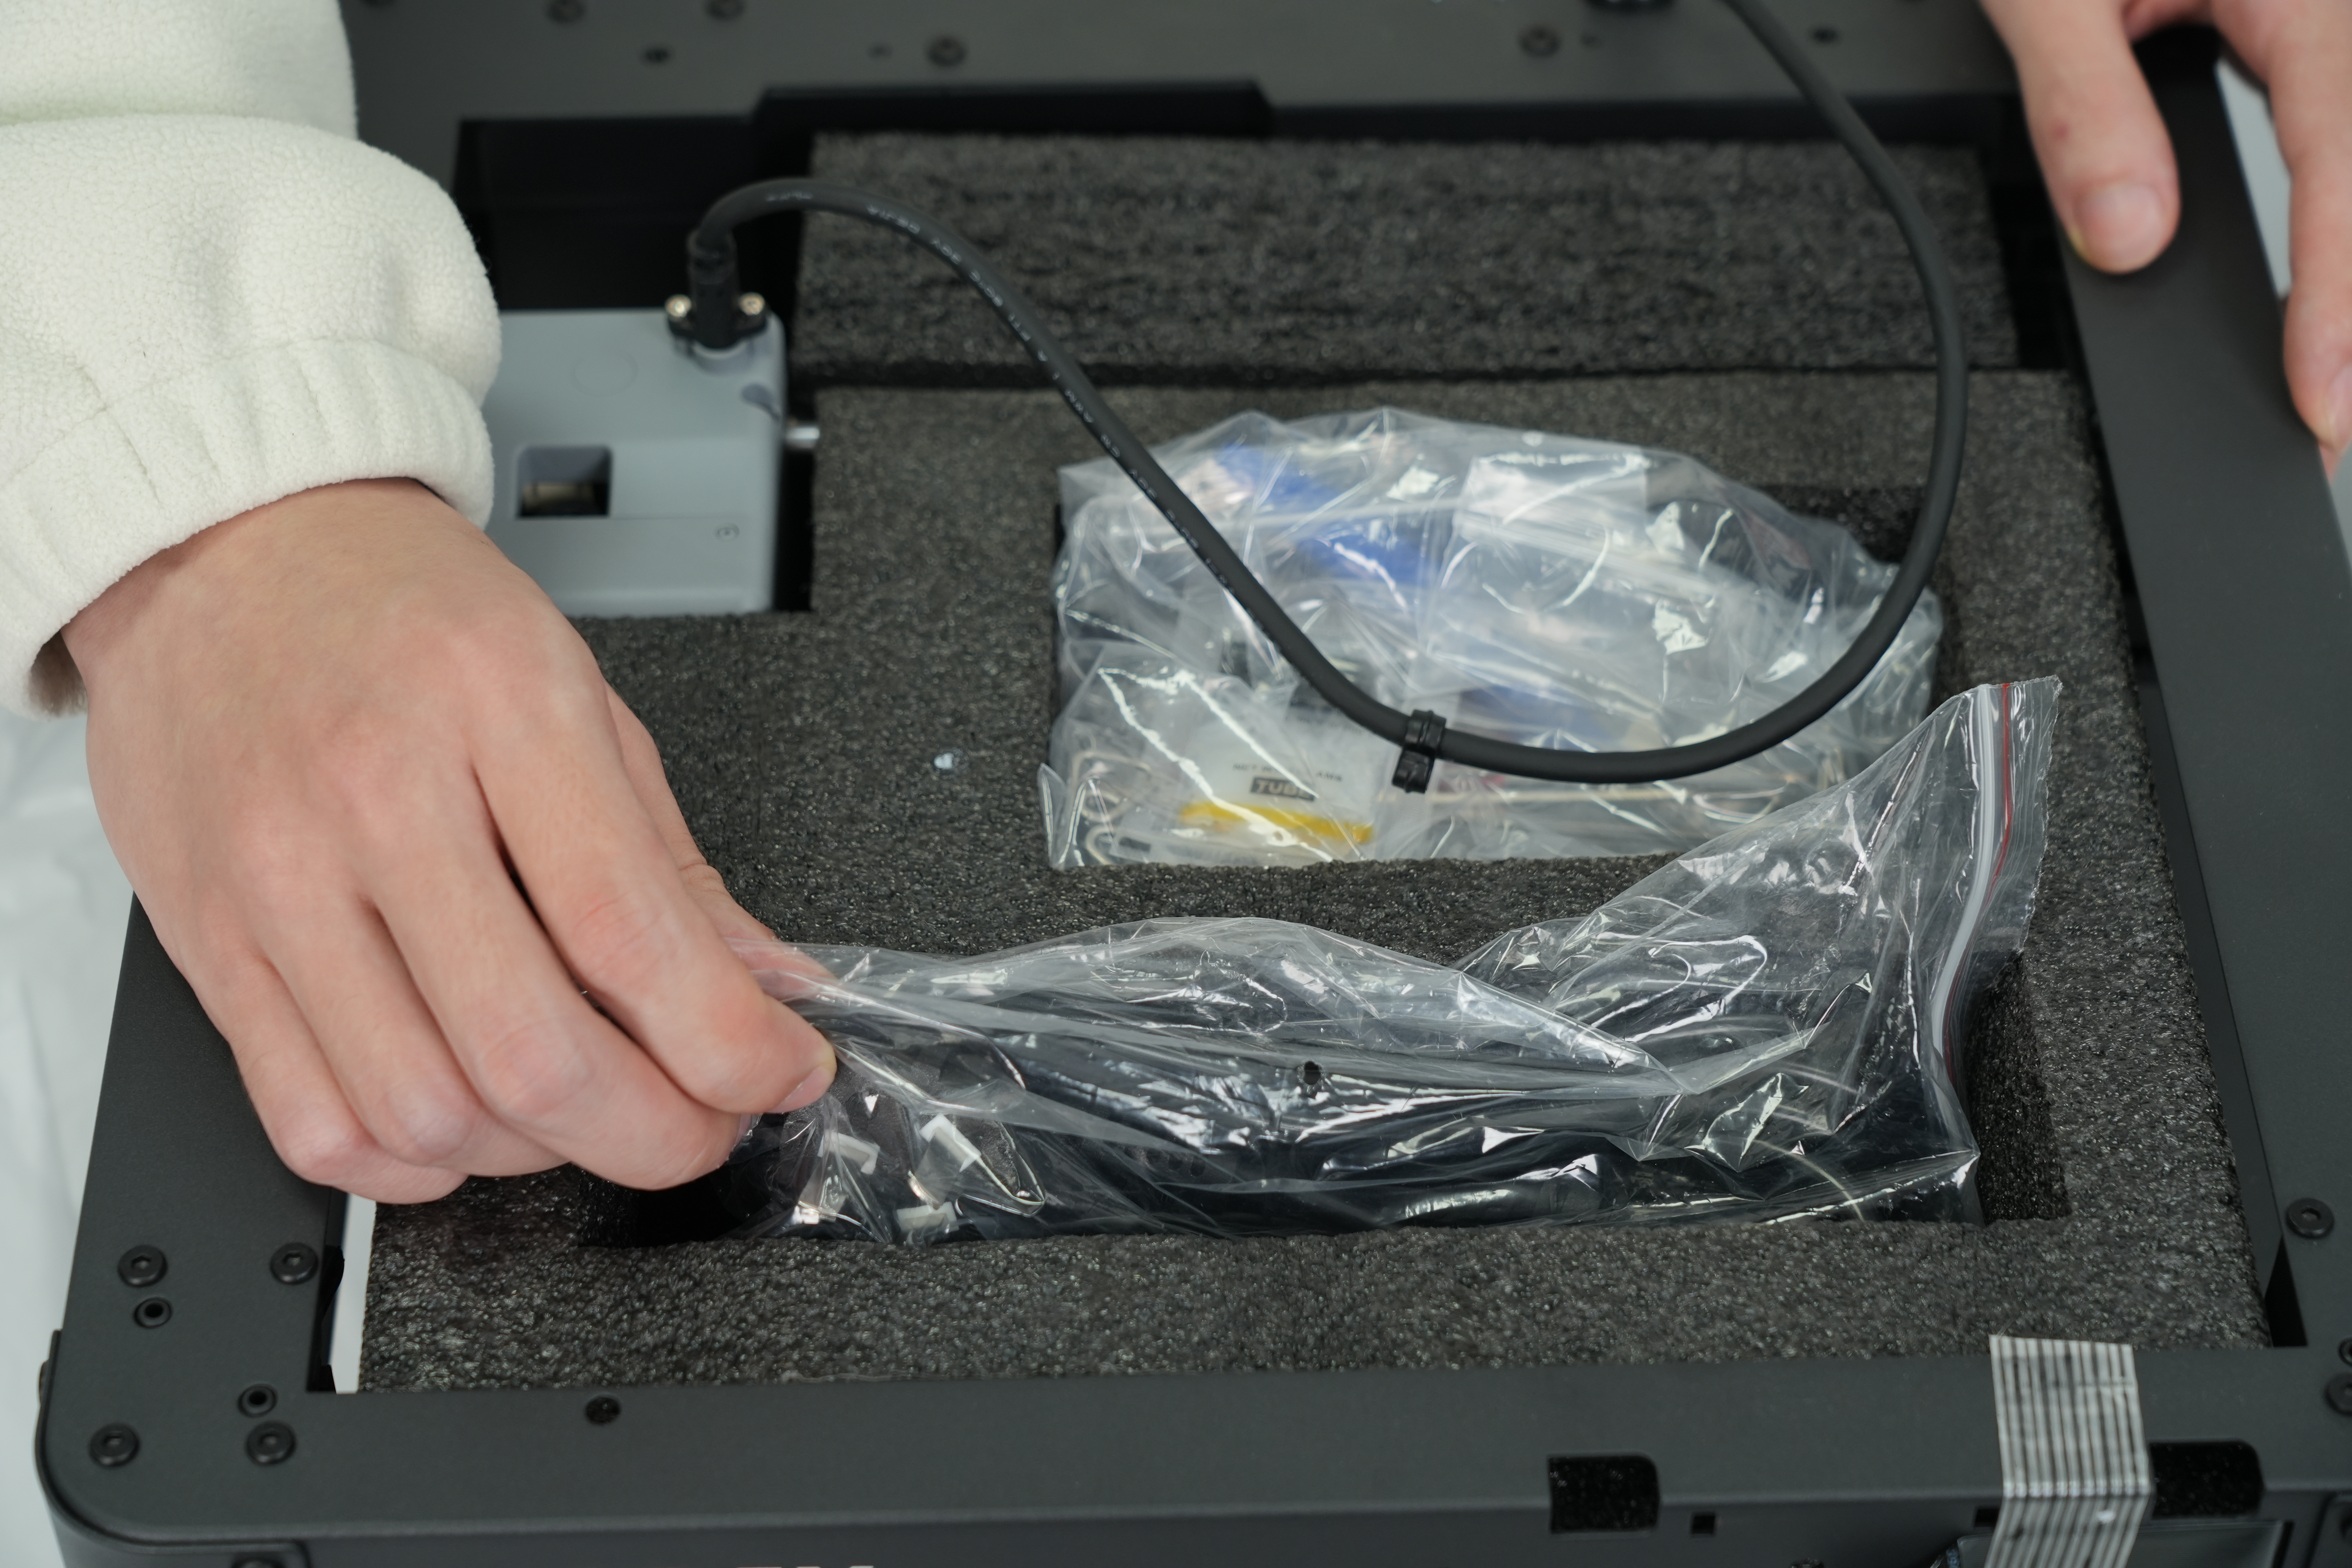
¶ Step 3: Remove the Foam and Accessories
Remove the power cord and toolkit from the chamber protective foam.
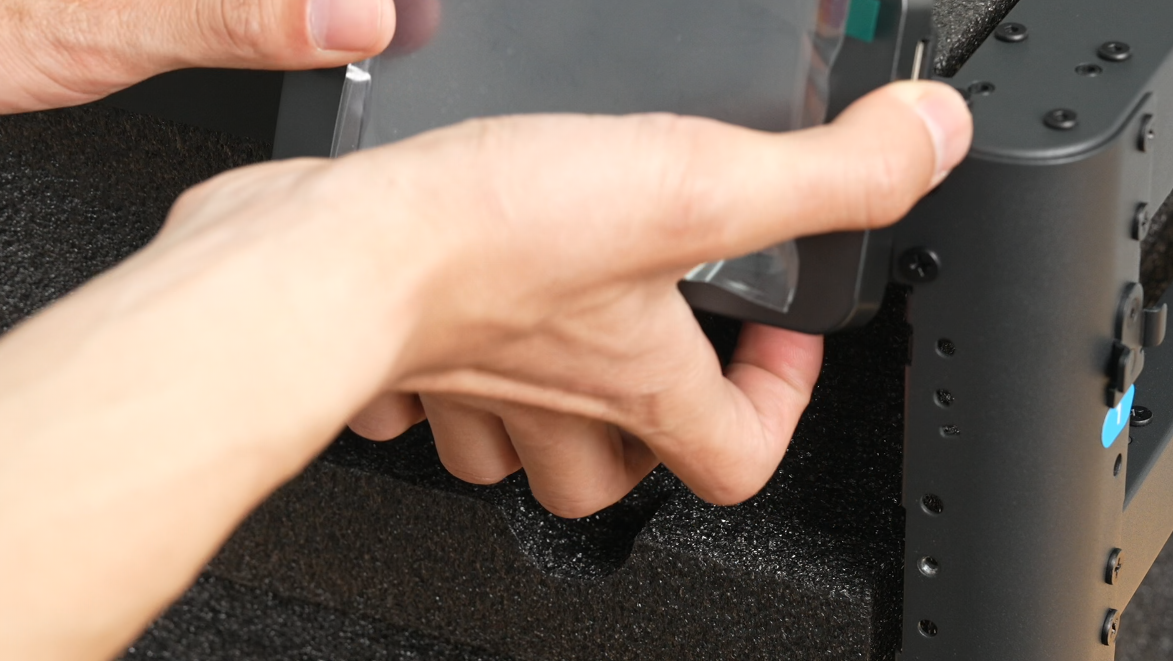
¶ Step 4: Install the Screen
1. Remove the screws and sheet metal fixing the screen.

2. Flip the display screen.
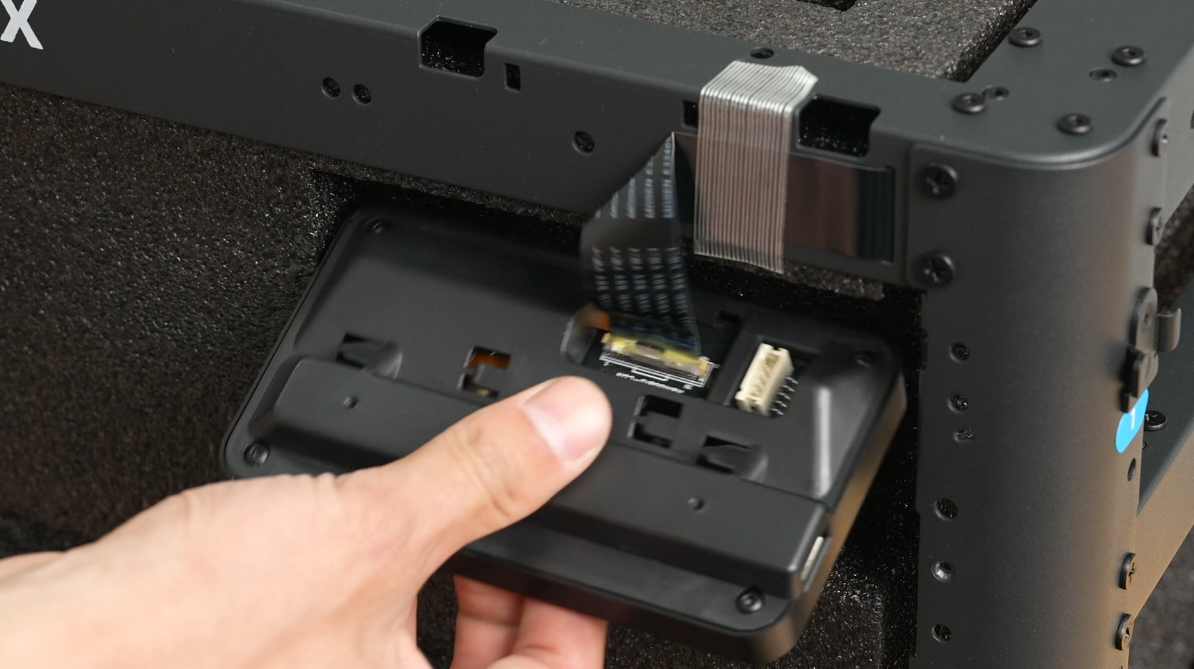
3. Push the screen to lock it in place.
¶ Step 5: Remove the Chamber Foam
1. Pull out the foam.
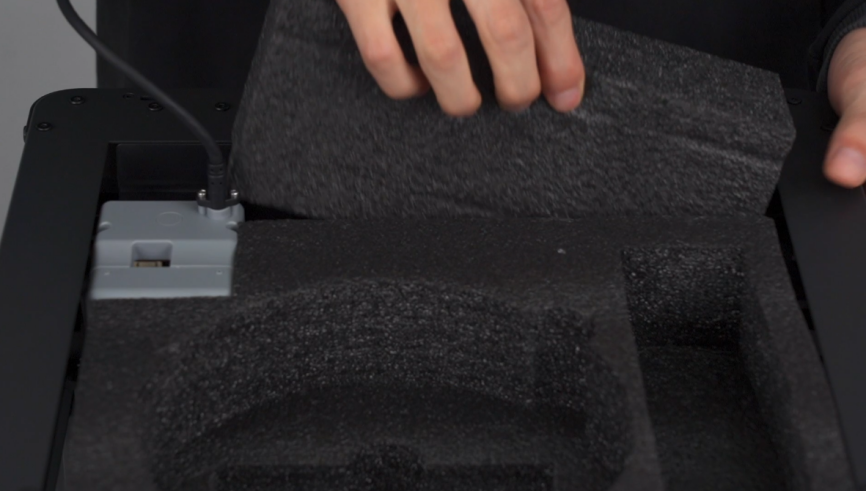
2. Move the extruder towards the back panel.
3. Push the foam backward and take it out.

4. Remove any remaining foam inside.

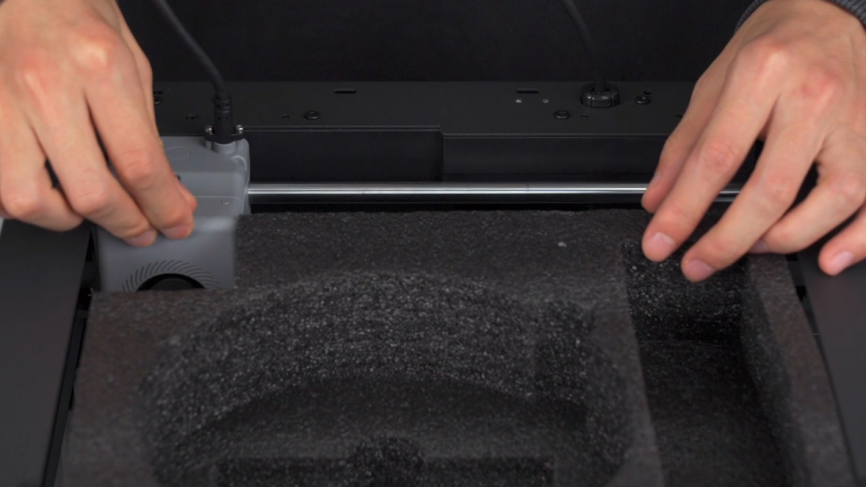
5.Remove the IFS connection cable, 4-color module (IFS), mounting plate, 4-in-1 guide tube, filaments, and spool holders.

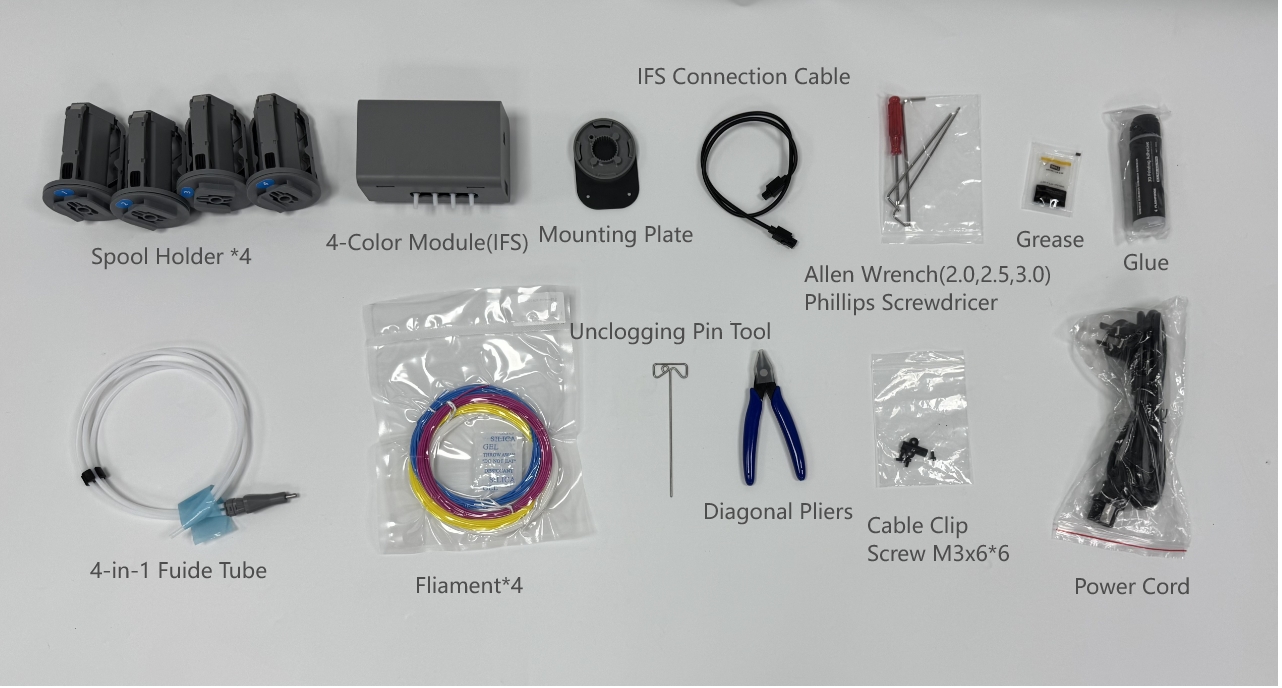
Packing List:
Filament *4
Power Cord *1
After-sales Service Card *1
IFS Connection Cable *1
Quick Start Guide *1
Grease *1
Spool Holder *4
4-in-1 Guide Tube *1
Mounting Plate *1
4-Color Module (IFS) *1
Screw M3×6 *6
Cable Clip *1
Glue *1
Diagonal Pliers *1
Unclogging Pin Tool *1
Phillips Screwdriver *1
Allen Wrench Set (2.0, 2.5, 3.0) *1
¶ Step 6: Install the 4-Color IFS Module
1. Secure the mounting plate to the side of the device using two M3×6 screws.

2. Rotate and secure the IFS module to the device using the clip, ensuring the guide tubes facing downwards.

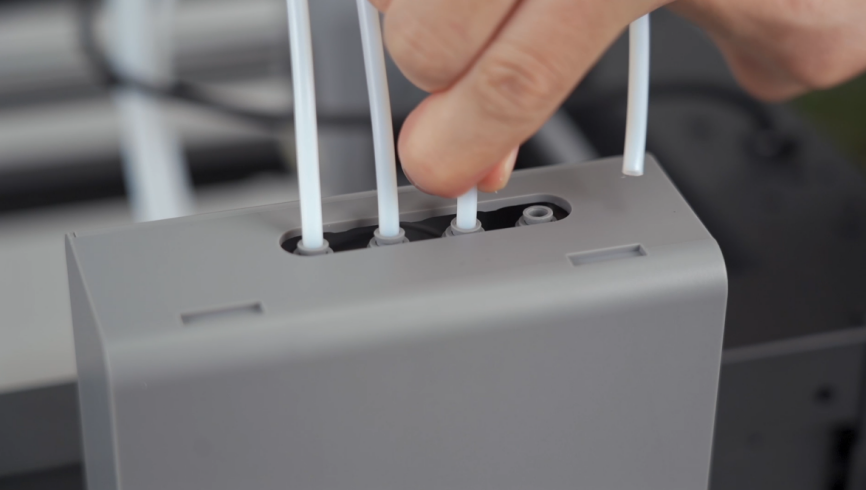
3. Insert the guide tubes into each channel of the IFS module. There's no need to follow a specific order for the channels. Connect the other end to the extruder.
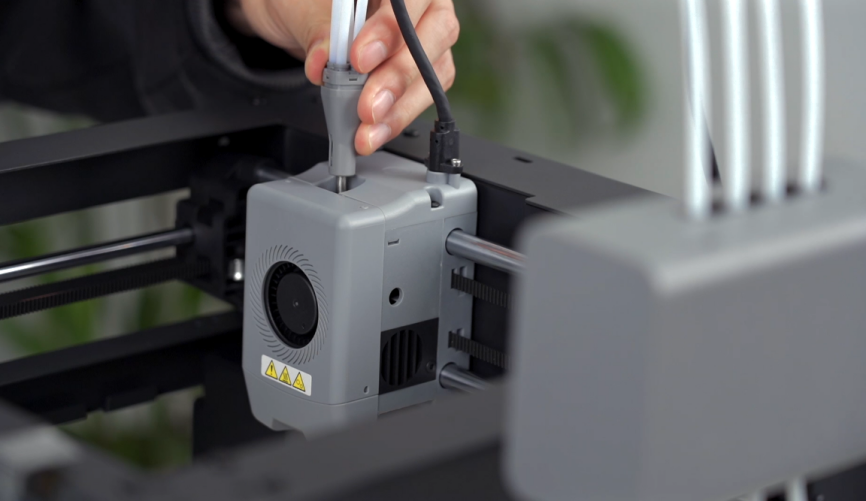
4. Connect the extruder cable and the guide tube together through the buckle.

5.Snap the spool holders onto the side mounting clips and press down to secure. Snap the spool holders onto the side mounting clips and press down to secure.
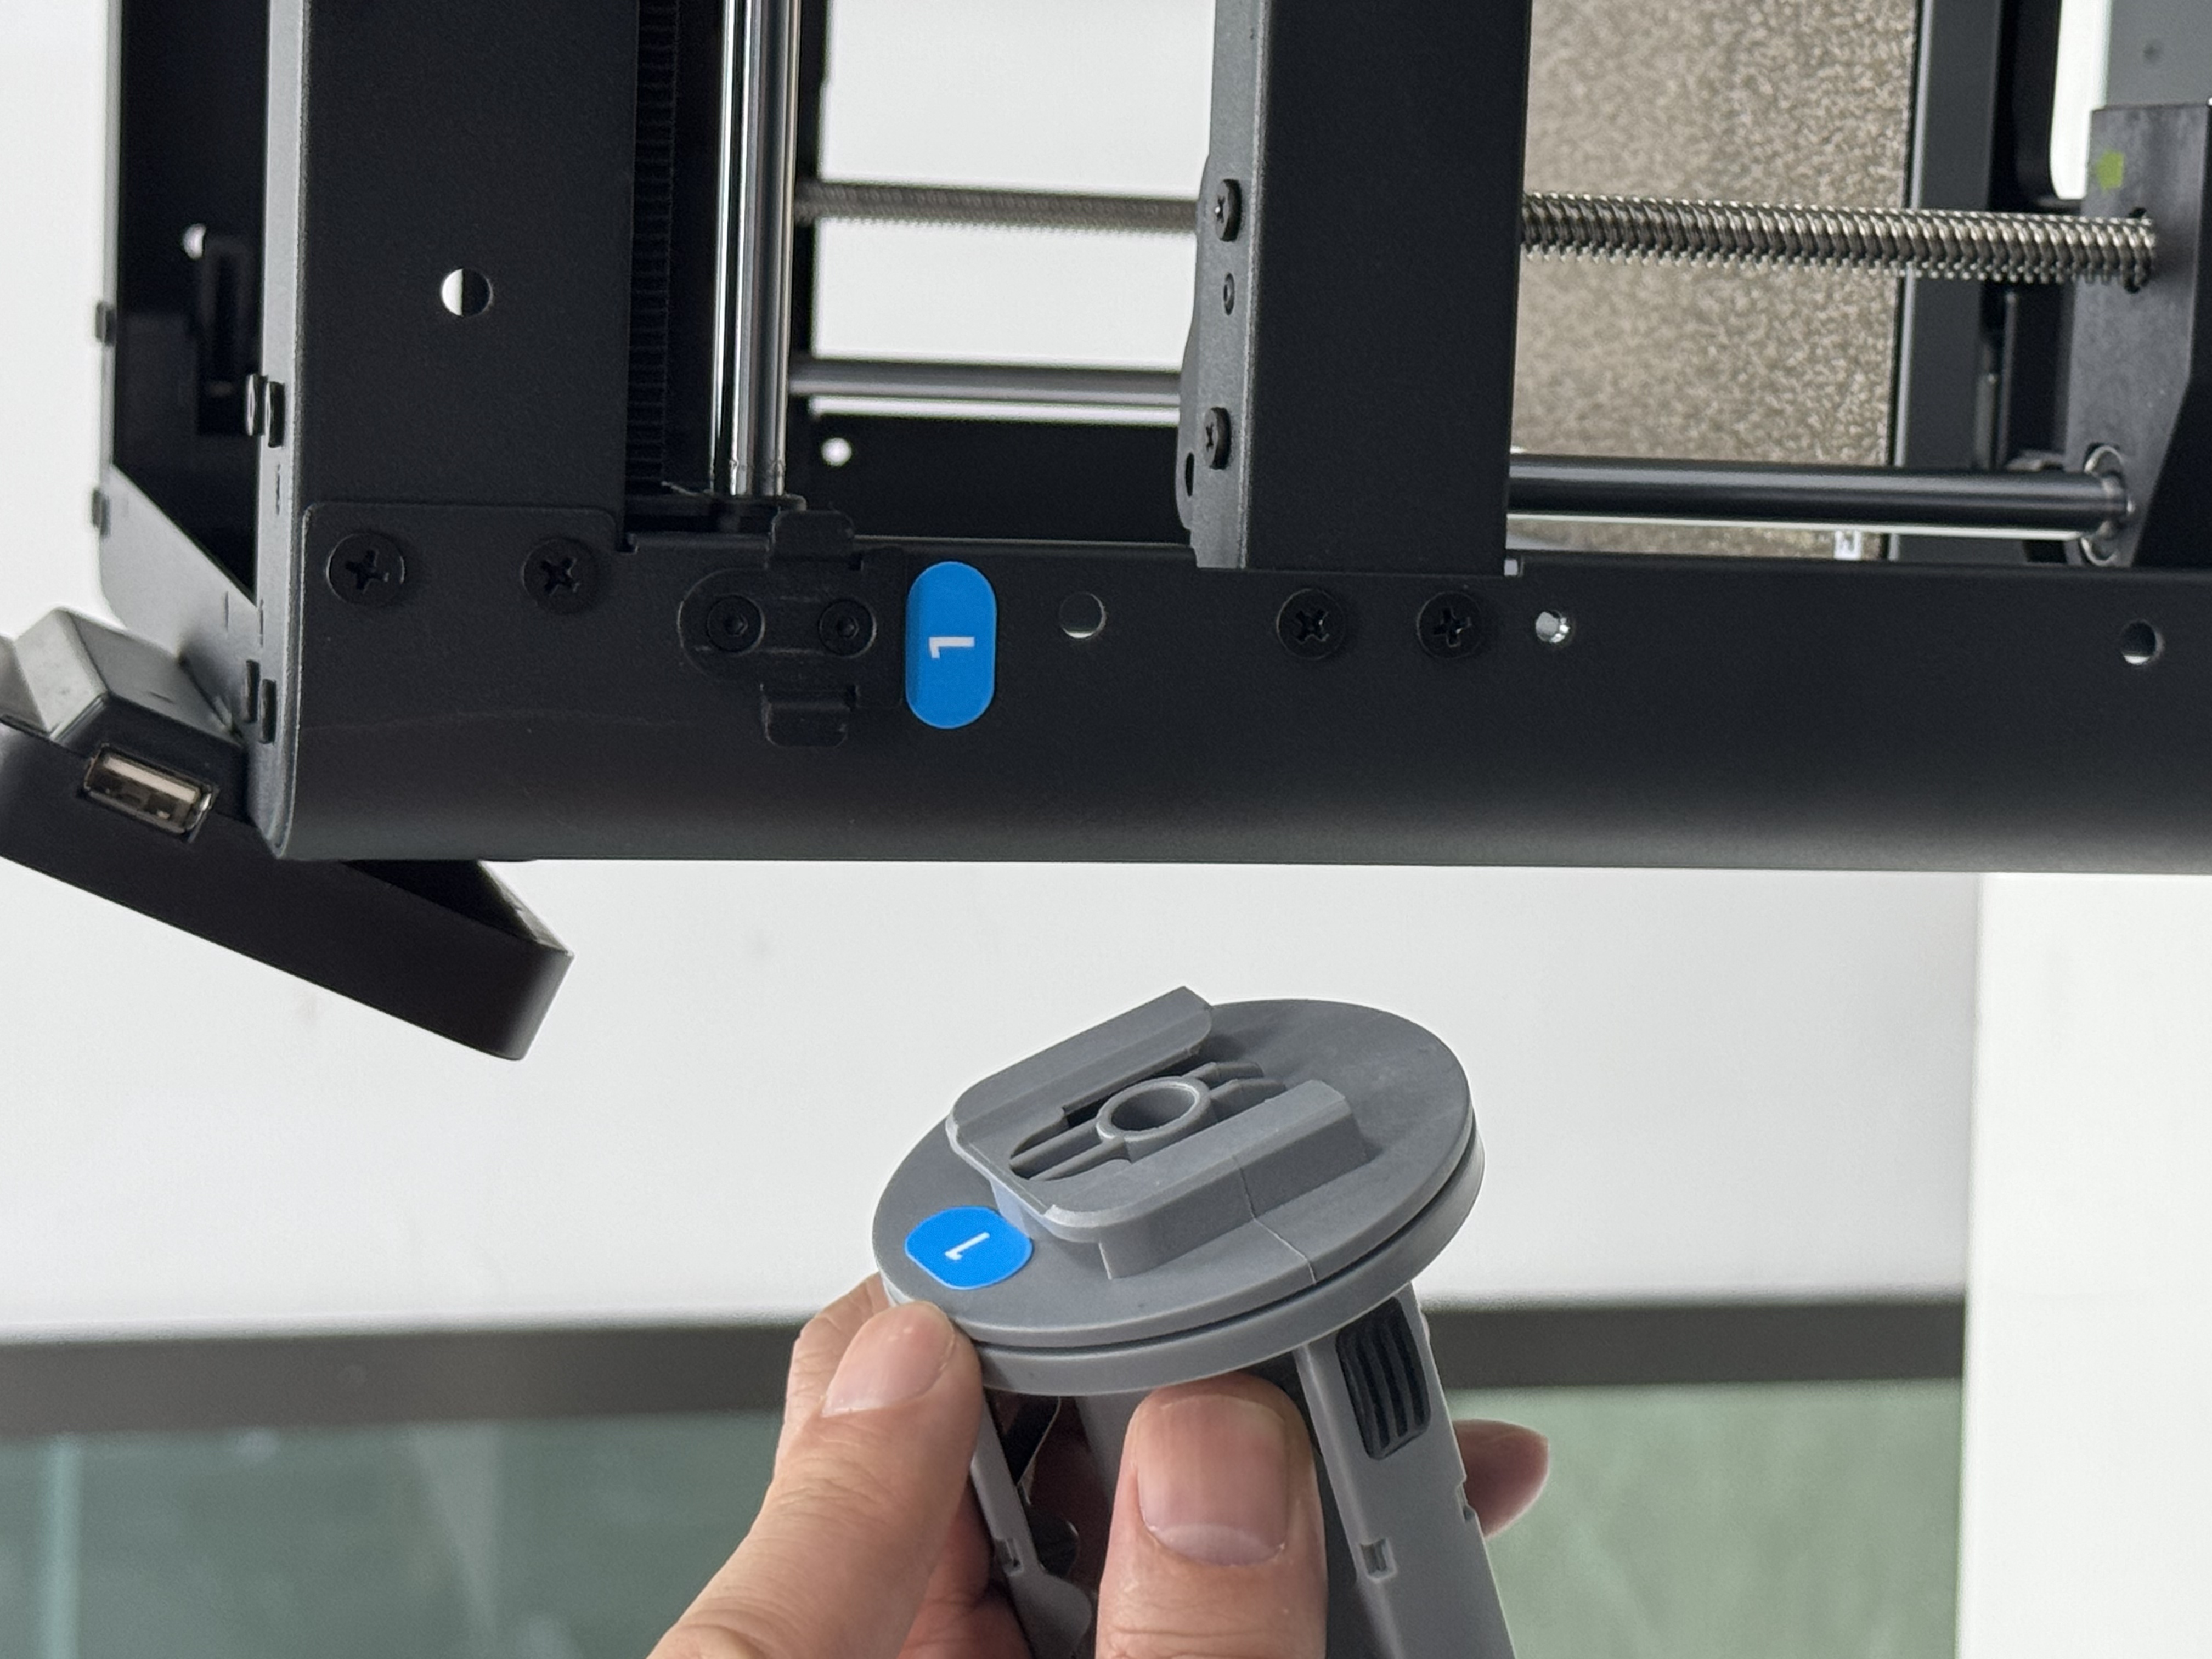
Note: Since the four spools of filament are mounted on both sides and may need to retract during operation, with varying retraction directions, please make sure the installed spool holder number, the installation position number, and the configured IFS channel number are consistent.
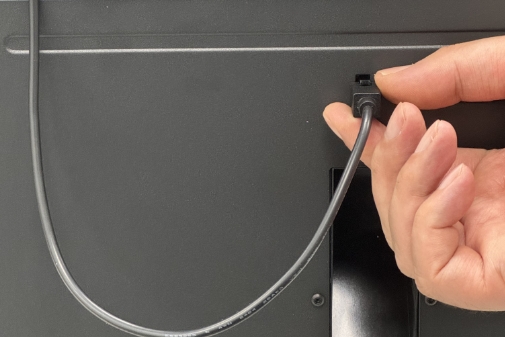
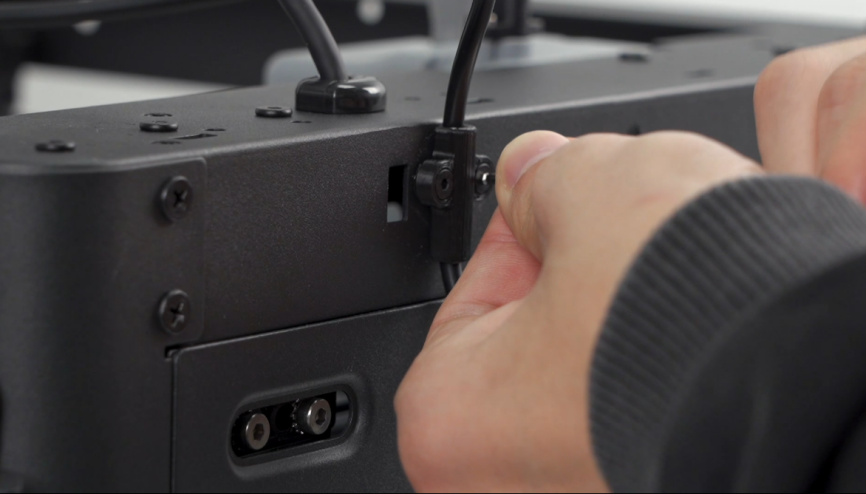
6. Connect the IFS cable to the four-color module and the corresponding port on the back of the device. Secure the cable clip with two M3×6 screws.
¶ Step 7: Unlock the Build Plate
Please use a 2.5mm Allen wrench to remove the three screws which lock the build plate (as indicated by the arrows).

¶ Unboxing Video:
Watch the full unboxing video on YouTube
Or use your mobile phone to scan the QR code to view the complete video tutorial.