¶ Slicing Parameters
In Flash Studio Desktop, parameter presets are the core of controlling print quality and success rate. Before slicing, please select the appropriate parameter configuration based on the filament being used and the printing requirements. Improper parameter settings may lead to print failures, substandard model quality, or even damage to the device.
Printing parameters are mainly divided into three categories: Printer, Filament, Process.
Users can save parameters set within a certain category as a parameter preset. There is no need to repeatedly set printing parameters for the next print.
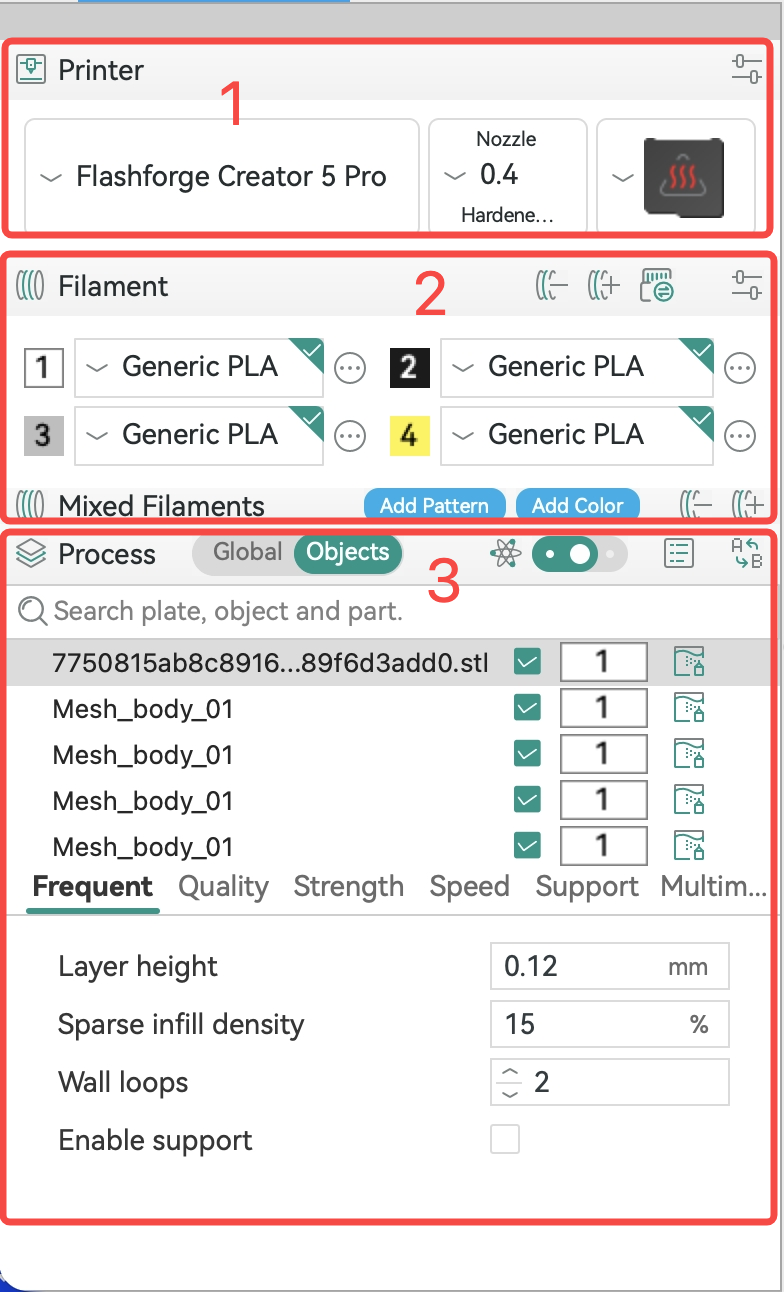
¶ Printer Preset
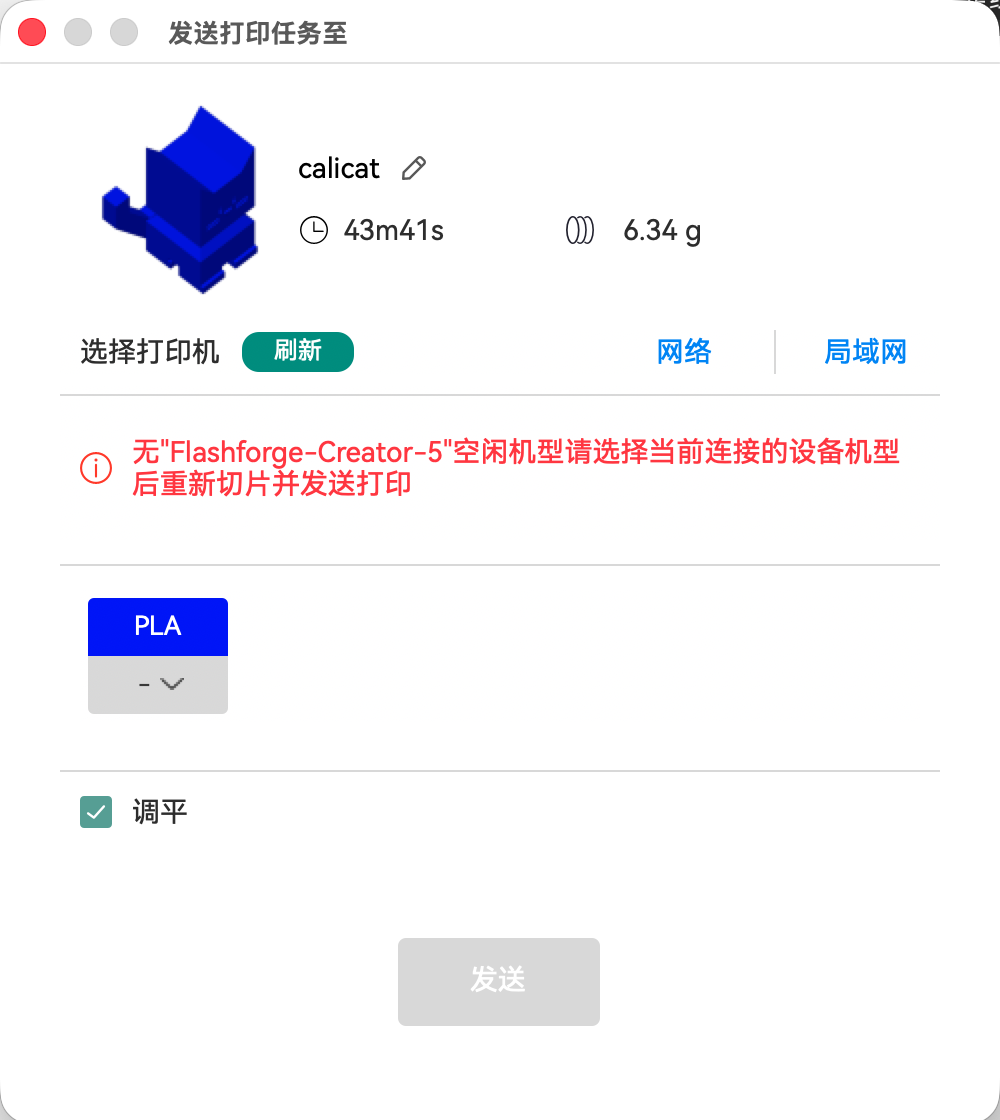
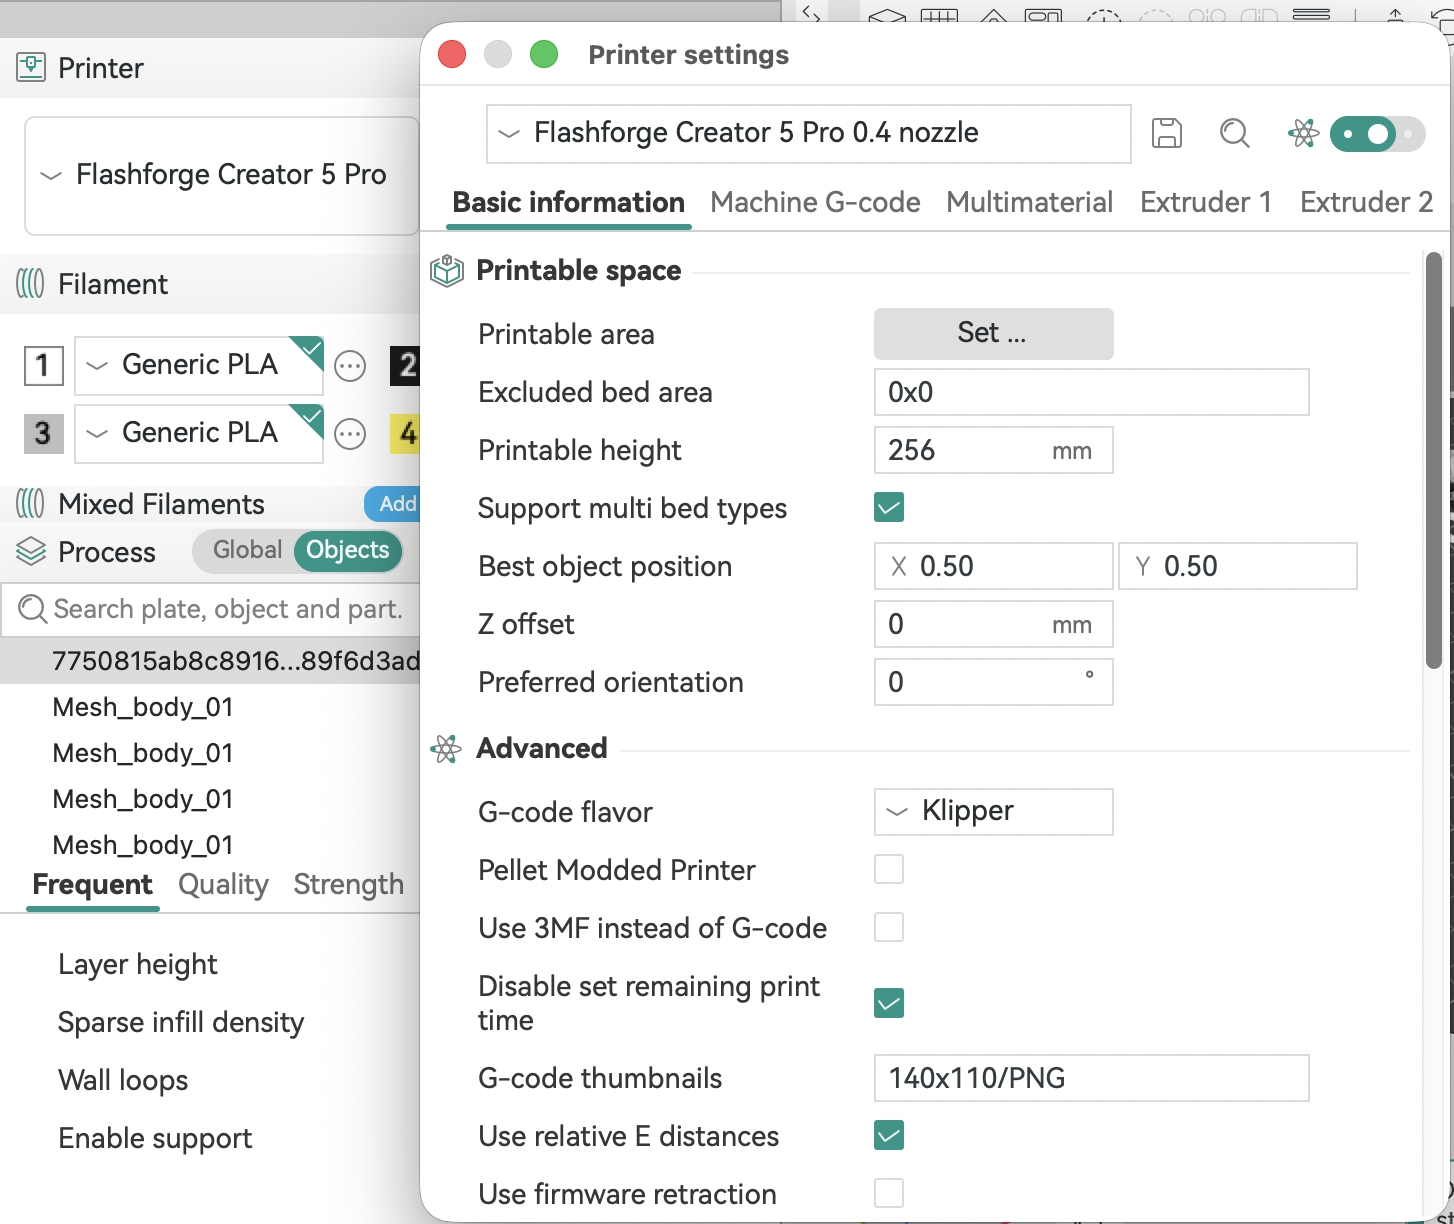
Before printing, please correctly select the device you have bound. For example, if you own an AD5X and connect the device via WAN/LAN, you also need to select the model as AD5X when choosing the printer, otherwise the slicing software will display an error prompting you that the selected device is incorrect.
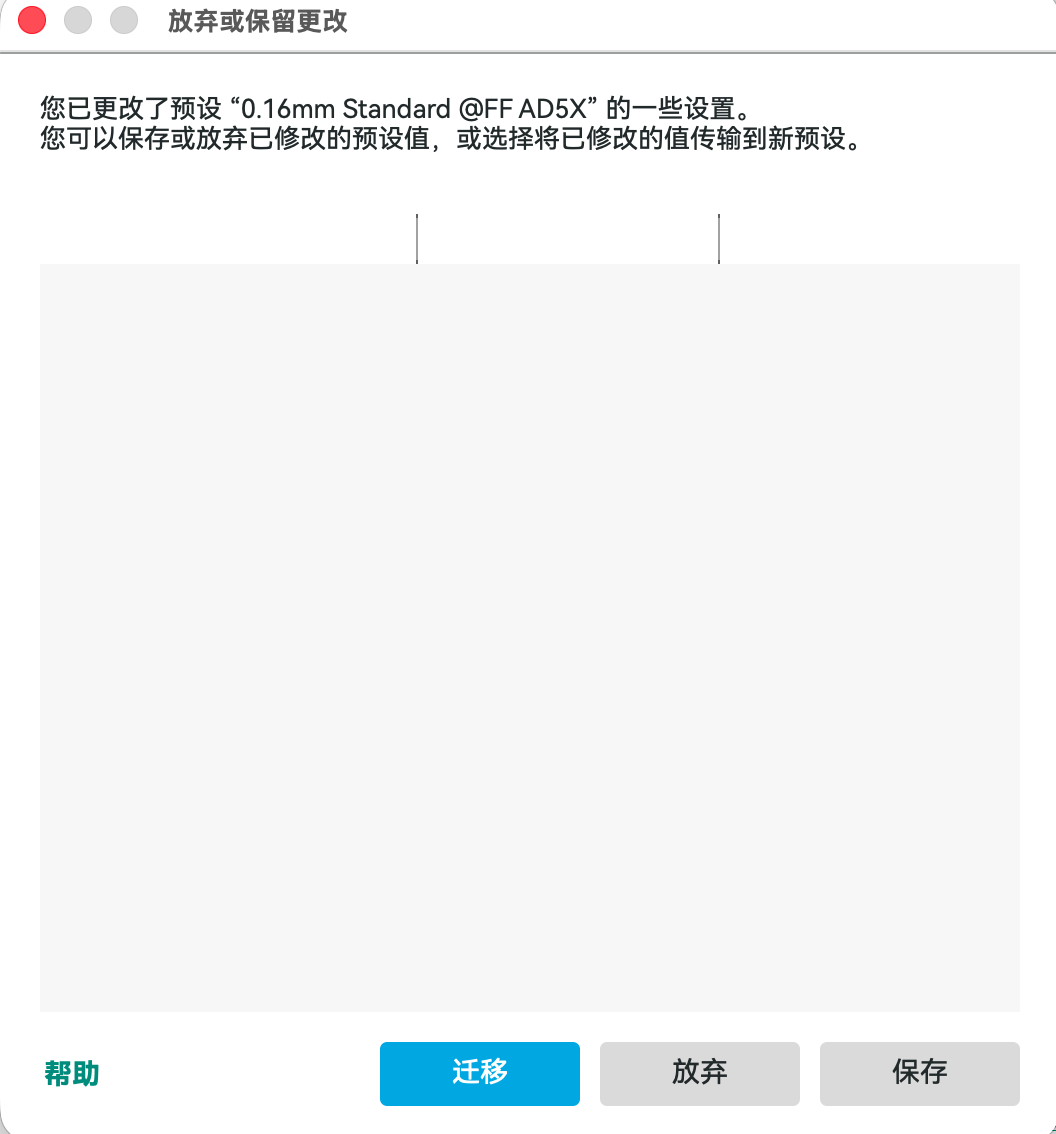
If the user has modified the printing parameters, the slicing software will prompt the user to migrate/discard the modified parameters.
Before slicing, please select the correct model and nozzle configuration based on your machine. (The default nozzle is 0.4mm; textured PEI bed. It is not recommended for beginner users to casually change the nozzle diameter and bed type.)
The printer preset contains all printer hardware settings, such as the maximum printing speed of the XYZ axis, extruder parameters, and printable area. (Note: The slicing software has built-in optimal printing parameters. It is not recommended for beginner users to casually change the parameters.)
¶ Filament Preset
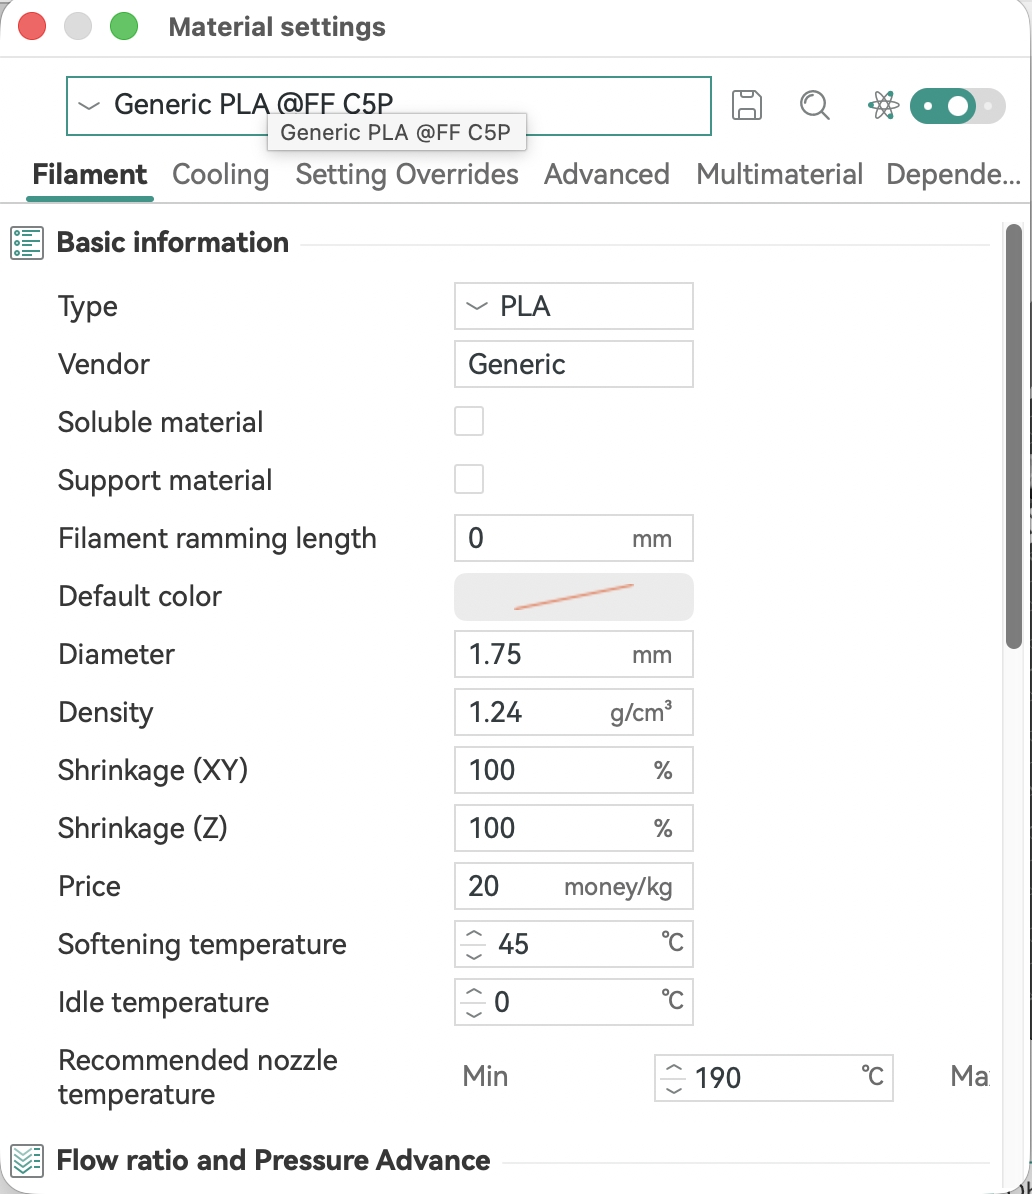
The filament preset defines all parameters directly related to a specific filament, including nozzle temperature, bed temperature, flow ratio, and cooling fan speed. Different filaments (such as PLA, PETG, ABS, TPU, etc.) require significantly different printing conditions. Selecting the wrong filament preset will greatly increase the risk of print failure.
Flash Studio Desktop has built-in preset parameters for Flashforge official filaments. Simply select the corresponding model.
Tip: It is not recommended for beginner users to casually change the parameters in the filament preset.
¶ Process Preset
The process preset controls parameters related to the printing task itself, including quality, strength, speed, support, Z seam, etc.
- For example, in the strength settings, the layer height — the smaller the layer height, the finer the model surface, but the longer the printing time. The system default is 0.20mm standard parameters, suitable for most scenarios.
Users can adjust the process parameters according to actual needs to balance print results and time consumption.
Tip: It is not recommended for beginner users to casually change process parameters.
¶ Parameter Hierarchy
Flash Studio Desktop supports a multi-level parameter system, from high to low: Global, Object, Part, Modifier. Lower-level parameter settings will override same-named parameters at higher levels.
¶ Global
Global parameters apply to all objects in the project. For example, setting the global infill density to 5% means every model in the project will use 5% infill. It is recommended to set global parameters to general values suitable for most objects.
Note: Parameter presets themselves are global. Only parameter modifications at the global level can be saved to user presets or project presets.
¶ Object
When a model in the project requires different settings from the global ones, you can switch to the object level and specify parameters individually for that model.
For example, after switching the process setting mode from "Global" to "Object", changing the infill density of a cube to 30% — after slicing, the cube will use 30% infill while the remaining models still maintain the global 15%.
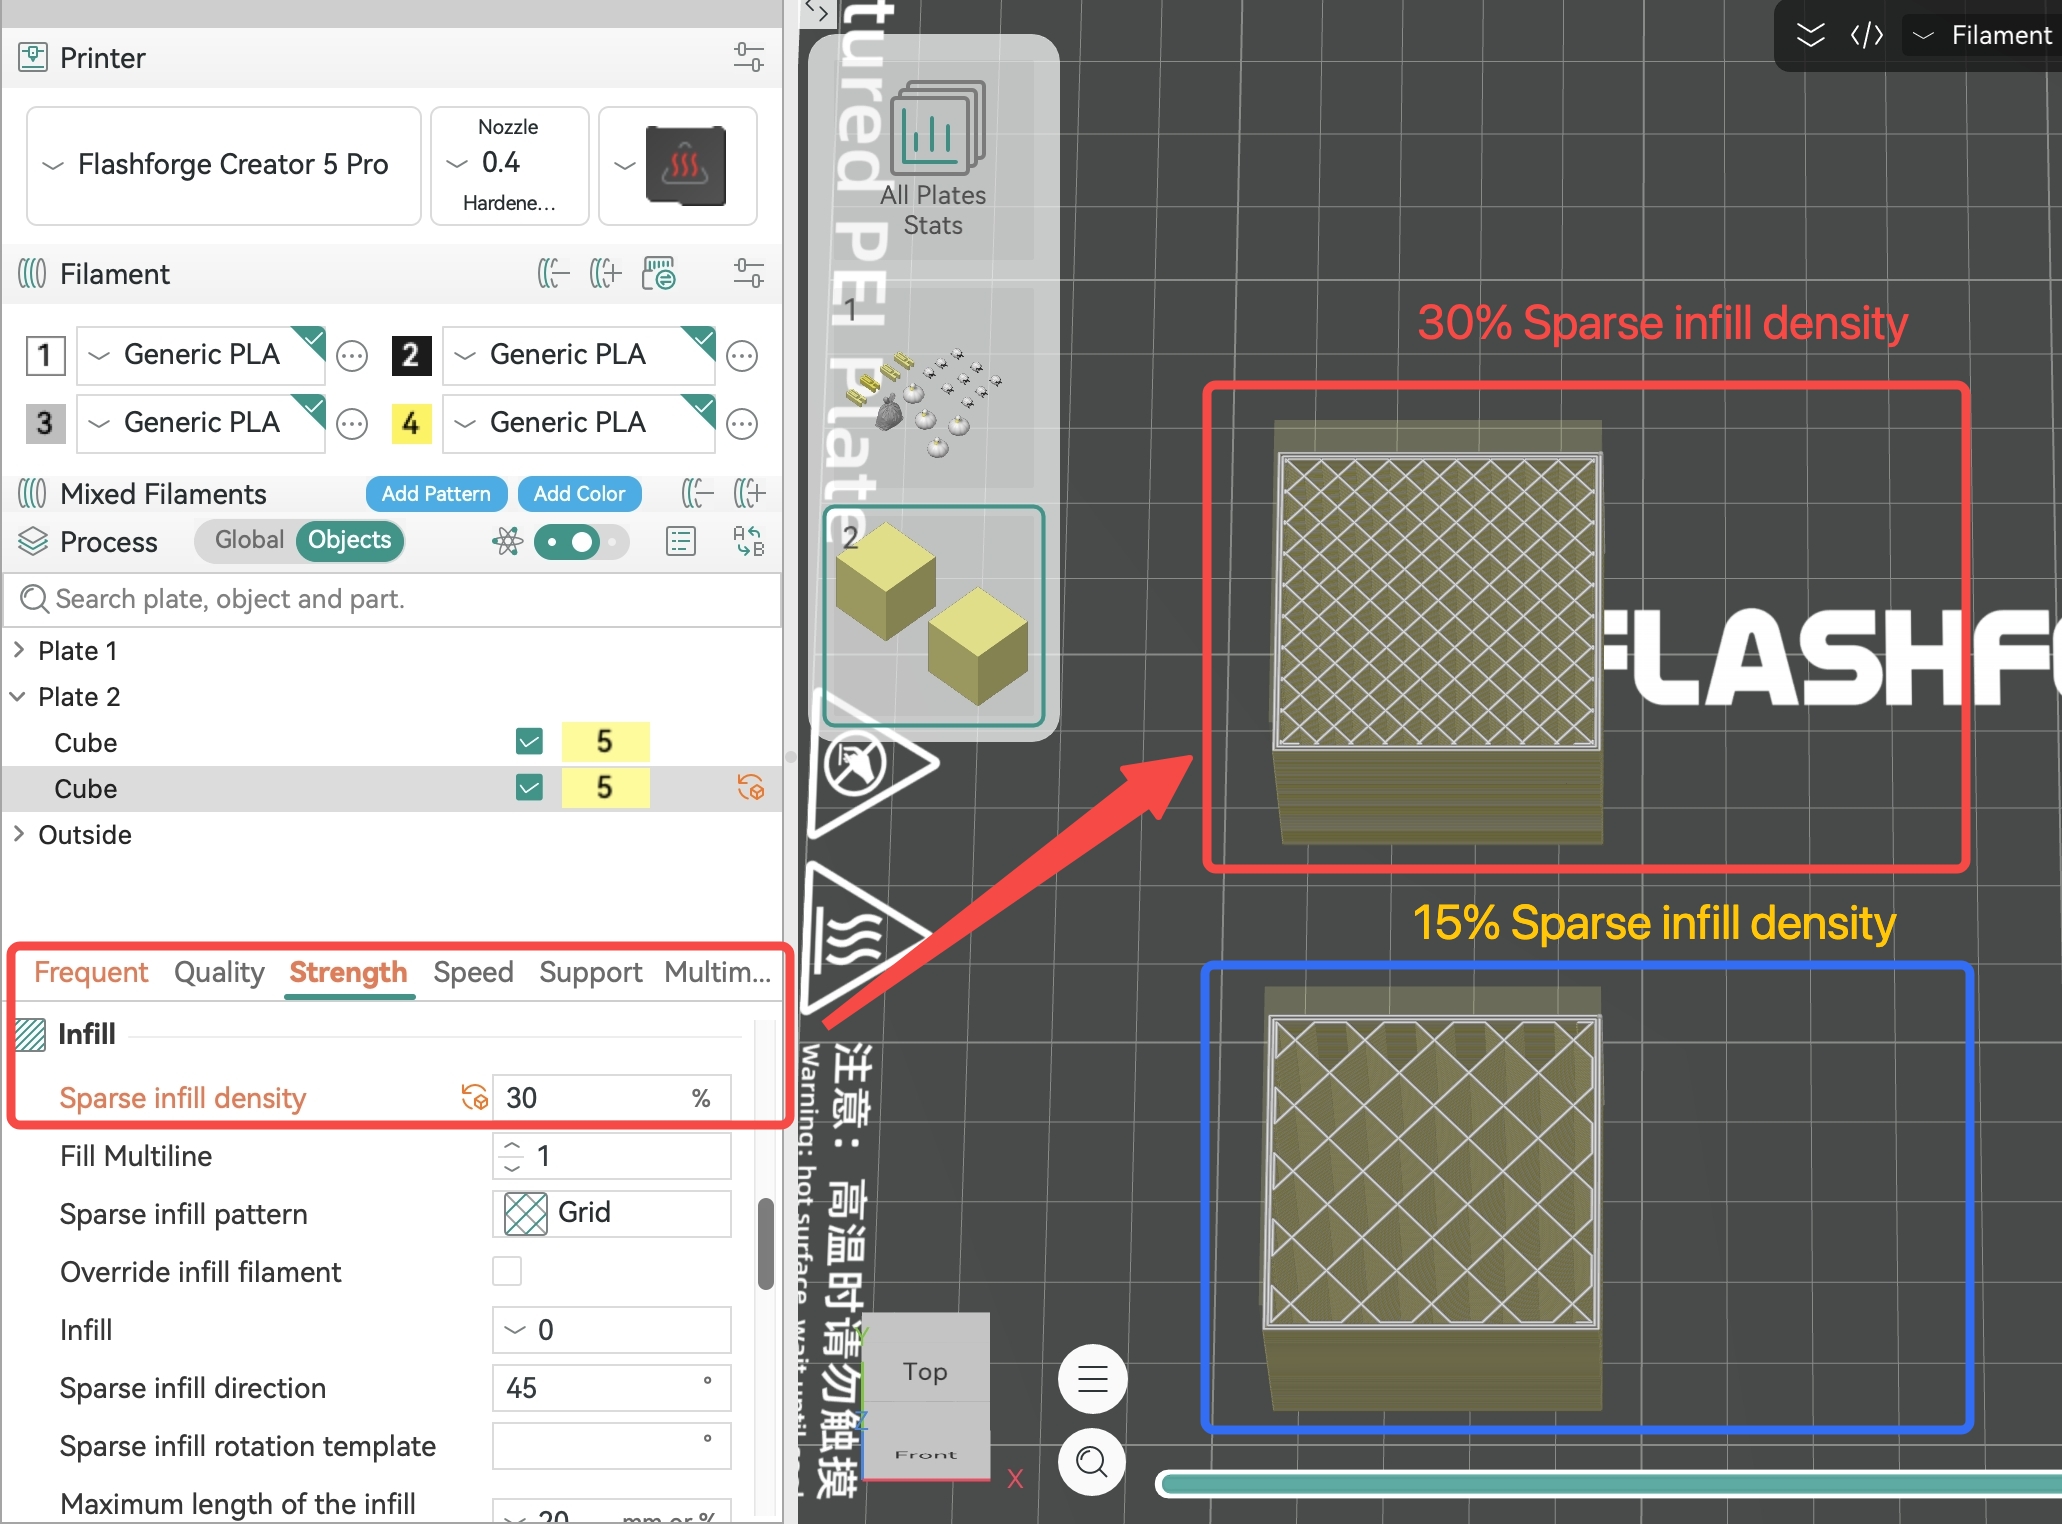
Note: Object-level parameters will override global-level parameters.
¶ Part
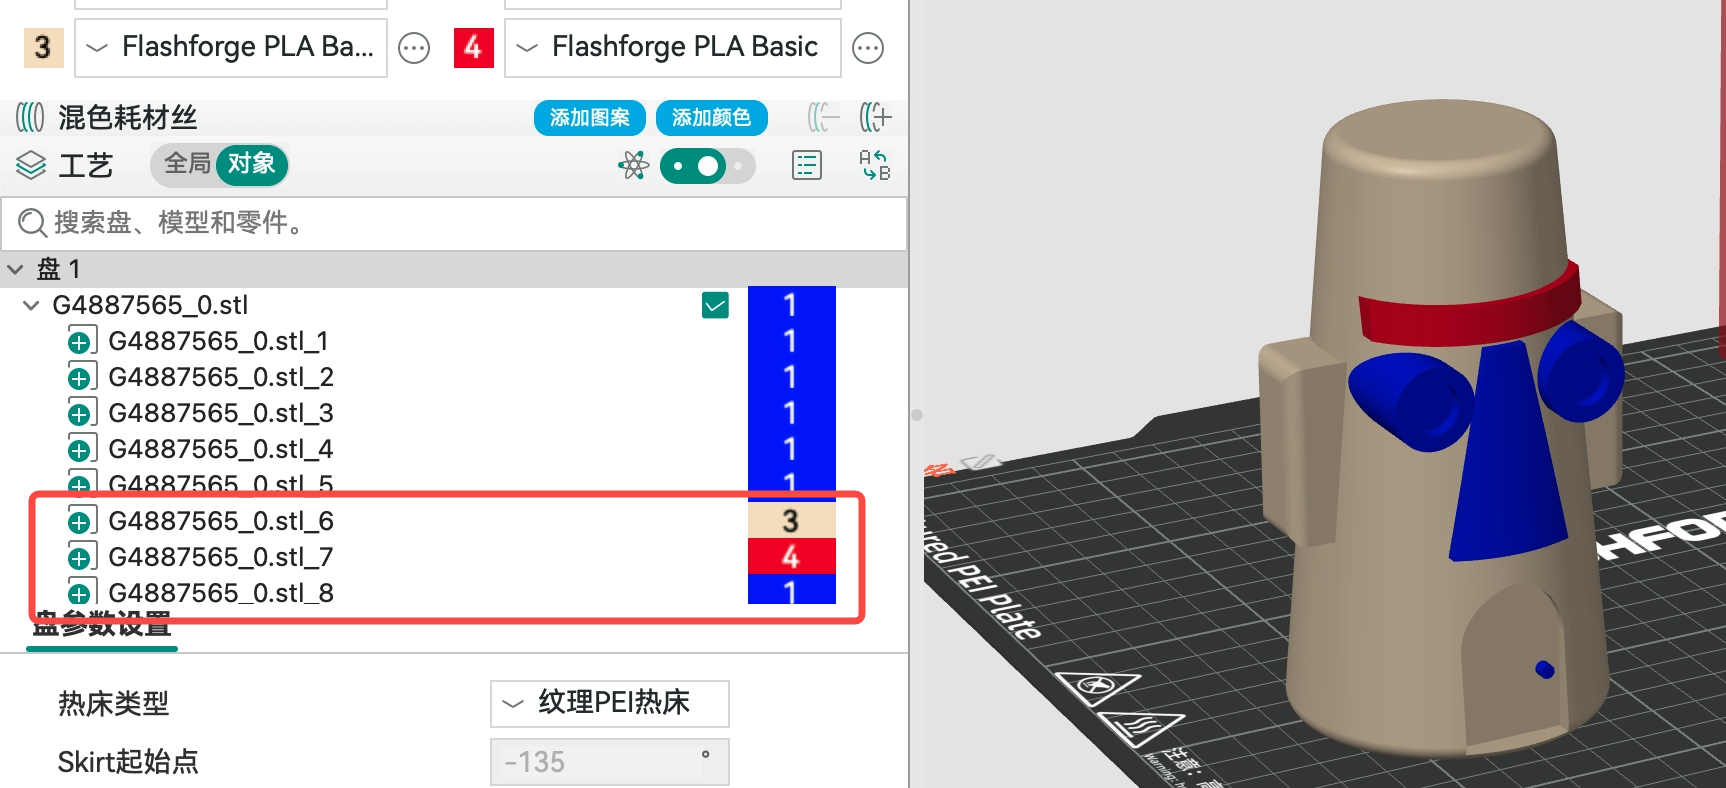
A combined model can be split into multiple parts. If you need to use different parameters for different parts of the same object, you can select a specific part in the object list and modify its parameters.
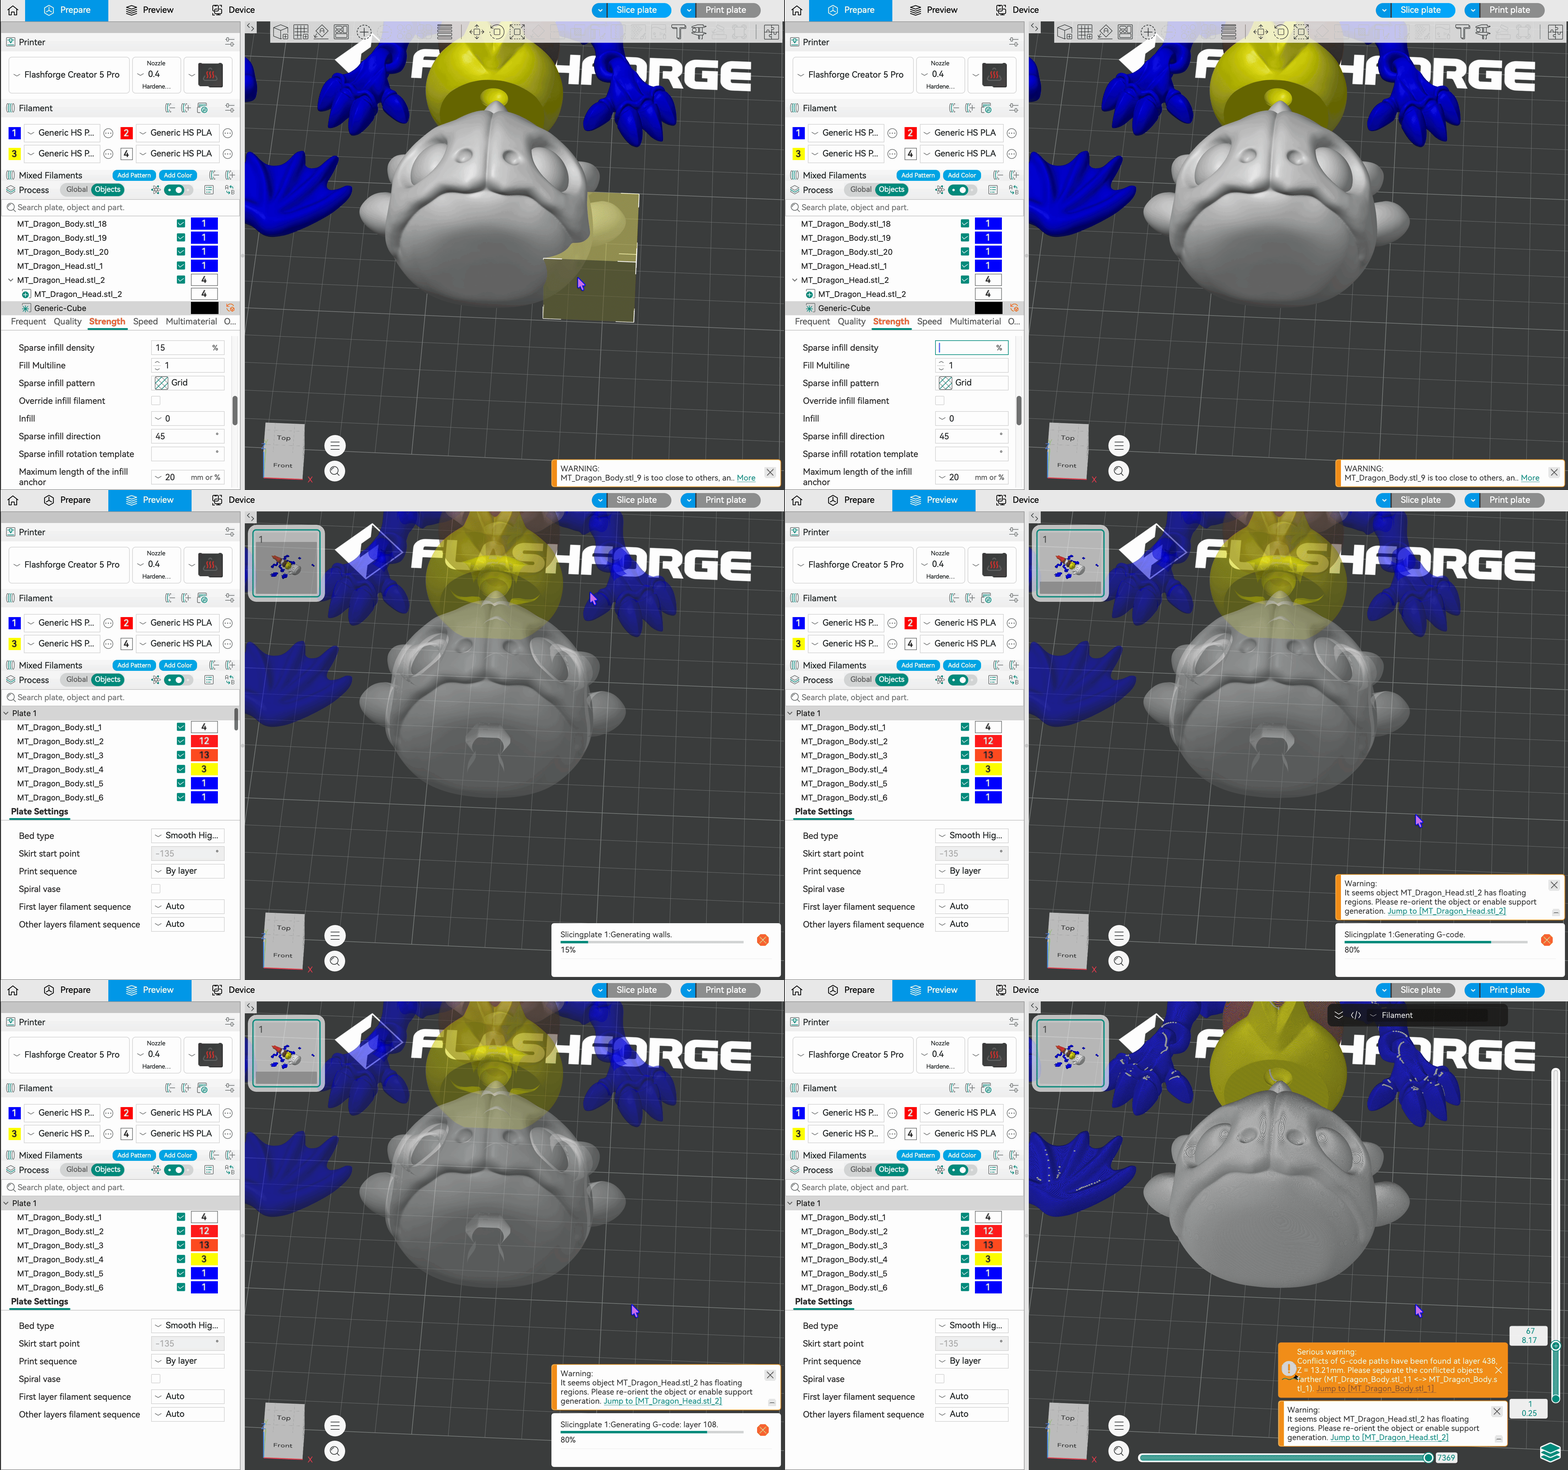
For example, after splitting the model shown below into parts, set some of the parts to filament of different colors for printing.
¶ Modifier
A modifier is a special attachment of an object. It is not a solid model itself, but is used to modify the parameter settings in the area that overlaps with it. Through modifiers, you can precisely control the filament color, infill density, and other parameters of a certain local area of the model without affecting the rest.
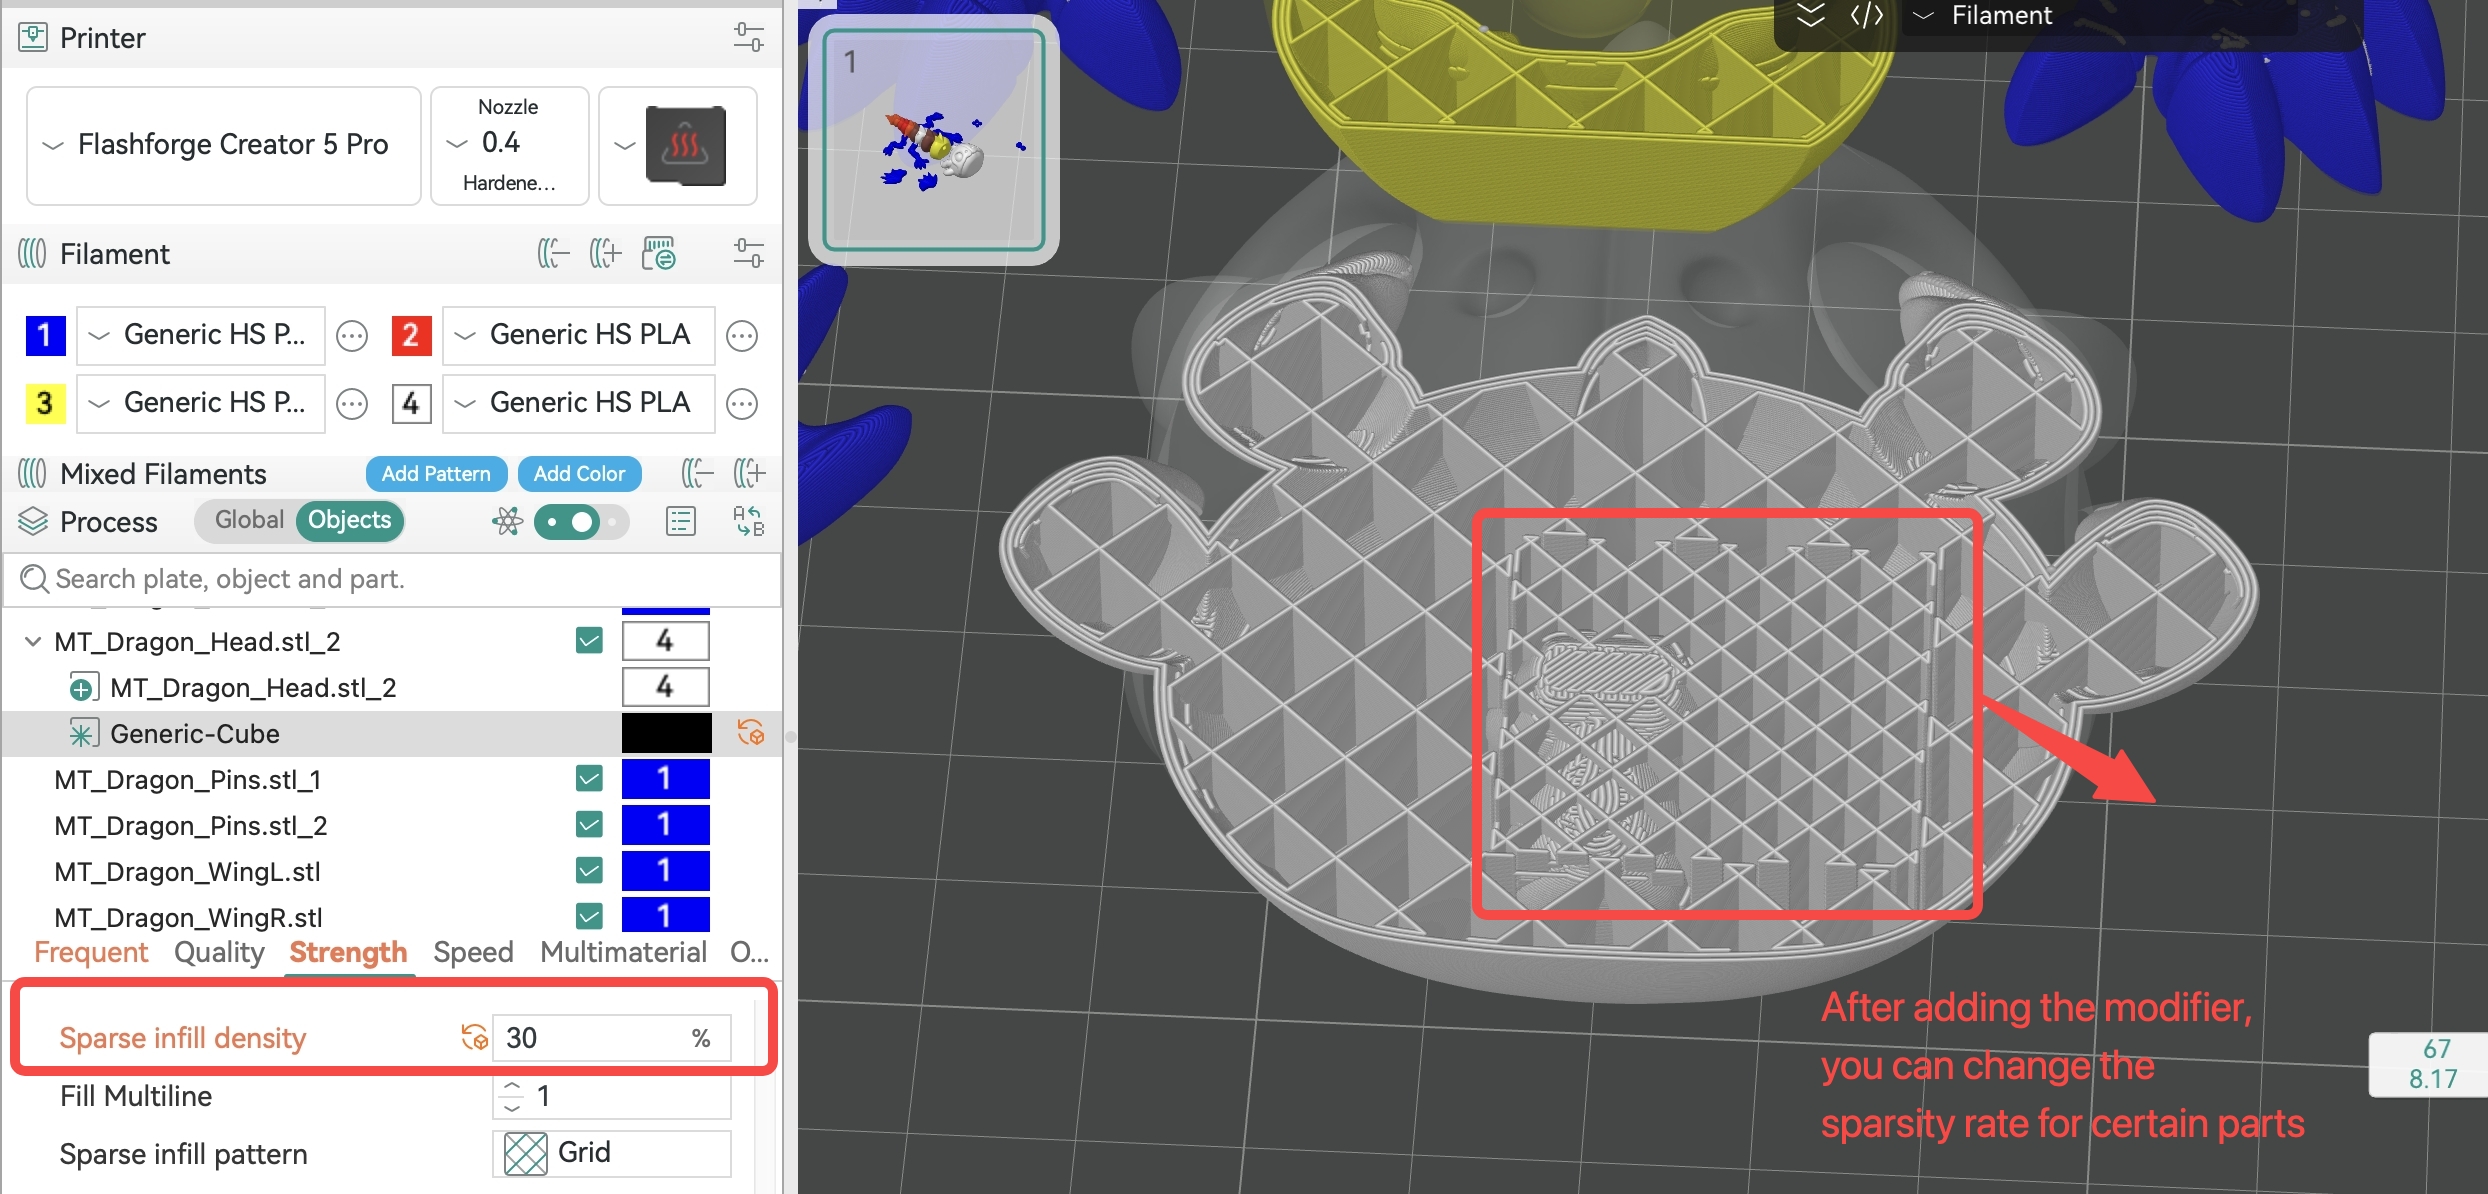
How to create a modifier: Right-click on the object, select "Add Modifier" from the menu, then choose the desired modifier shape. Adjust the position and size of the modifier so that it overlaps with the target area, then set the parameters to be overridden.