¶ Flash Studio Desktop Quick Start Guide
¶ What is Flash Studio Desktop?
Flash Studio Desktop is a slicing software developed by Flashforge based on Orca Slicer, featuring model download, model editing, slicing preview, remote printer monitoring, and print process monitoring functions developed specifically for Flashforge 3D printers. With optimized slicing algorithms and a user-friendly interface, it provides users with a smooth printing experience.
¶ Installation Requirements
- Windows 10 and above
- MacOS V10.15 and above
- Intel® Core 2 or AMD Athlon® 64 processor; 2 GHz or faster processor
- RAM requirement: 8GB and above
- Disk space requirement: 80GB and above
¶ Download and Installation
- Download Flash Studio Desktop
- Follow the steps below to install Flash Studio Desktop
¶ Installation Wizard
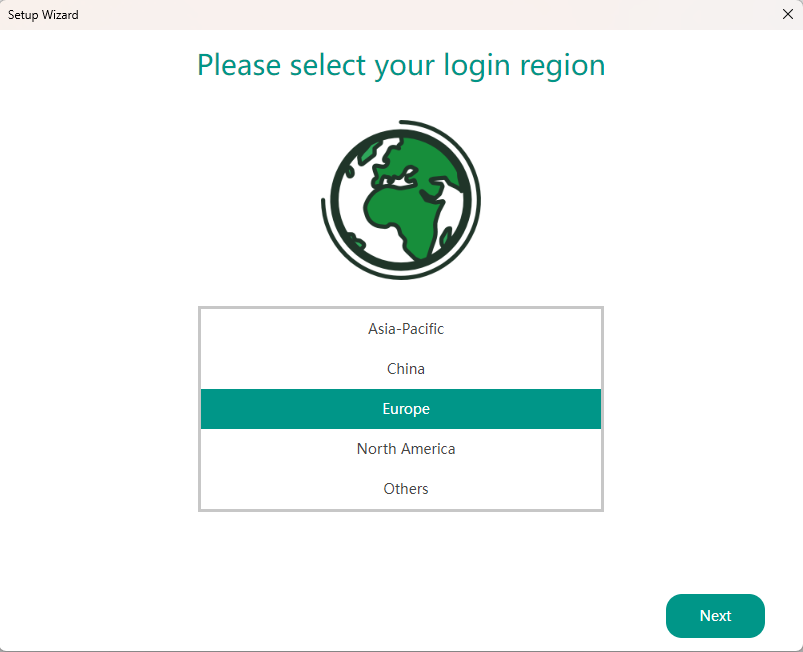
¶ 1. Select login region as "China"
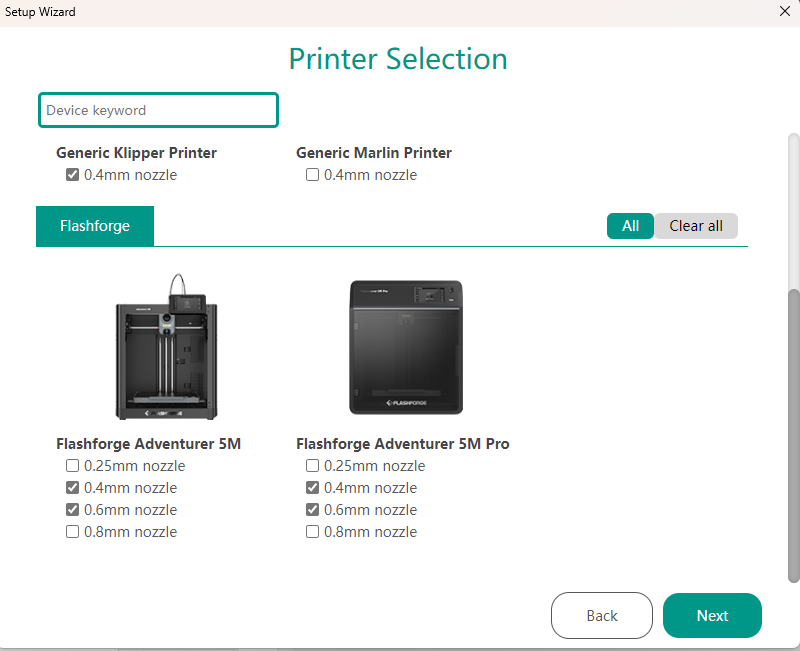
¶ 2. Select Printer
Select the printer/nozzle you want to display in the operation menu. It is recommended that you select the all available printers option.
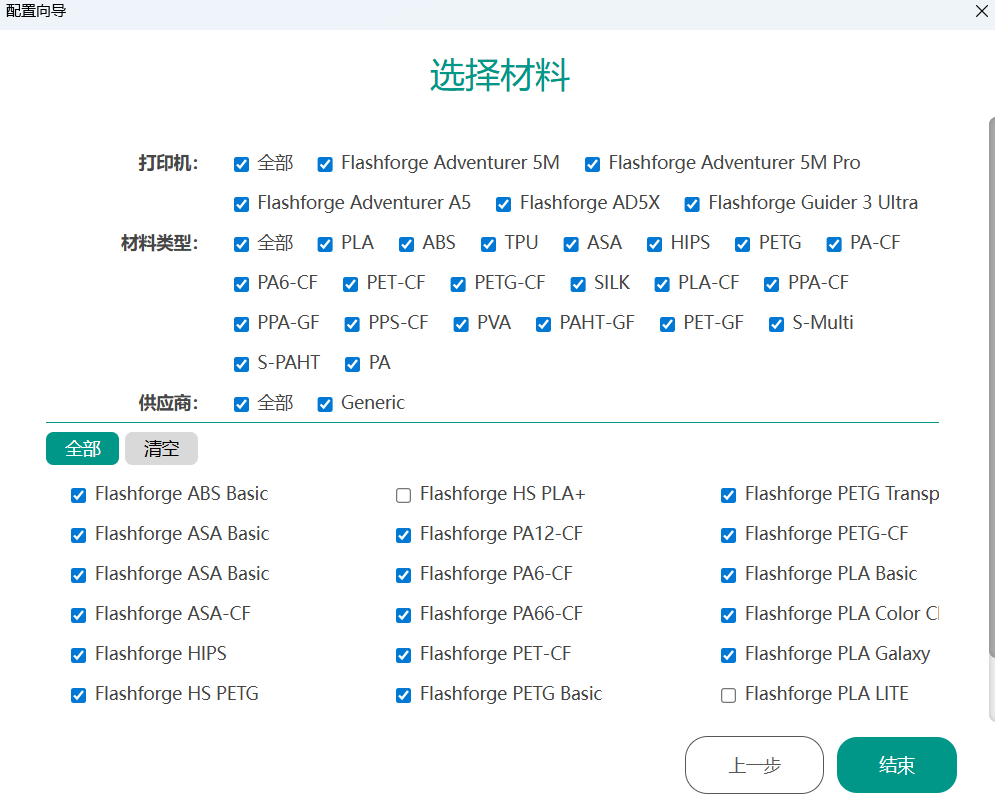
¶ 3. Select Filament
Select the filaments you wish to have listed in the "Filament Preset List". It is recommended that you select all types of filaments.
¶ First Print
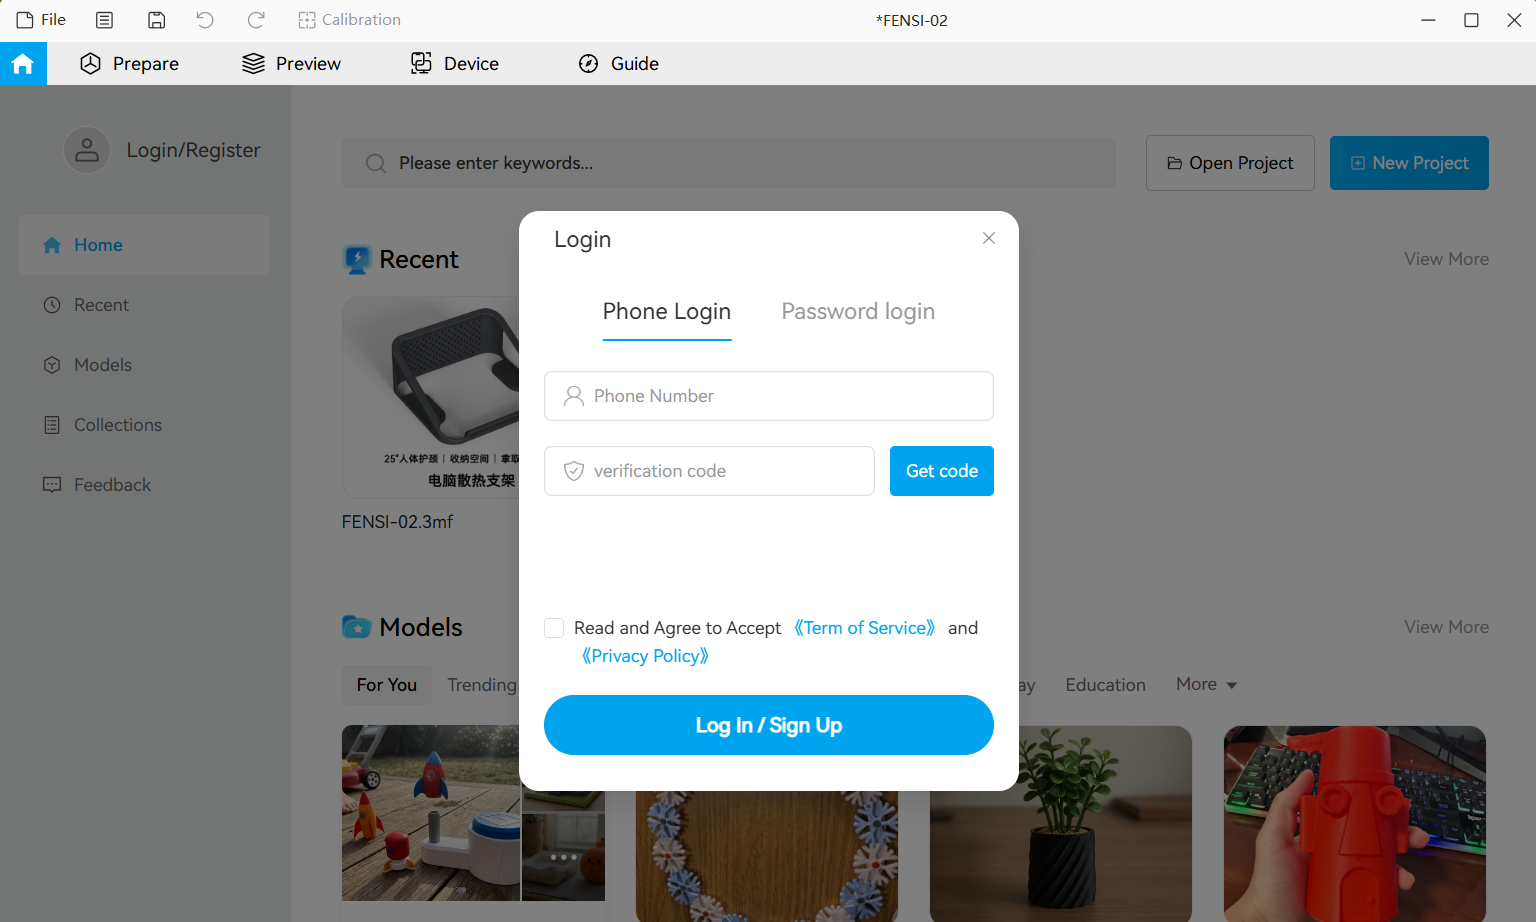
¶ Register/Log in to Account
Before using the software and printer, you need to first register/log in to your Flashforge account. This is a prerequisite for enabling account information synchronization and printer control. Your account information will be synced across mobile, desktop, and device.
The device has two connection modes: Network Mode and LAN Mode
- Network Mode: Files are transmitted to the device via the cloud server;
- LAN Mode: Files are transmitted via the local network, bypassing the cloud server.
¶ Connecting to the Printer via Network Mode
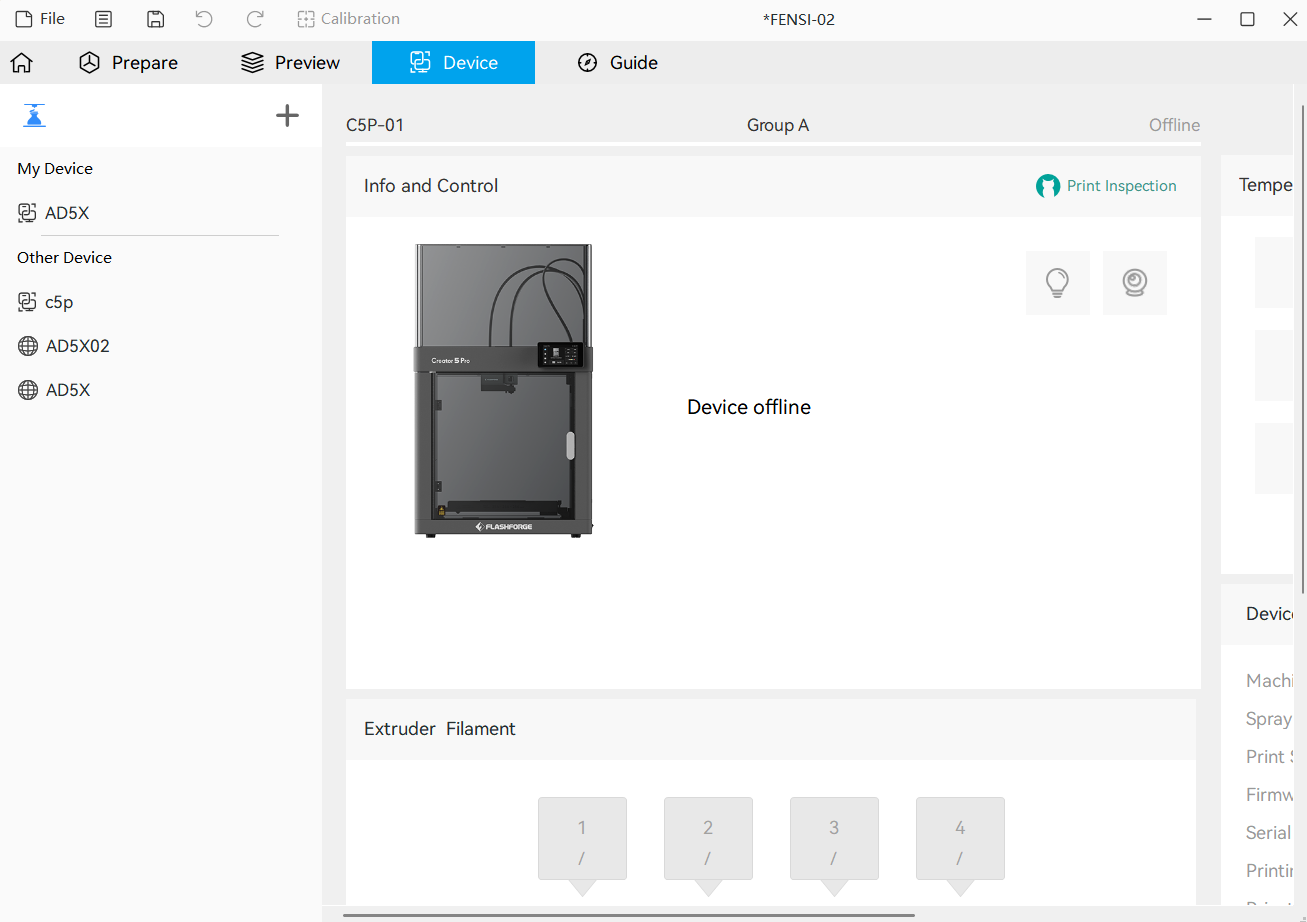
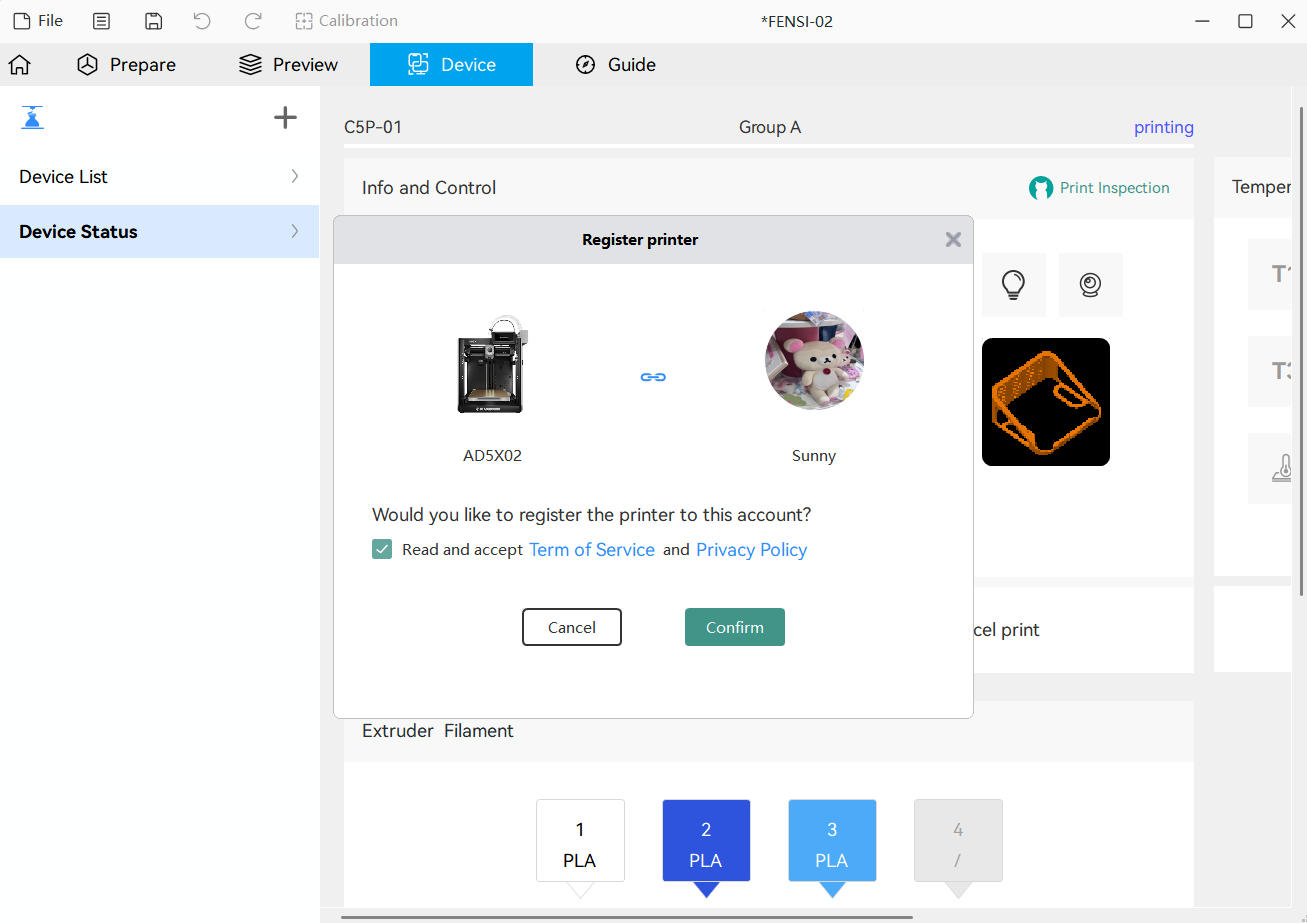
Click the "+" button on the device page to open the search list, and select the device to connect to.
Click "Confirm" to bind the printer.
¶ Connecting via LAN Mode
Make sure the device and computer are connected to the same network.
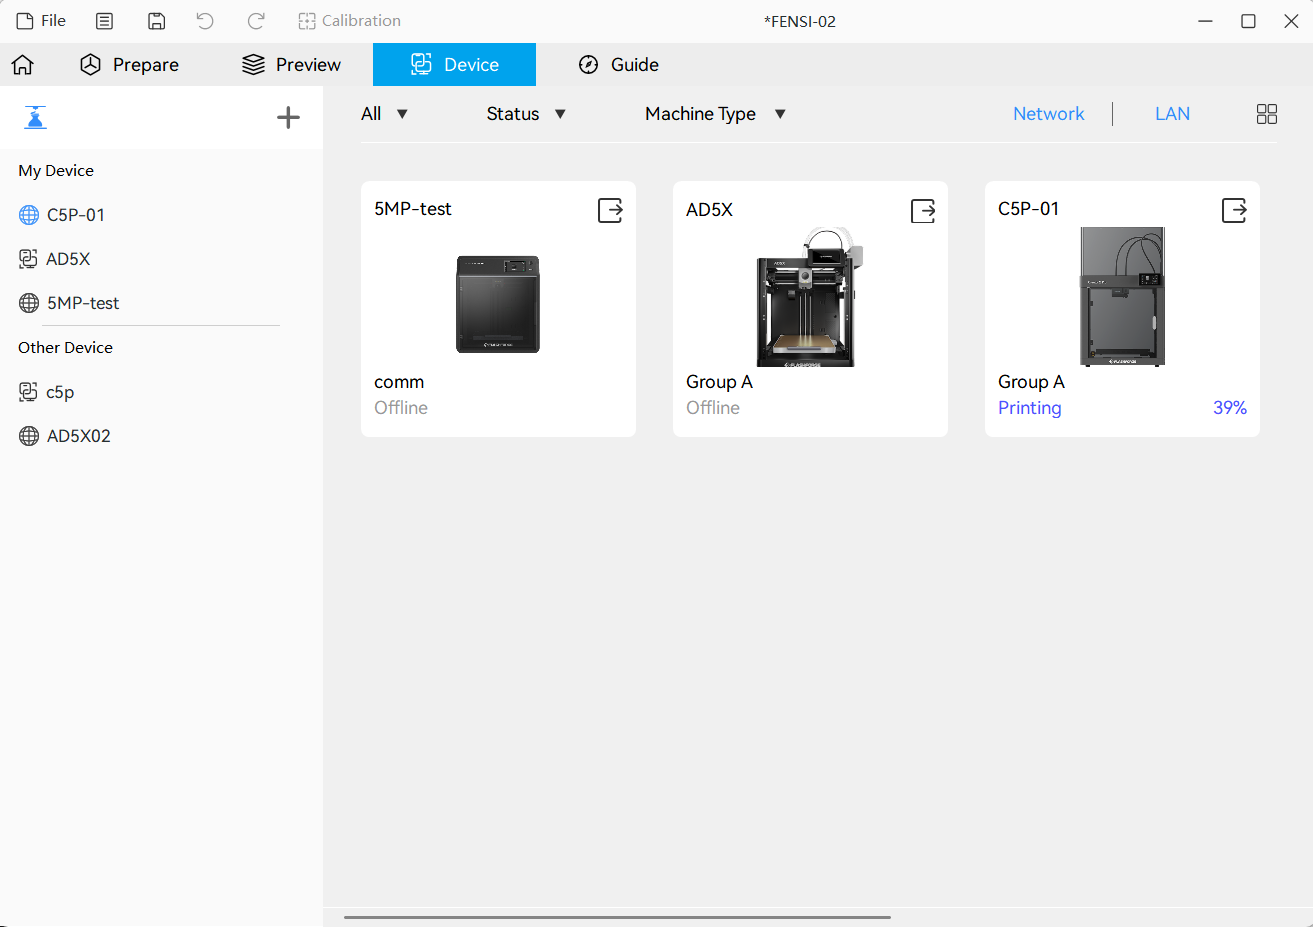
¶ 1. In the slicing software, click the "+" button on the device page to find the corresponding printer.

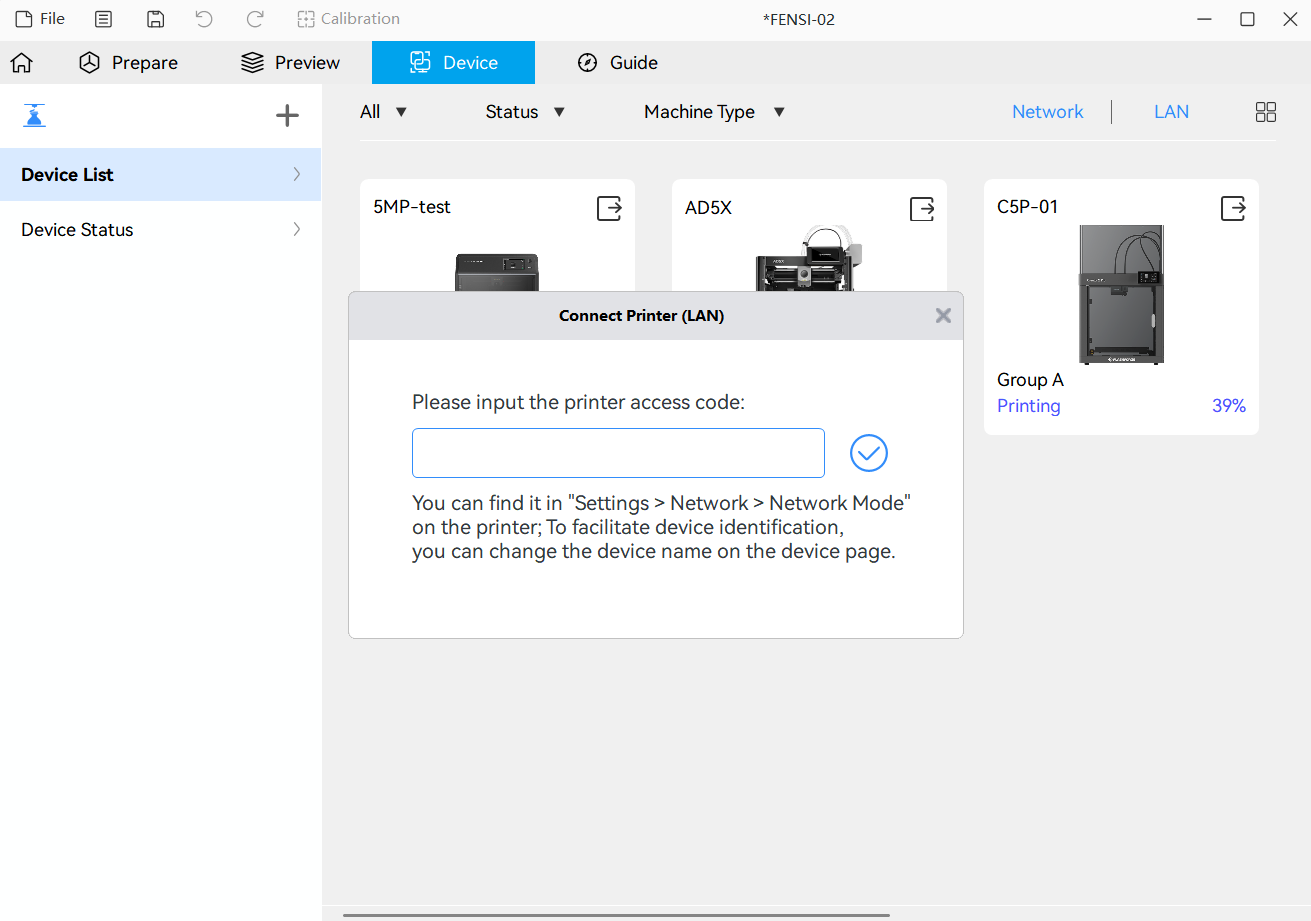
¶ 2. Select the printer and enter the printer verification code displayed on the printer.
¶ Create New Project
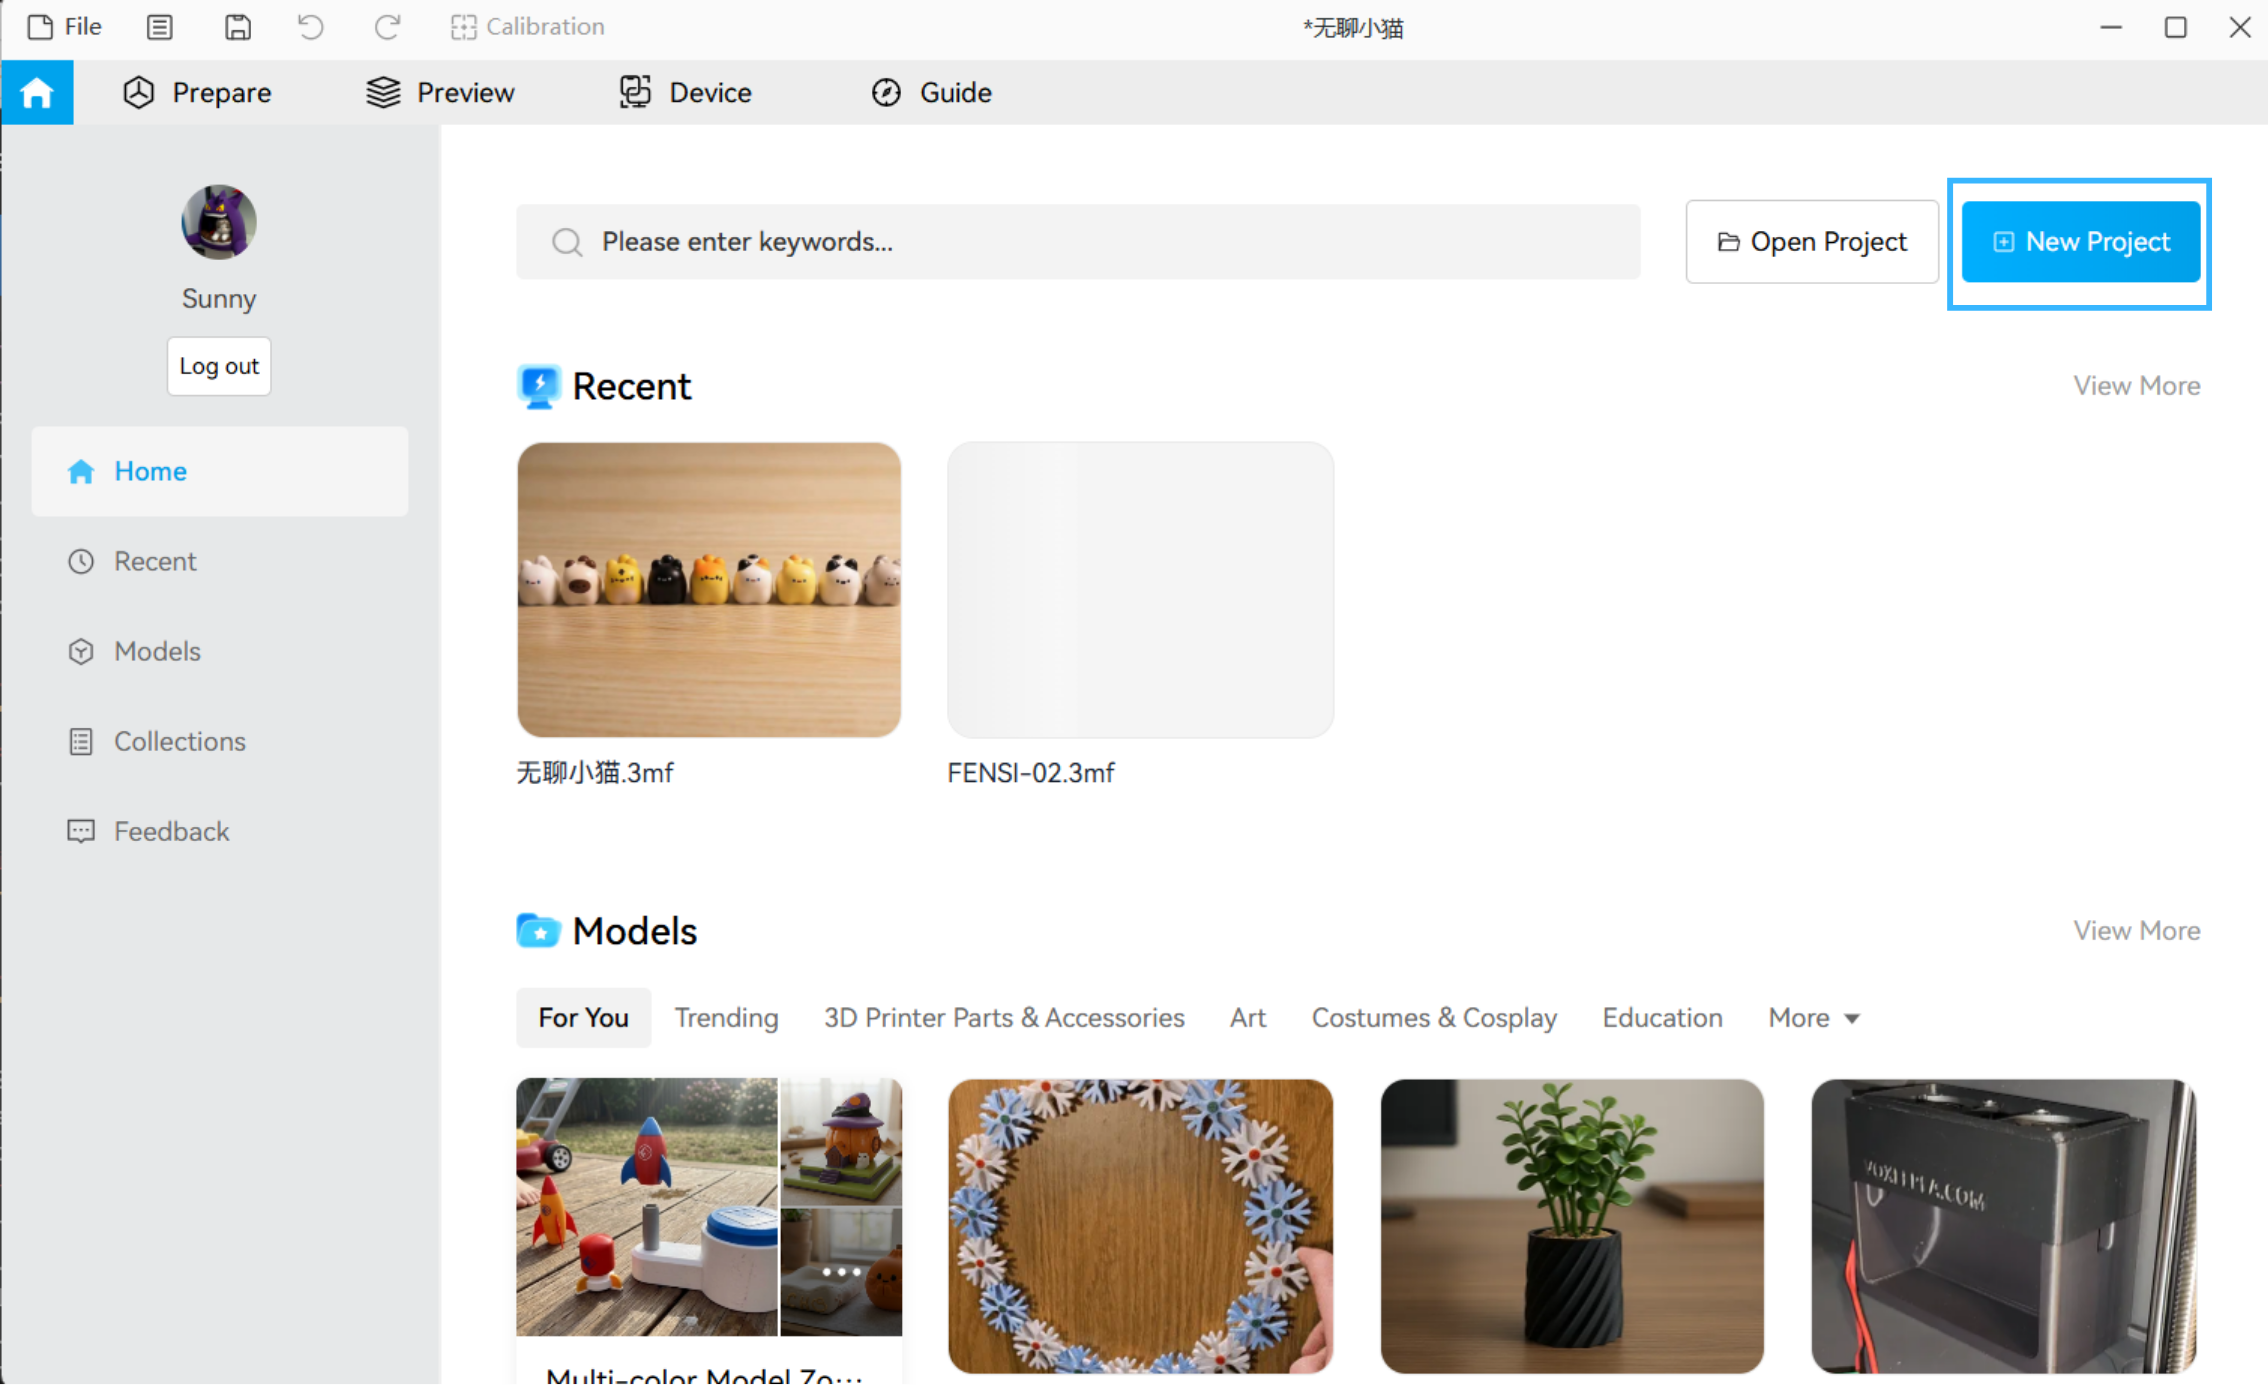
Click New Project on the home page.
¶ Add Model
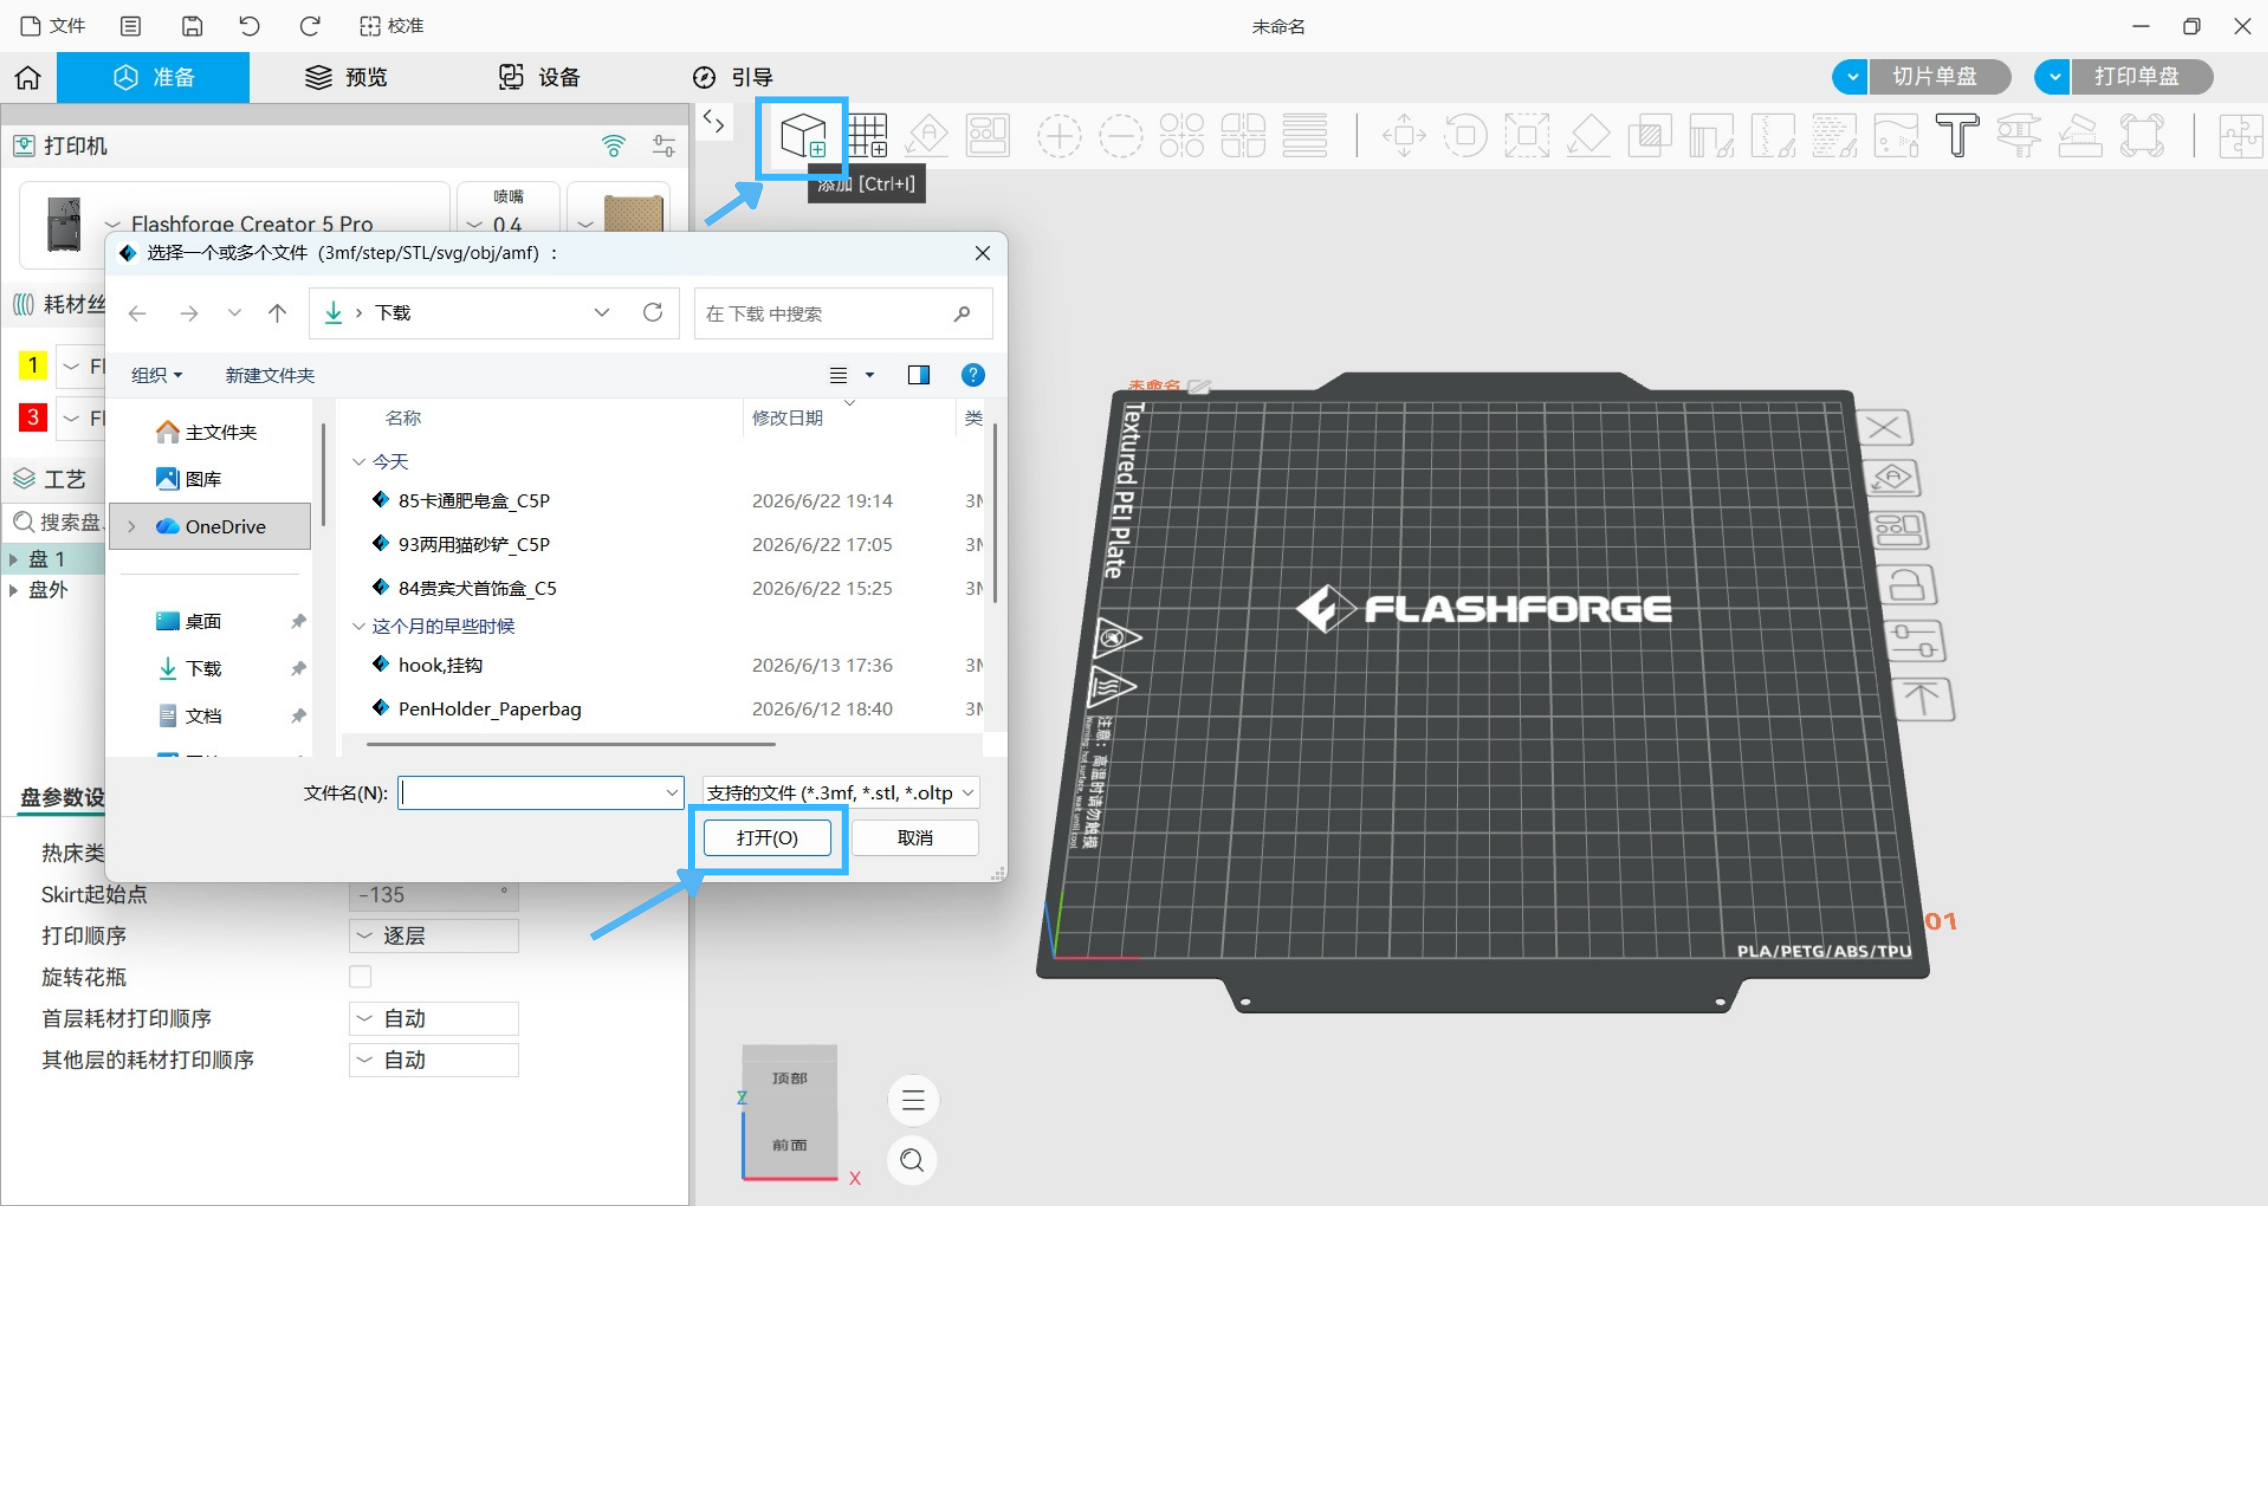
On the top toolbar of the Prepare pane, click the first icon to add and import a model; you can also drag model files from a folder into the 3D preview page to import. Supported file formats include .3mf .stl .stp .step .svg.
¶ Select Printer/Filament/Process Preset
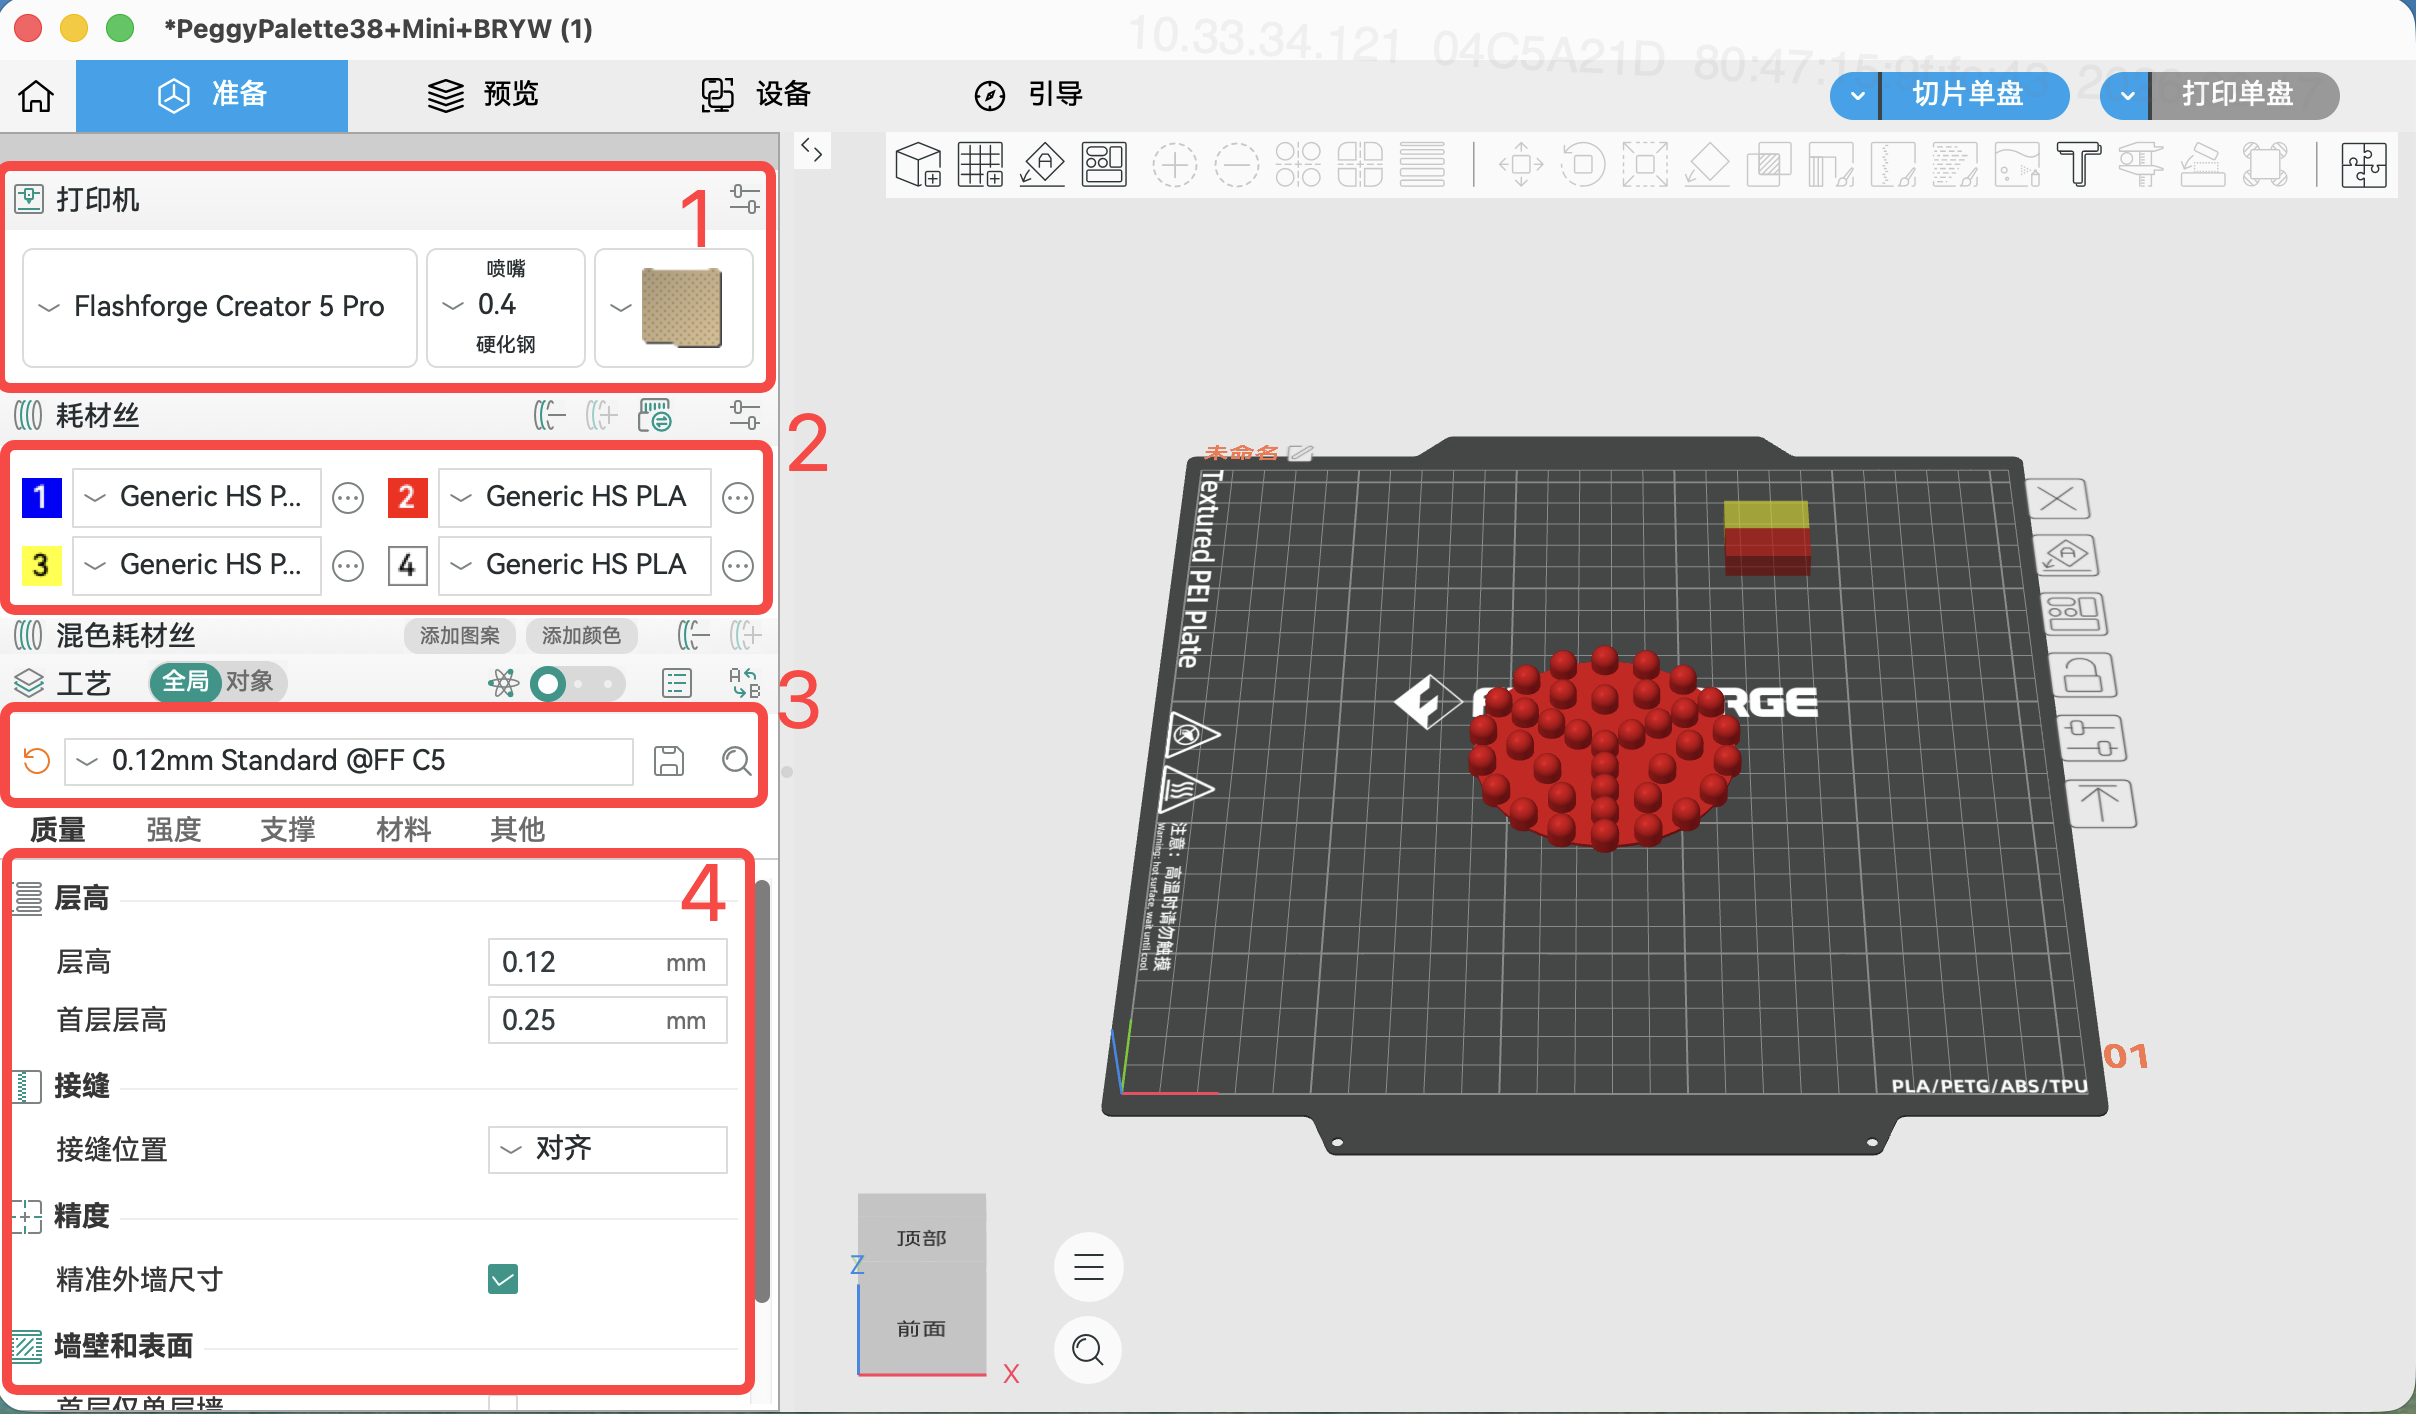
Before slicing the model, you need to select your bound printer and loaded filament, and configure the relevant printing settings for the model.
- Click the Printer selection box and select your bound printer model and nozzle size from the list
- Click the Filament selection box and select the filament type you want to use and have loaded from the list
- Click the Process selection box and select the layer height for the model from the list. The smaller the layer height, the longer the printing time and the better the print result. For most models printed with a 0.4 mm nozzle, the default setting of 0.2 mm layer height is most suitable.
- In the Process box, configure more advanced printing settings for the model, such as adding tree supports.
¶ Model Slicing
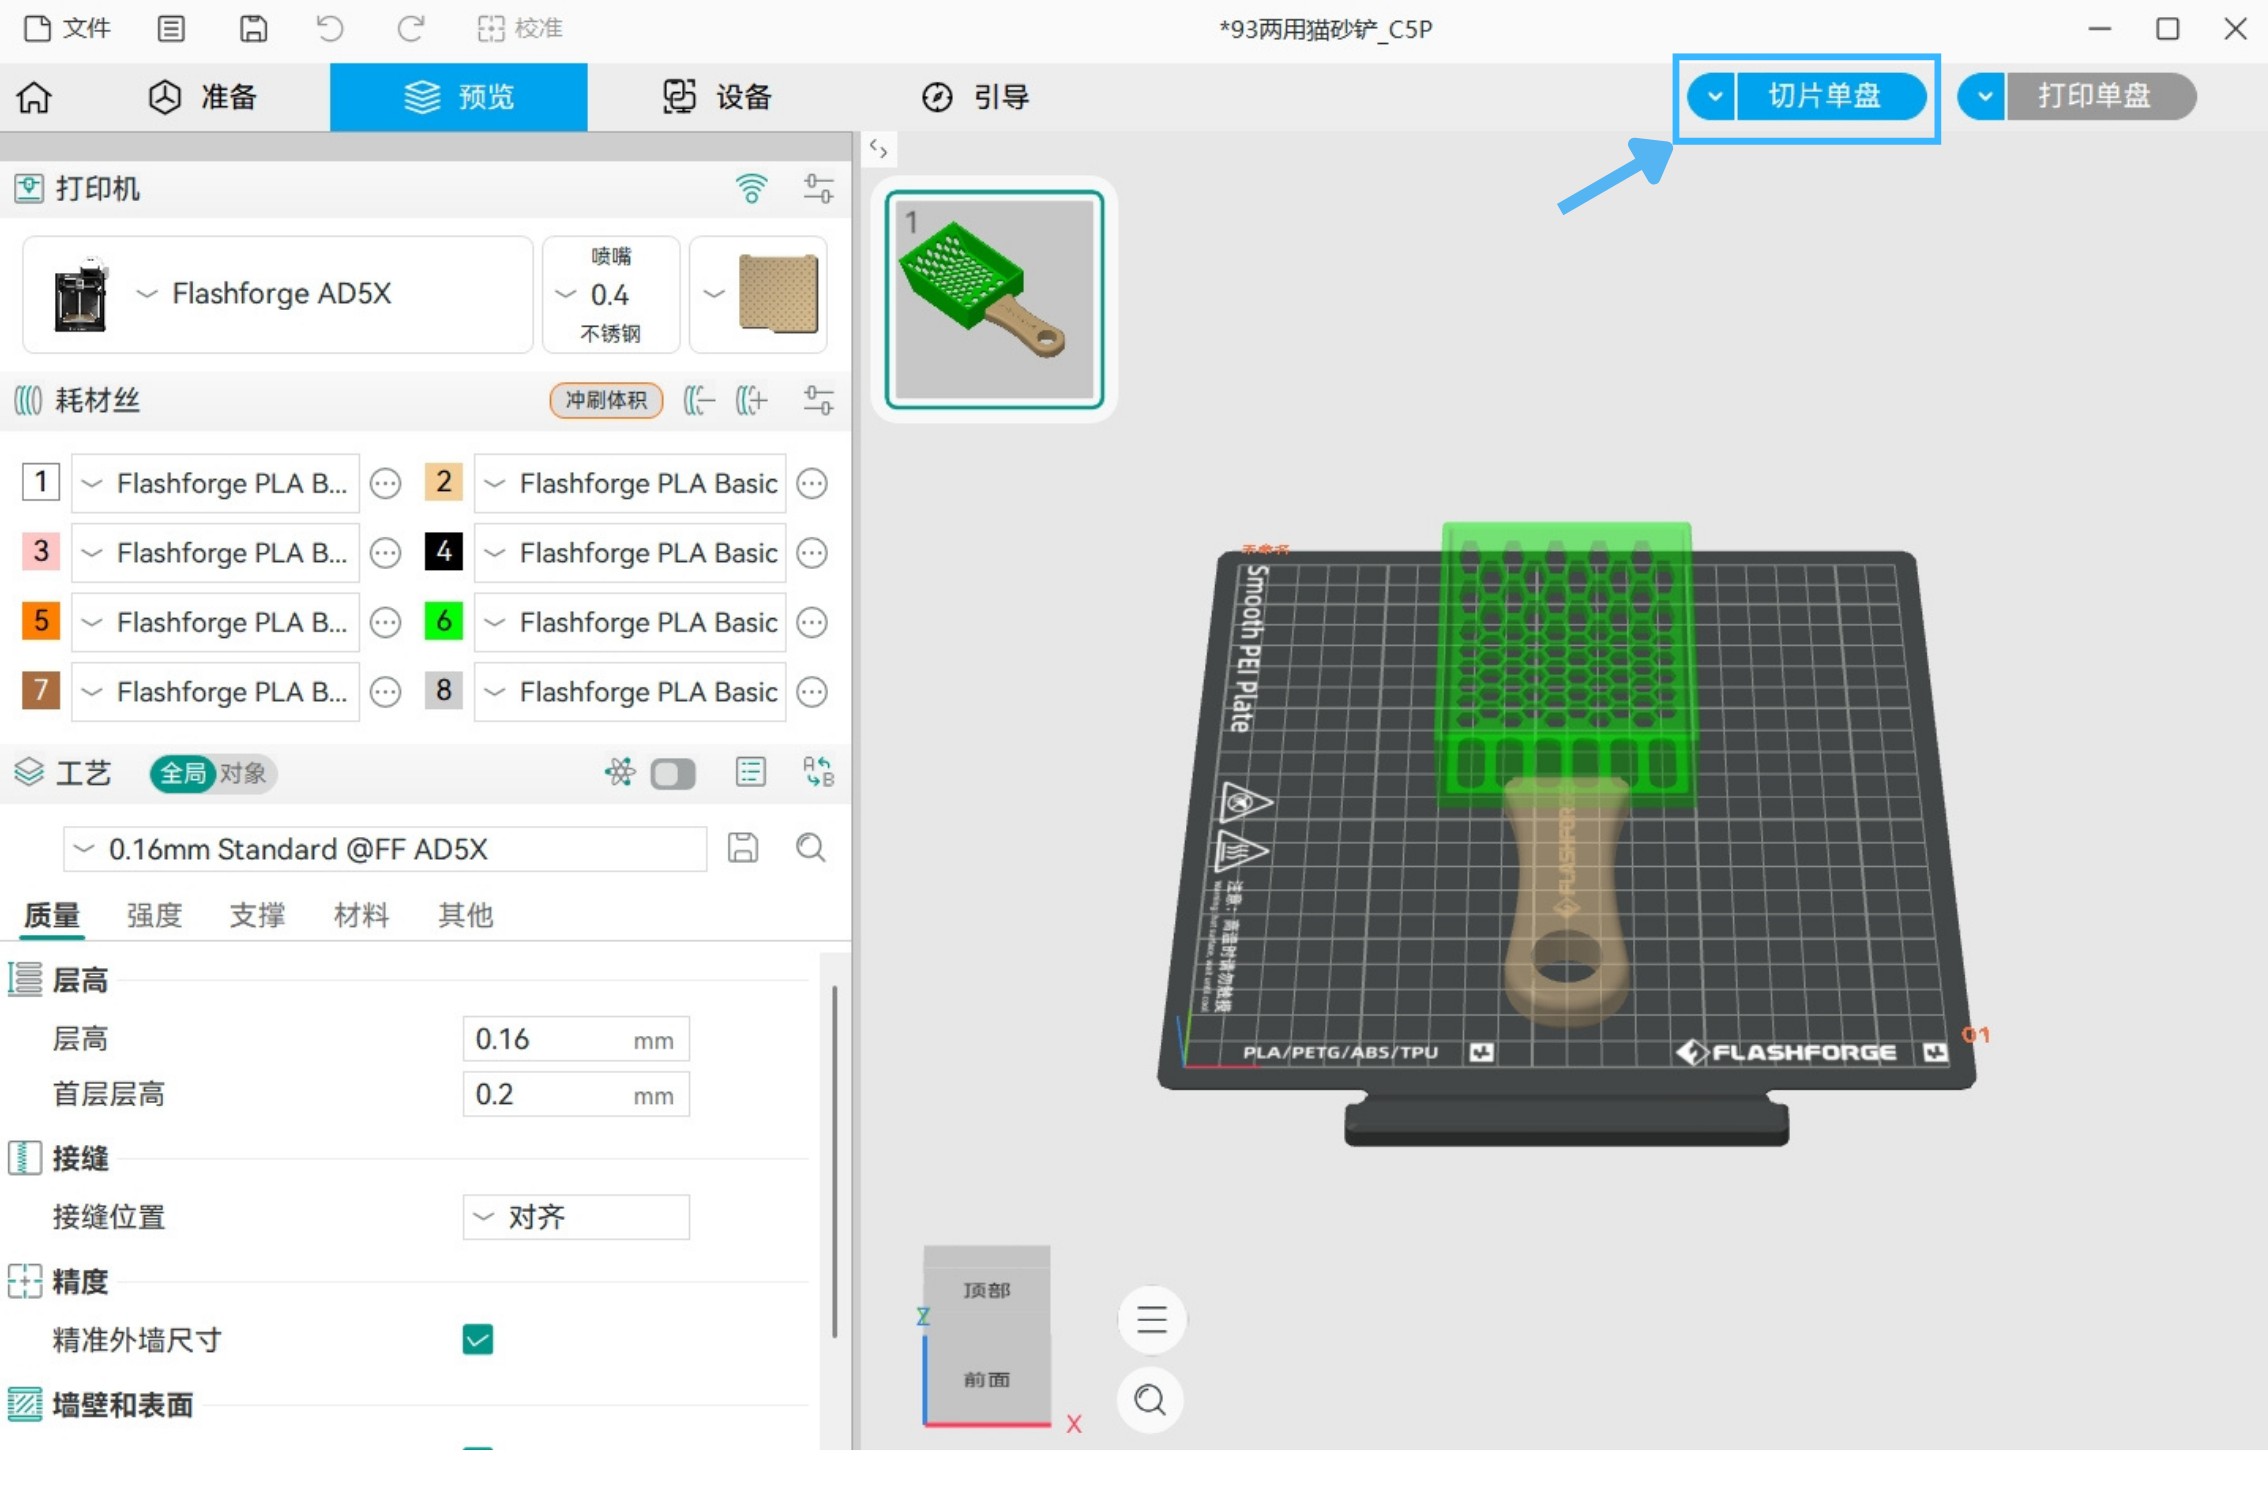
- After completing the print configuration, click the slice platter button on the Preview page.
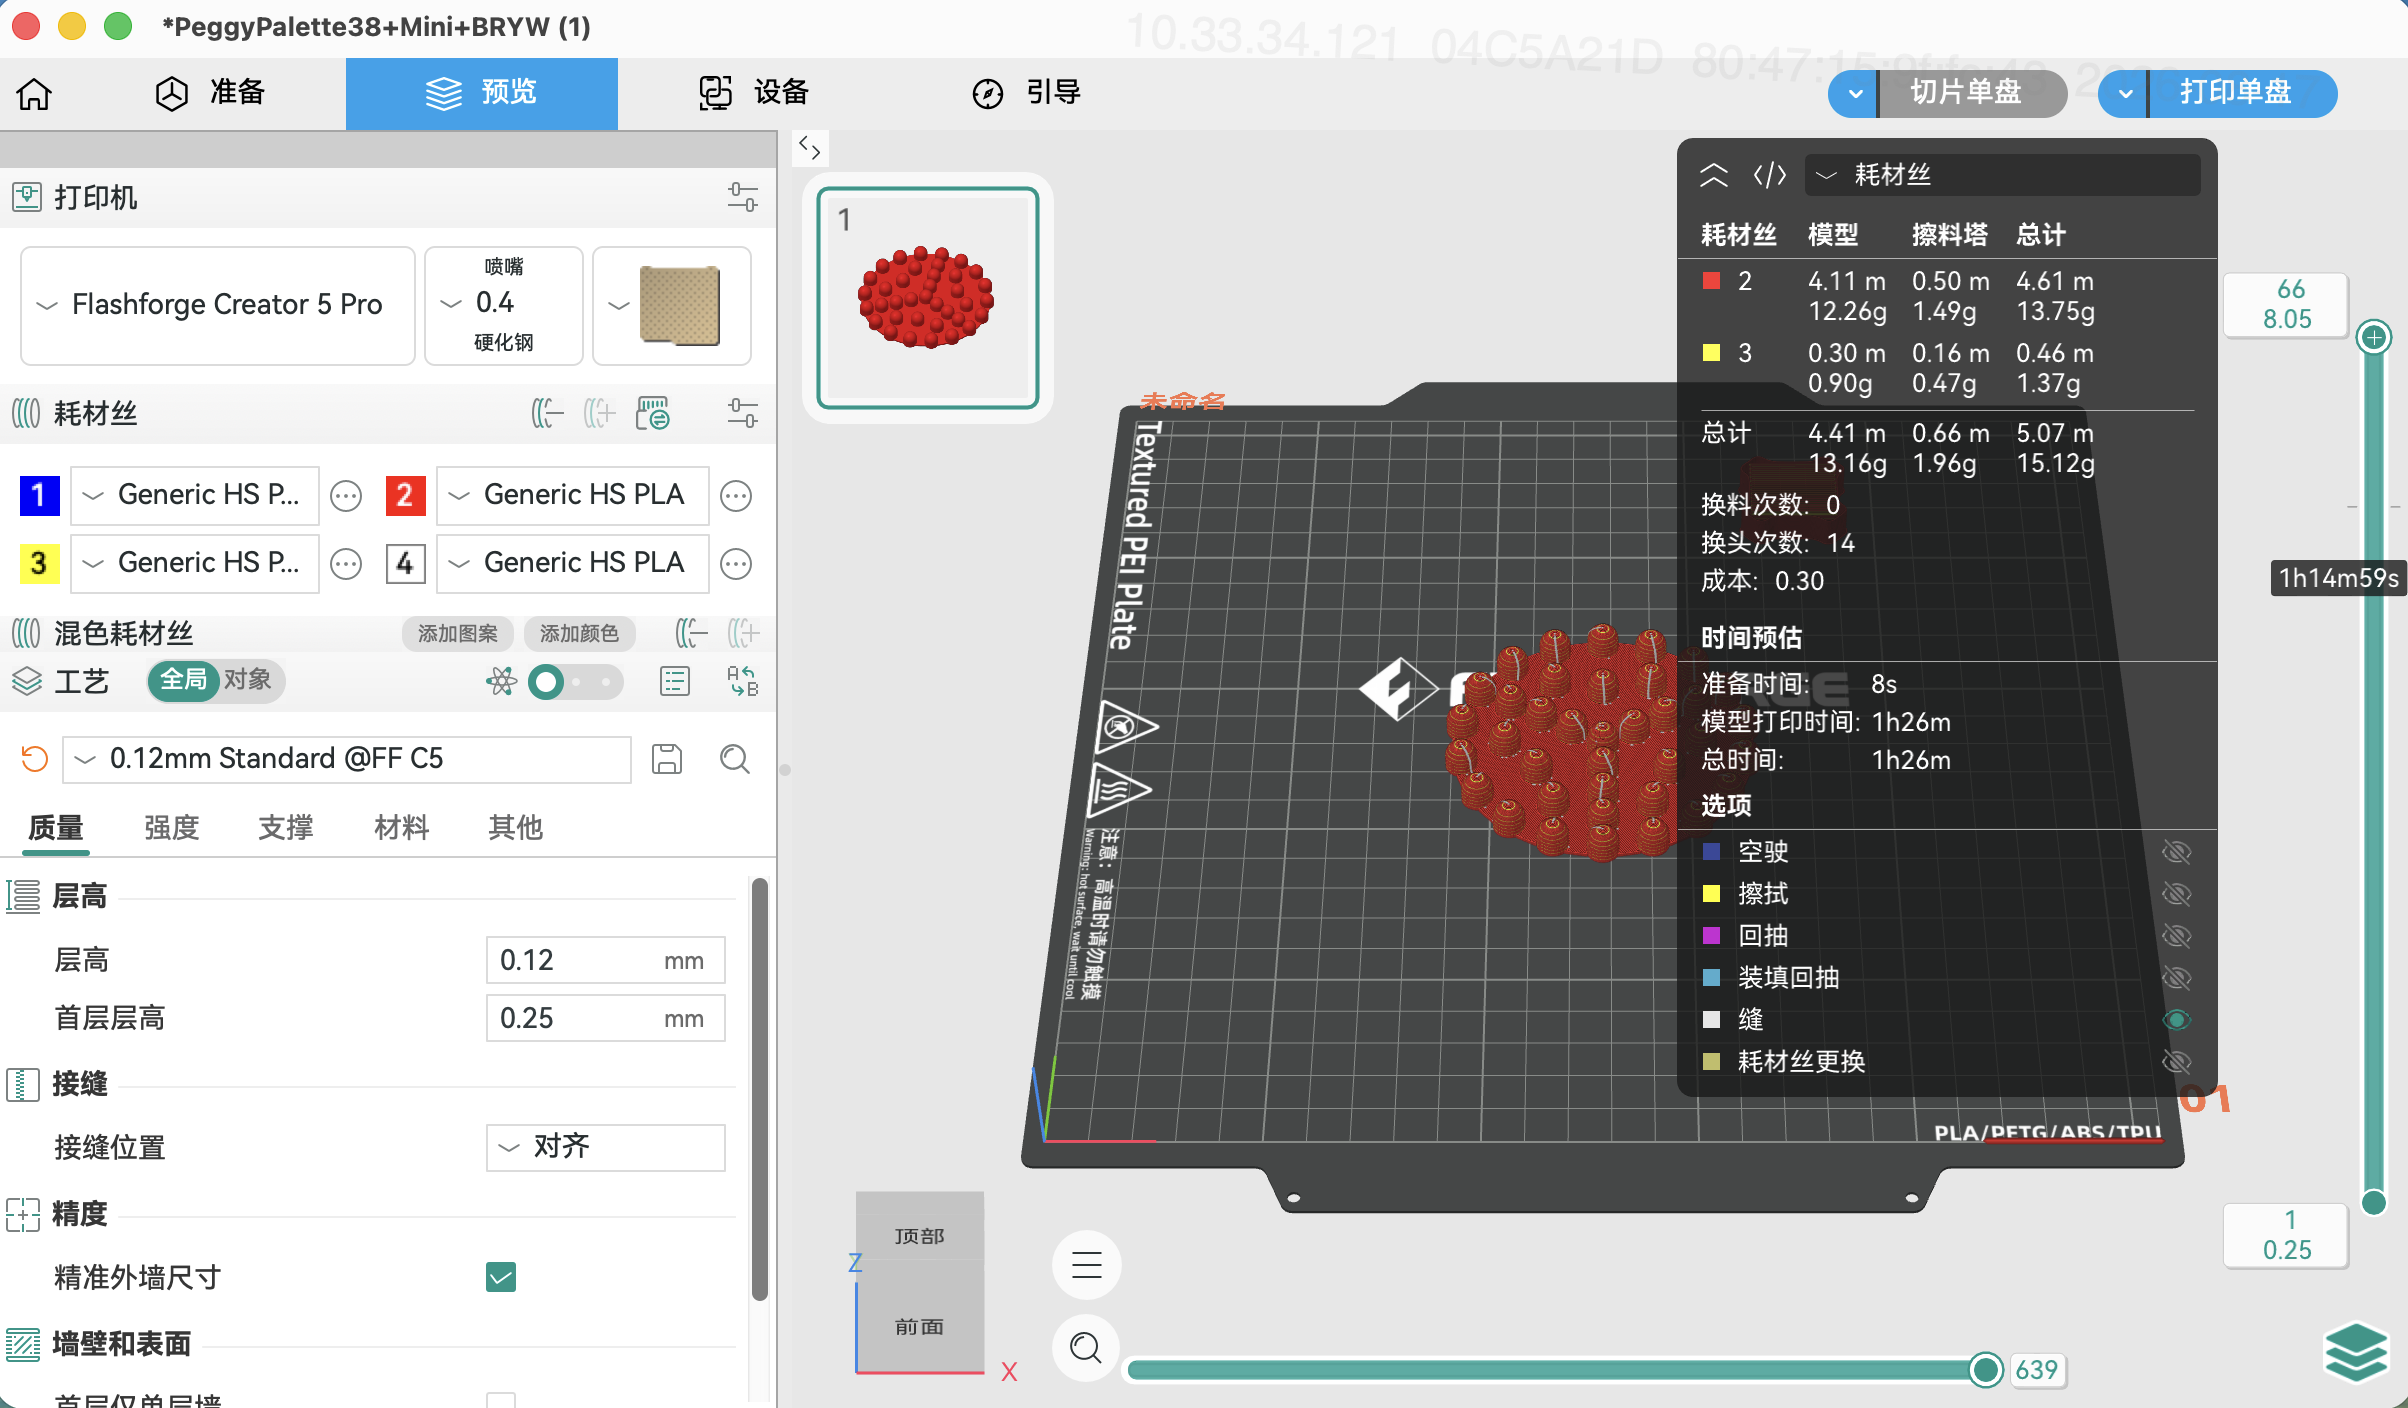
- After slicing is complete, the screen will display the sliced appearance of the model file, and the histogram on the right will also display information such as the model's color scheme, filament usage, and printing time.
¶ Printing
There are two methods for printing files: 1. Remote file sending for printing 2. Printing via USB drive
¶ Remote Printing
-
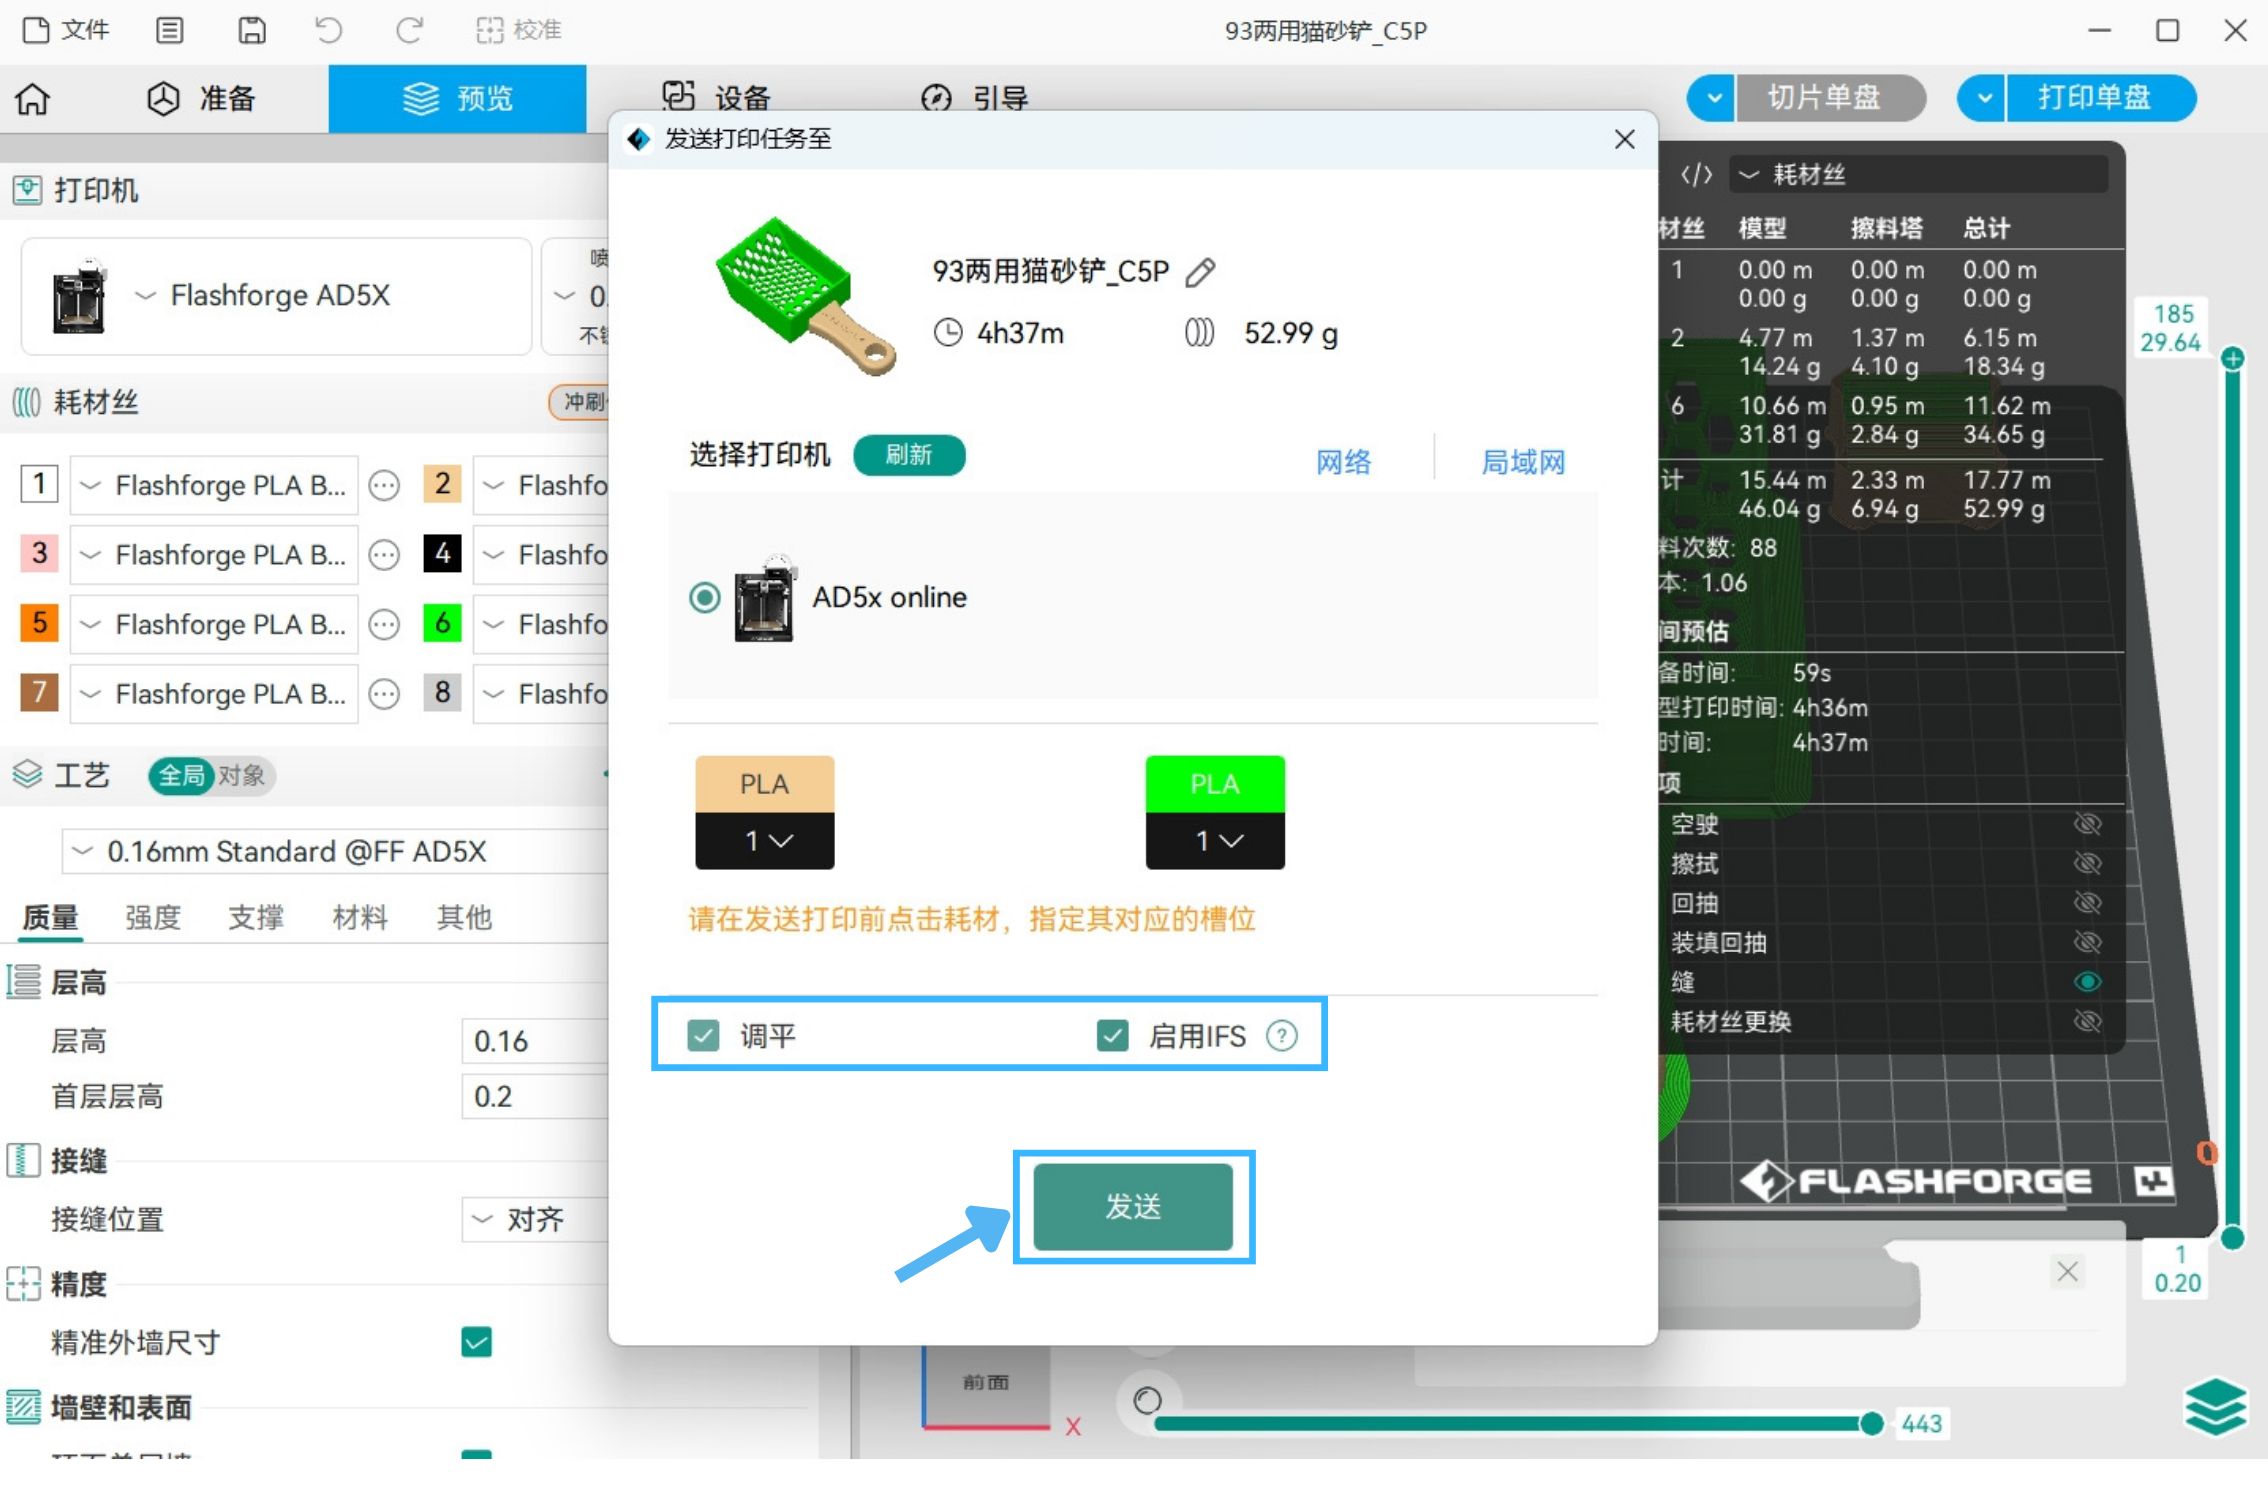
After slicing the model, click the "Slice and Print" option and select a printer to send to.
-
Click [Send] to send the model to the printer. You can choose "Leveling" and enable IFS.
-
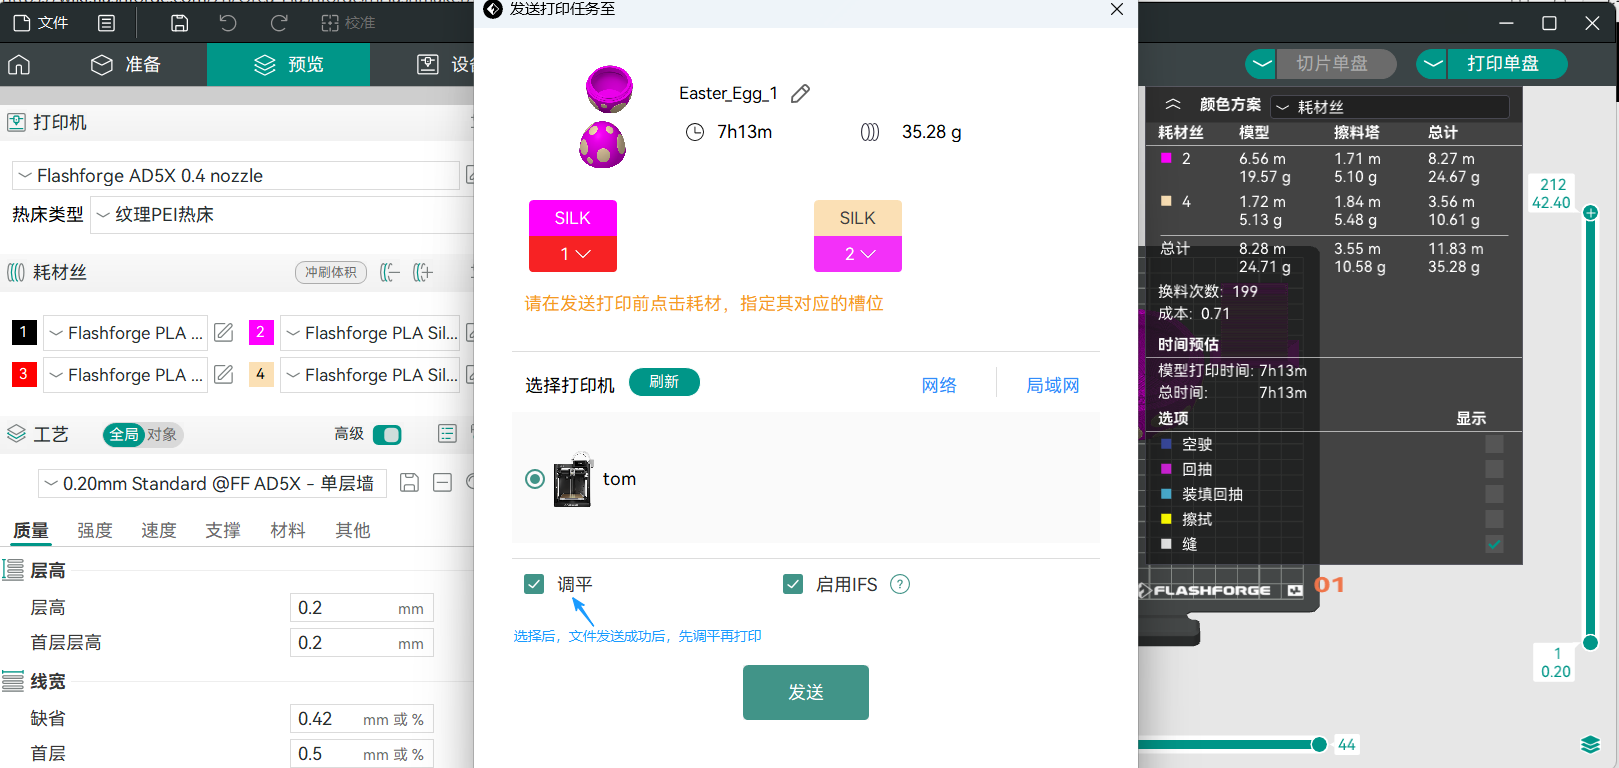
The printer receives the file data; after the file transfer is complete, printing begins immediately.
¶ Export Sliced Files
- After slicing is complete, one-click printing, file-only sending, and exporting in .3mf or G-code format are supported to meet different printing and file management needs.
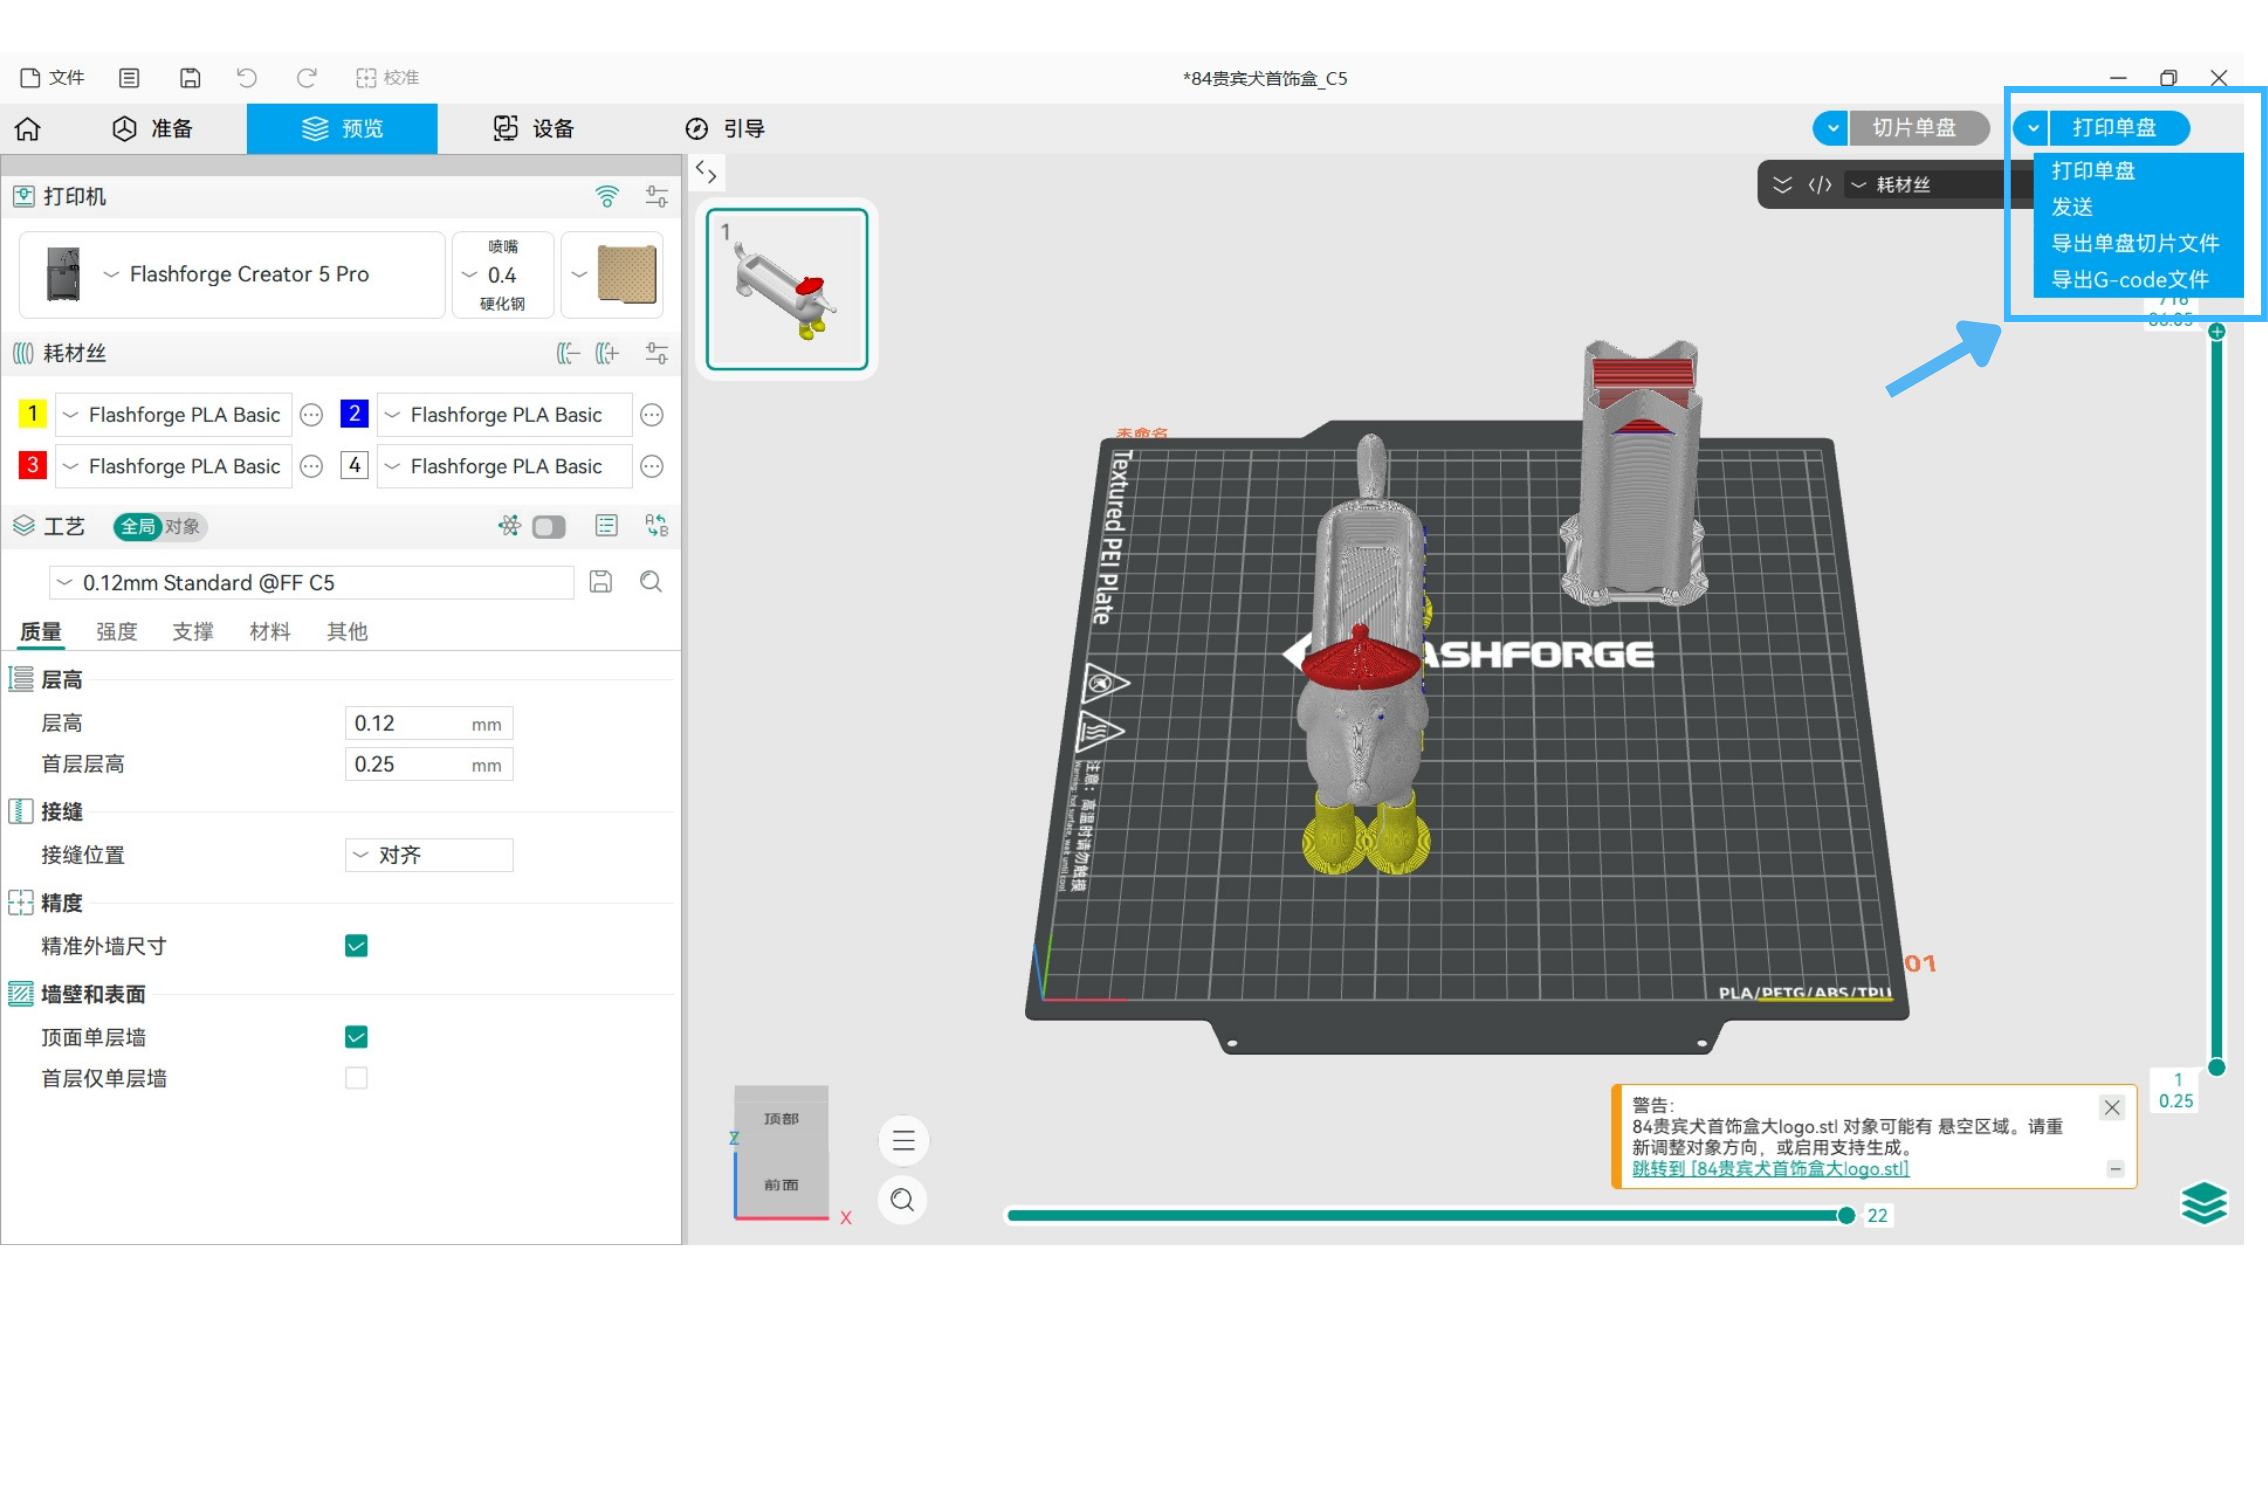
①Slice and Print: Send the print file to the printer and execute the print command.
②Send: Only send the print file and save it to the print memory list without executing the print.
③Export Platter Sliced File: Export the sliced file in ".3mf" format to the local disk.
④Export G-code File: Export the sliced file in ".gcode" format to the local disk.
¶ USB Printing
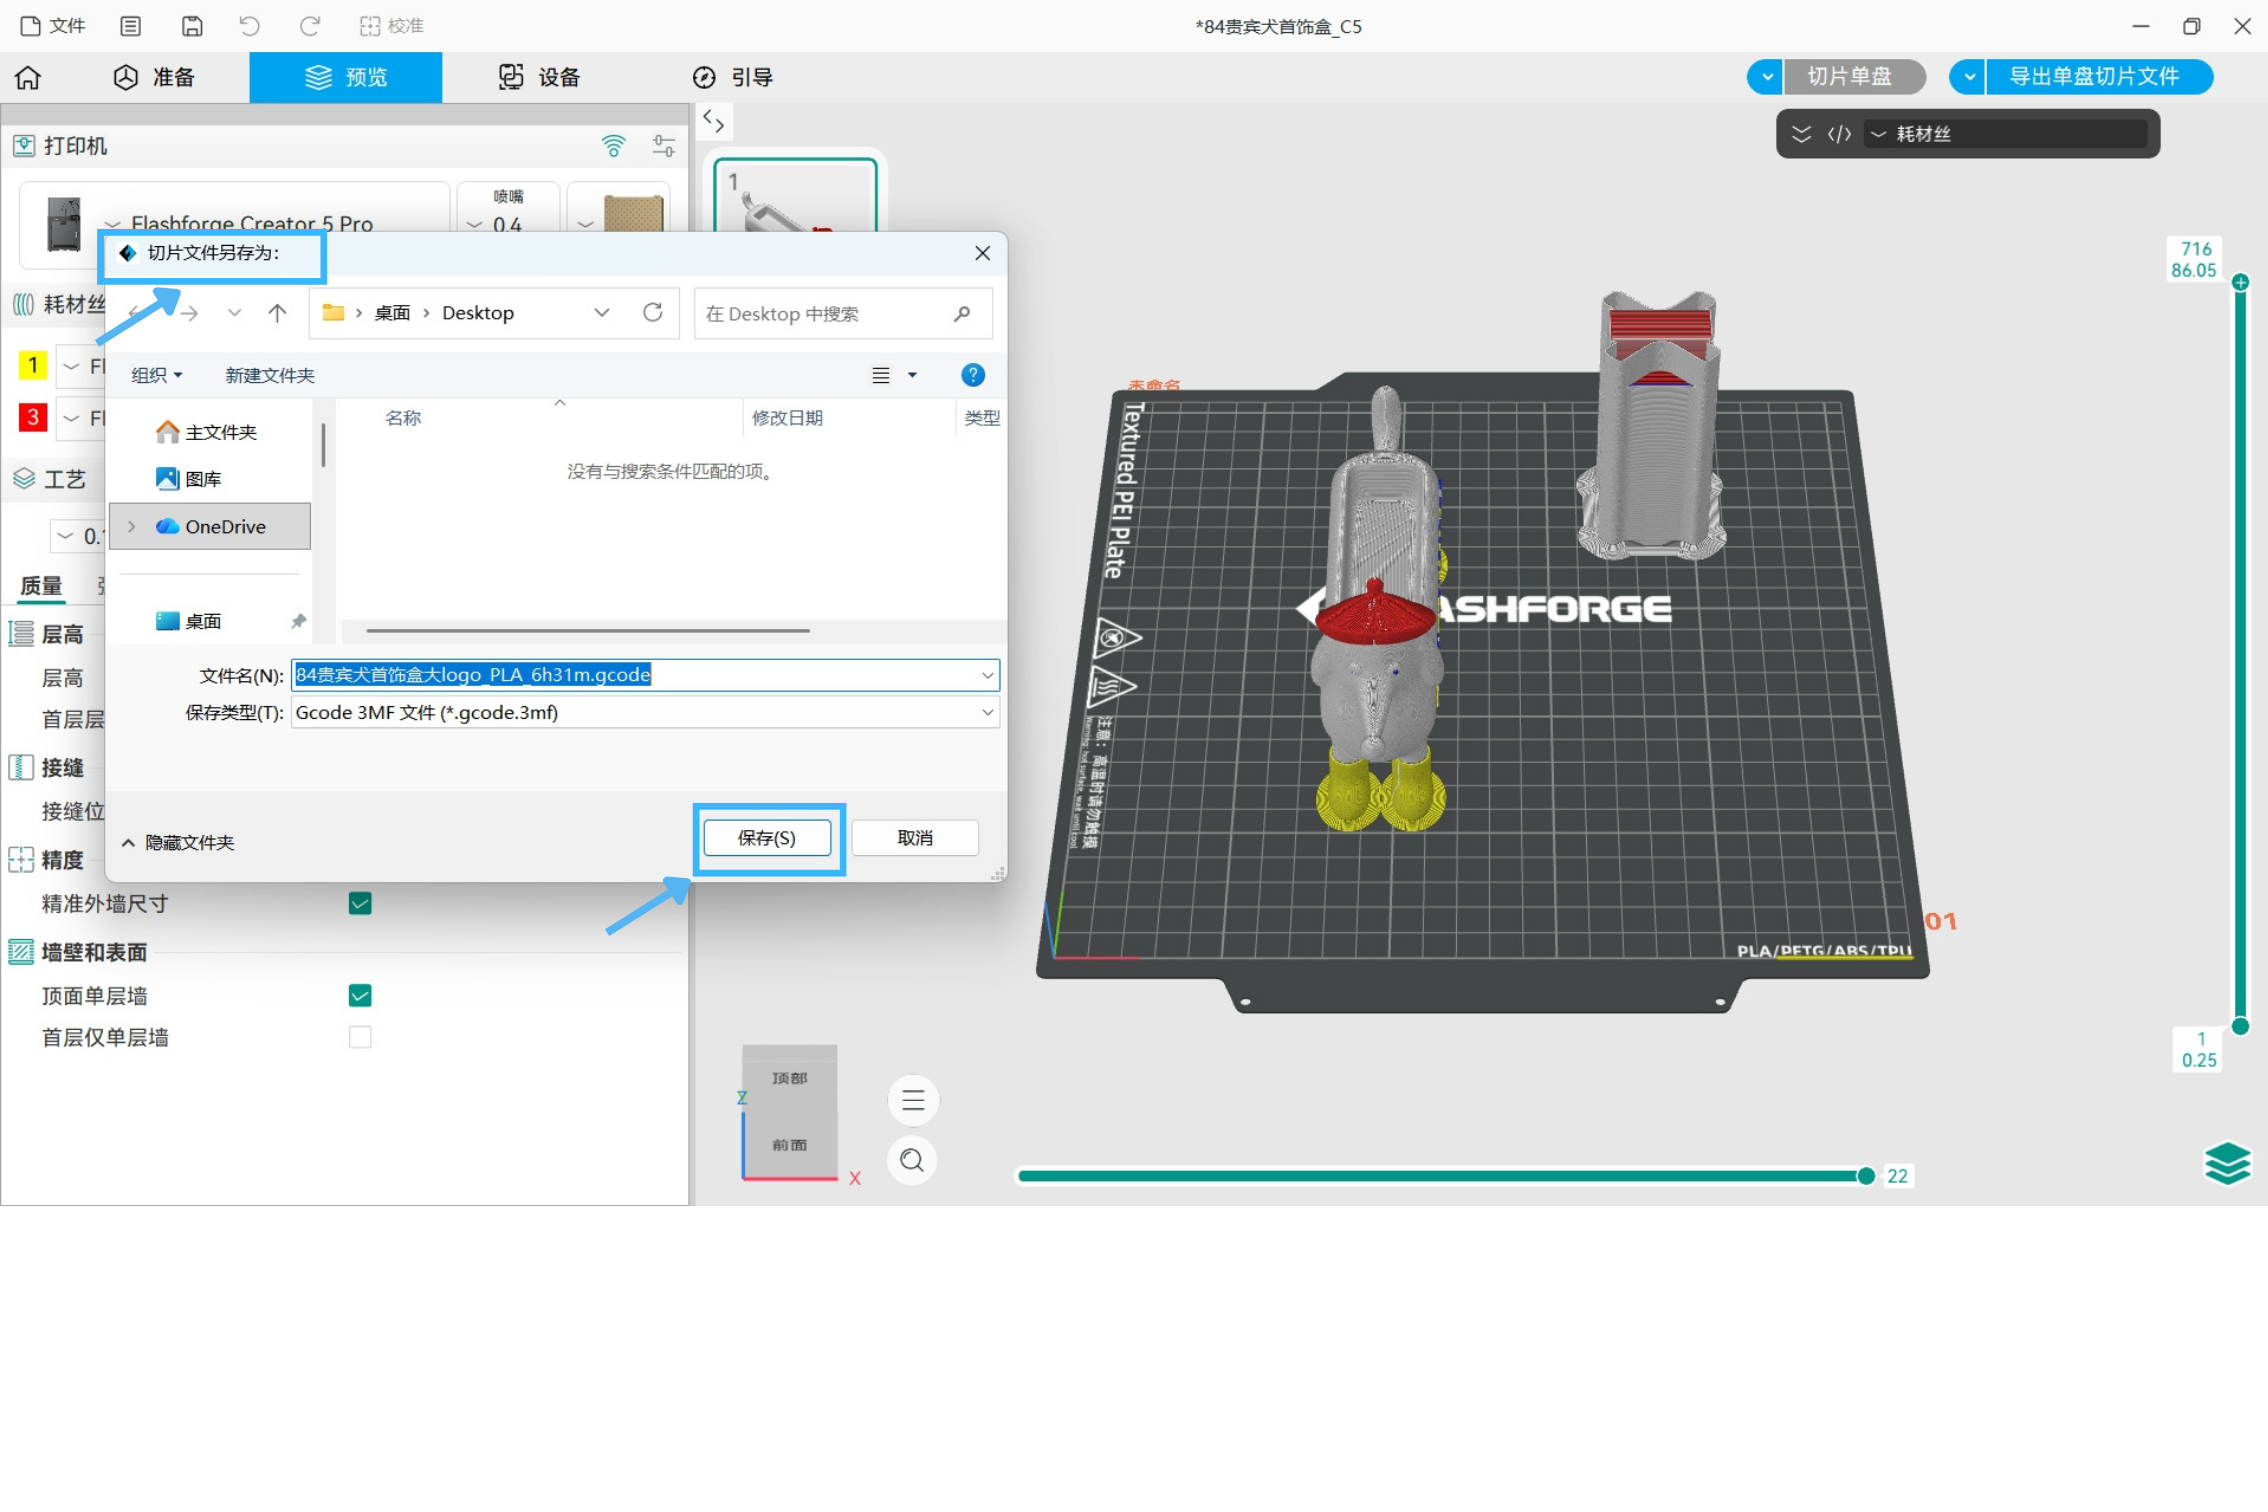
Click the dropdown arrow next to the print icon in the top right corner, then select [Export Platter Sliced File]. Clicking this option will open a file explorer window. Select the USB drive and click [Save], and the file will be transferred to the USB drive.
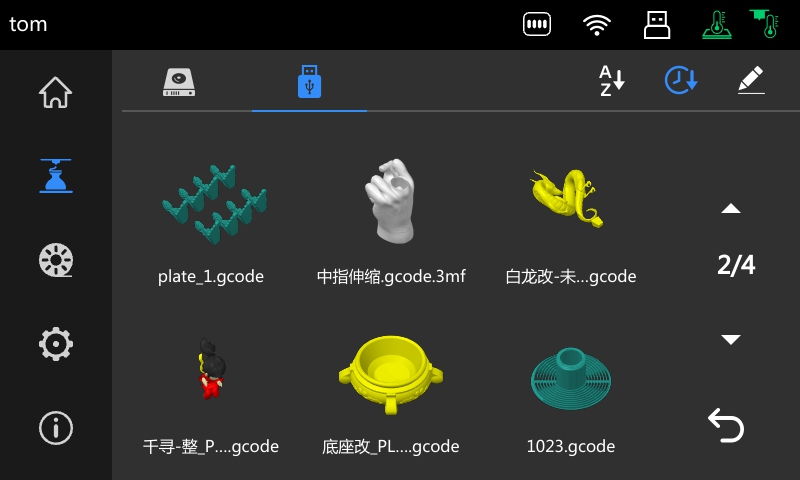
After saving is complete, insert the USB drive into the printer's USB port. In the memory interface, select the USB icon and choose the corresponding model file to print.
¶ Conclusion
We hope this guide has provided you with useful information to help resolve your issues.
If you have any concerns or questions about the processes described in this guide, you can seek help from the support team, or contact us through the "Feedback" entry in the software.