¶ Object List
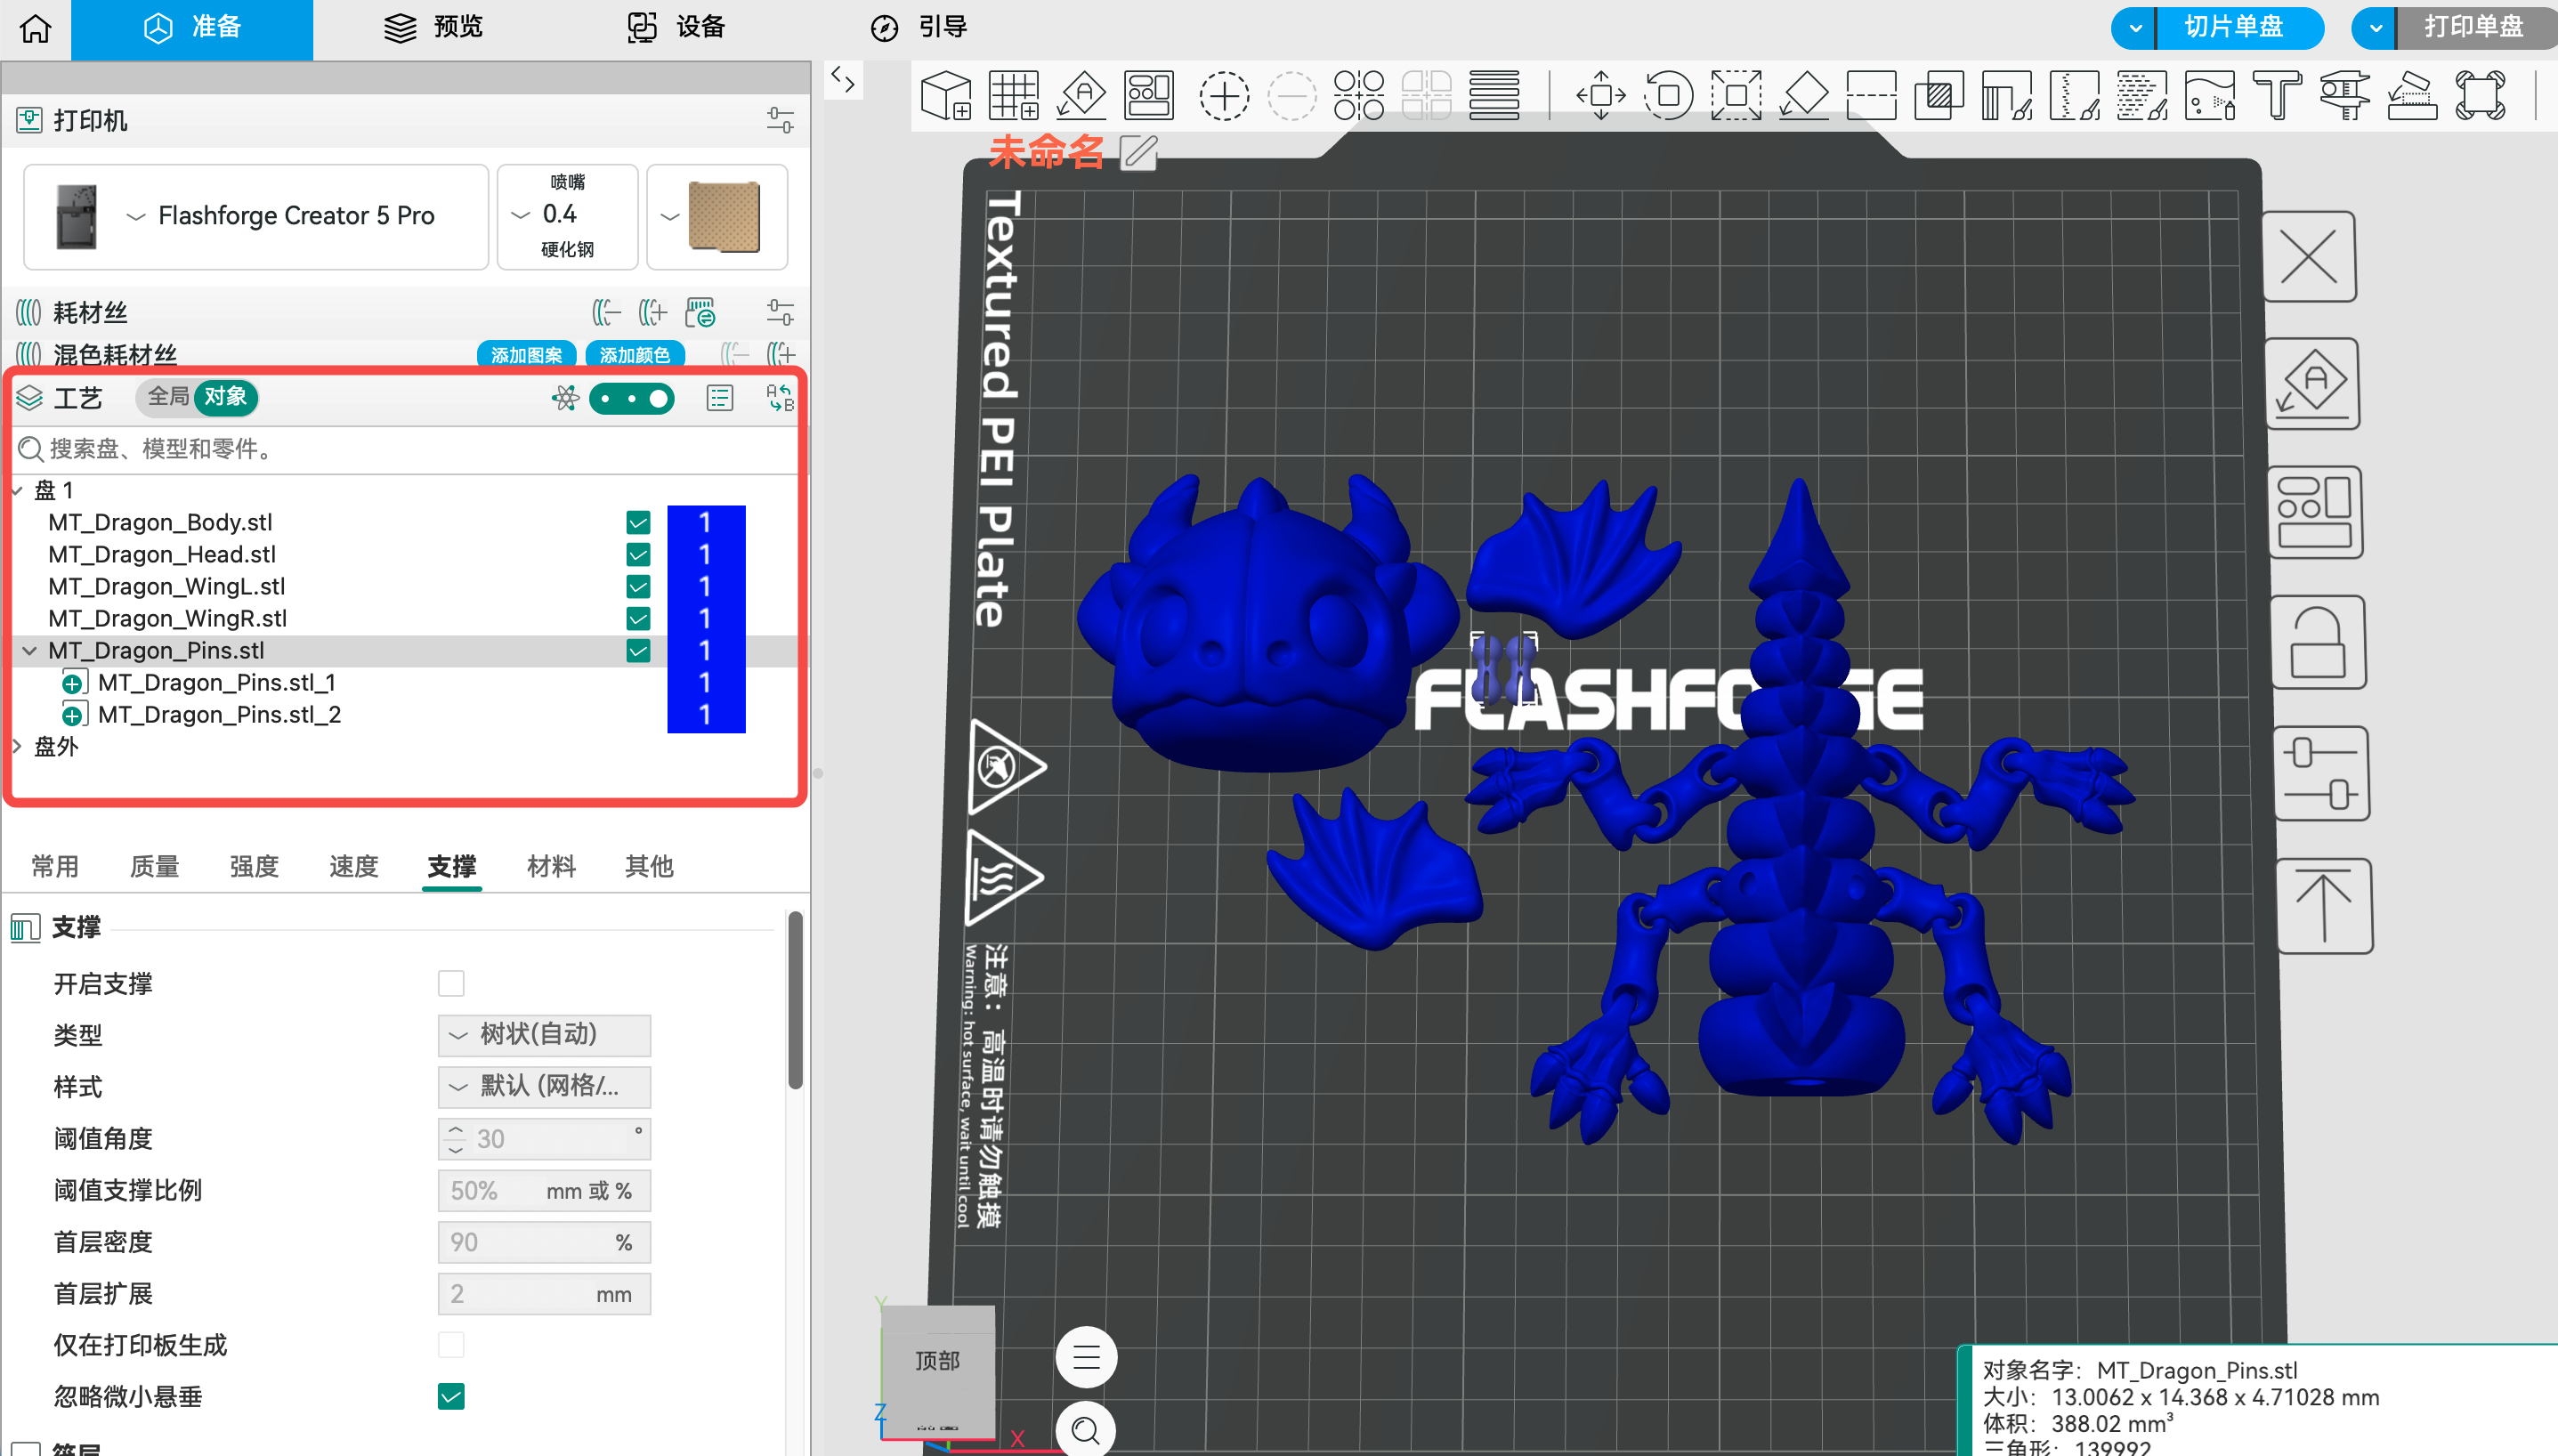
The Object List is located in the "Process" tab of the left panel in Flash Studio Desktop. It is used to manage all print objects in the current project. It displays the relationships between build plates, models, and parts in a hierarchical structure, making it convenient for users to independently set up and manage each object.
¶ Hierarchical Structure
The Object List is divided into three levels from top to bottom:
¶ Build Plate (Plate)
The build plate is the container of the object list, representing the actual build platform on the printer. A project can contain multiple build plates (Plate 1, Plate 2, etc.), and each plate can hold multiple models. The plate level is used to uniformly manage shared settings for all objects on the plate.
¶ Model (Object)
A model is an STL or 3MF file imported onto the build plate. Each model appears as an independent entry in the list, such as MT_Dragon_Body.stl or MT_Dragon_Head.stl. The model level allows users to rename, search, and set parameters for the entire model. These settings override global parameters and apply to all parts of that model.
¶ Part
A combined model can be split into multiple parts. In the object list, click the arrow to the left of a model to expand and view its contained parts. For example, expanding MT_Dragon_Pins.stl reveals two parts: MT_Dragon_Pins.stl_1 and MT_Dragon_Pins.stl_2. The part level allows users to set parameters (such as filament color and print parameters) individually for each part of a model. Part-level settings override model-level and global-level parameters with the same name.
¶ Off-Plate
The "Off-Plate" area displays models that have been imported but not yet placed on any build plate. These models will not participate in slicing and printing and can be dragged onto a build plate at any time.
¶ Basic Operations
¶ Importing Models
You can add models to the current build plate by clicking the import button in the top toolbar or dragging model files into the 3D view. Imported models automatically appear in the object list.
¶ Splitting into Parts
After selecting a model, right-click and choose "Split into Parts." The system will automatically split it into multiple independent parts based on the model's geometry. The split parts can be expanded and viewed in the object list, allowing you to assign different filaments and parameters to each.
¶ Switching Object/Global Mode
The "Global" and "Object" buttons above the object list are used to switch the scope of parameter settings. When "Global" is selected, parameter modifications apply to all objects in the project. When "Object" is selected, you must first select a specific model or part, and parameter modifications will only apply to that selected item.
¶ Search
A search box is provided at the top of the object list, allowing you to quickly find plates, models, and parts by name, which is convenient for locating targets when there are many objects.
¶ Show/Hide
Each model and part has a checkbox on the right. Unchecking it hides the object, and hidden objects will not participate in slicing.
¶ Multi-Filament Assignment
In multi-color mixing filament mode, you can assign different filament numbers (e.g., #1, #2) to different parts in the object list to achieve multi-color printing. The number on the right side of each part in the object list represents its assigned filament number.