¶ Color Mixing Printing Principle
Conventional multi-color printing works by having the printer switch between different color filaments during the printing process based on the model's color requirements. The number of colors that can be printed depends on the color and quantity of filaments loaded in the printer.
In contrast, Flash Studio's color mixing feature enables the printer to generate a wider range of color effects by adjusting the mixing ratios of different colored filaments. For example: combining red and yellow produces an orange effect, and multiple color combinations can achieve richer color variations.
After completing the color mixing ratio settings, the slicing software generates G-code based on the user's color mixing plan. The printer then controls the feed ratio of different colored filaments according to the instructions, achieving color variation during each layer of printing.
As shown in the image below, this model was printed using color mixing with only four colors of PLA filament, yet it presents rich color effects.
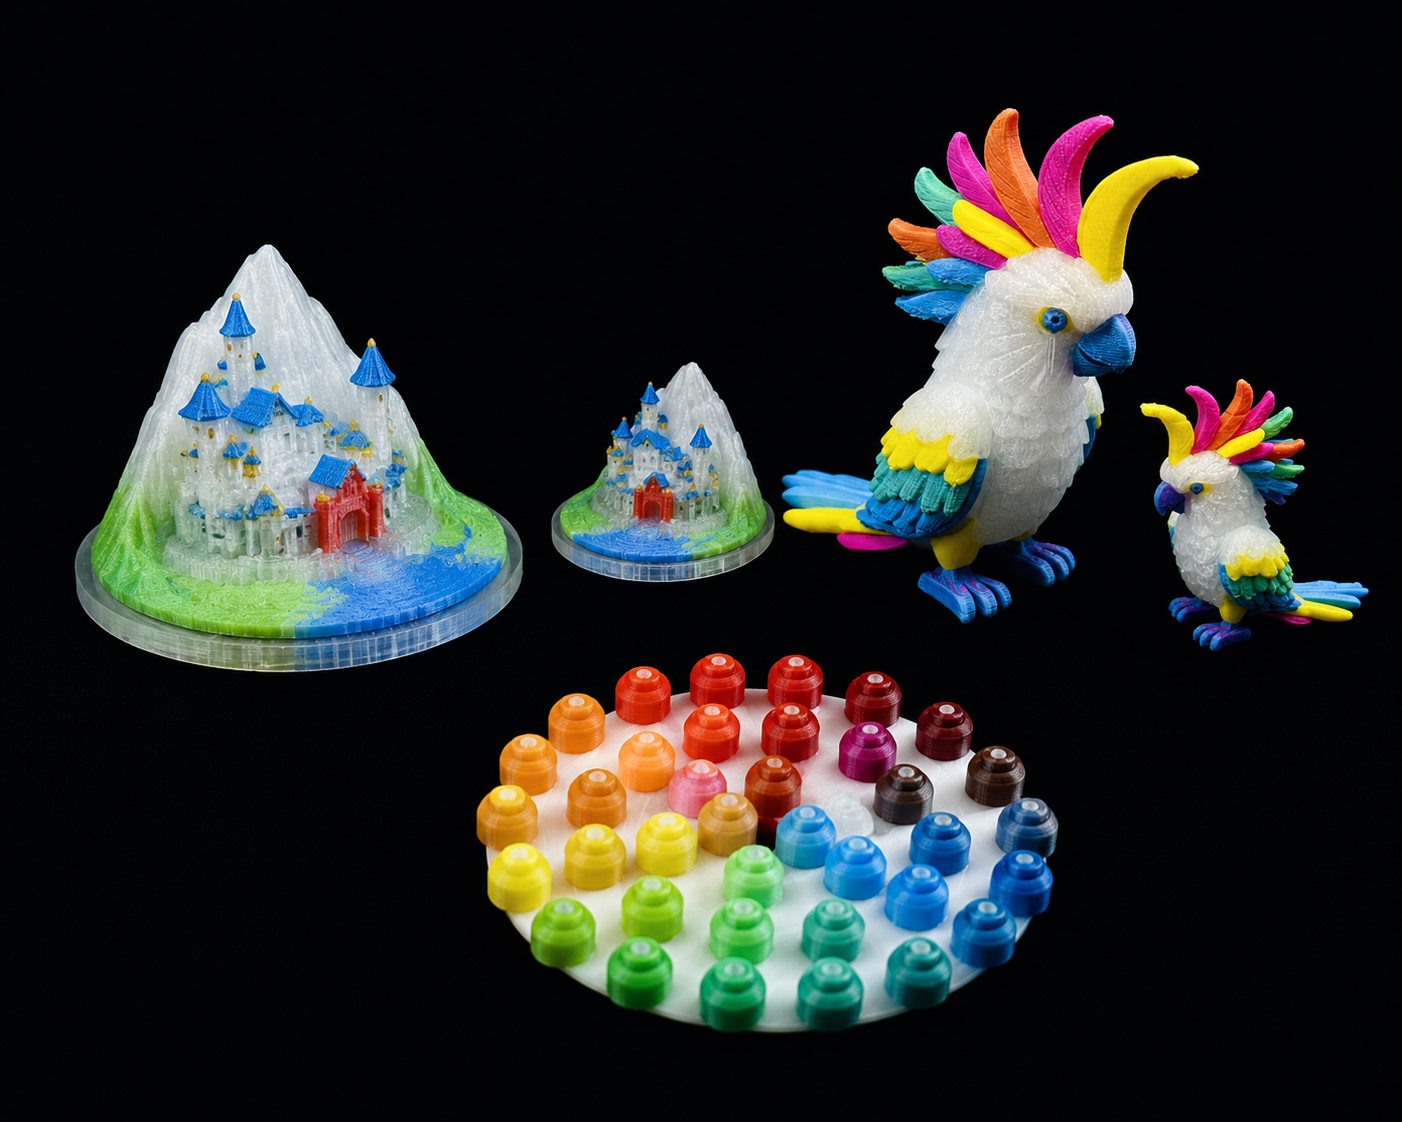
Color mixing printing typically requires: 1. A device that supports multi-color printing; 2. Multiple colors of filament (at least two); 3. A model that supports multi-color printing;
Flash Studio version requirement: 1.7.14 or above
¶ Interface and Features
Feature Entry:
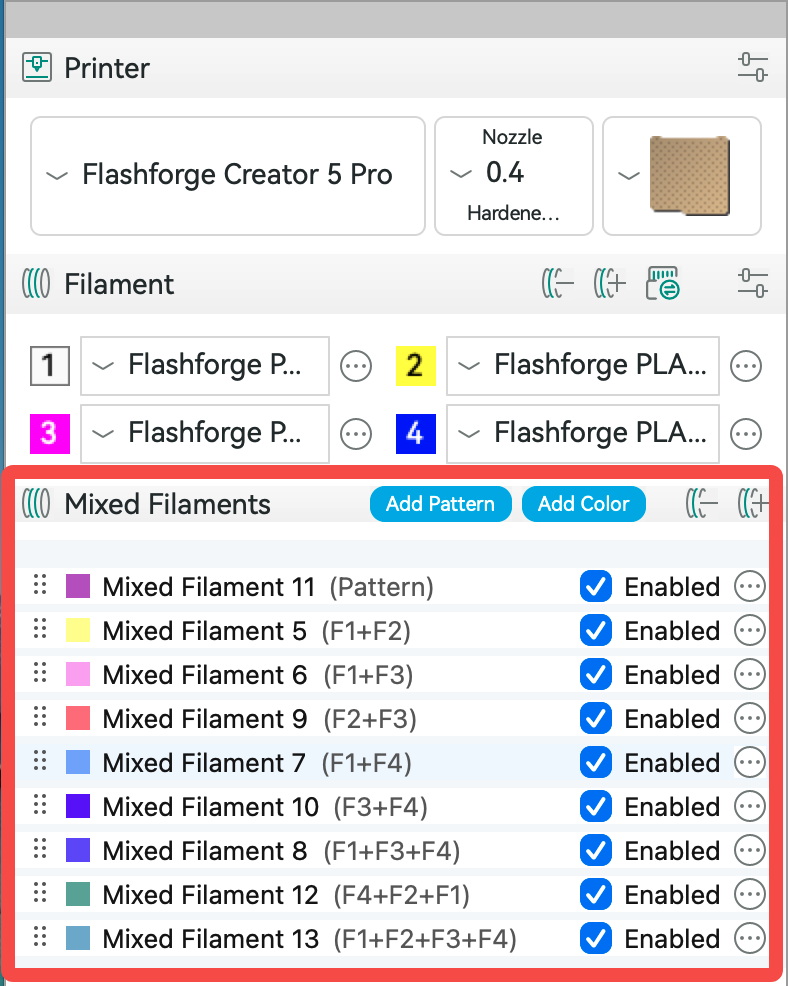
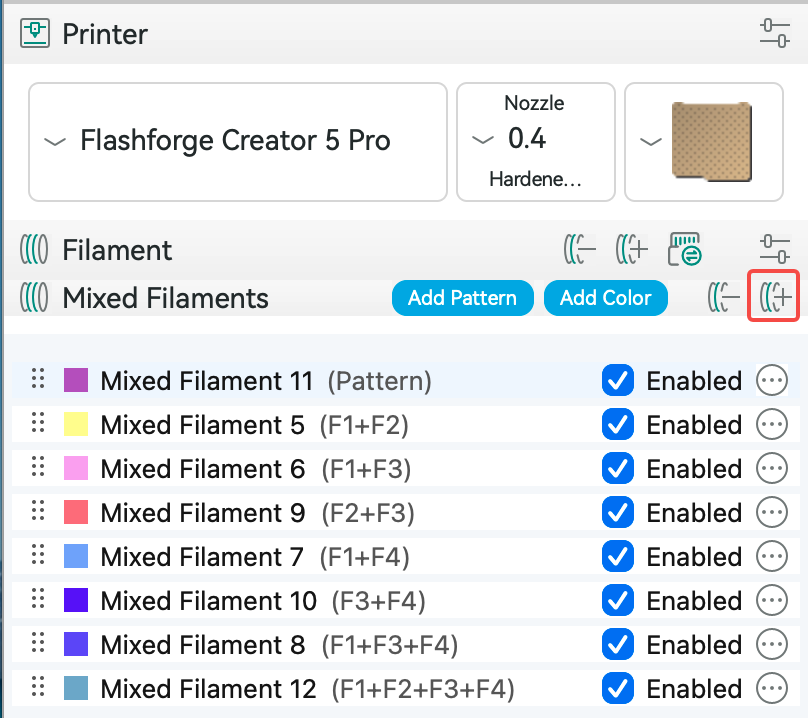
Click the add mixed filament button in the "Mixed Filament" section of the filament list to manage the filaments you want to mix in the mixed filament list.
¶ Three Color Mixing Methods
¶ 1. Add Pattern
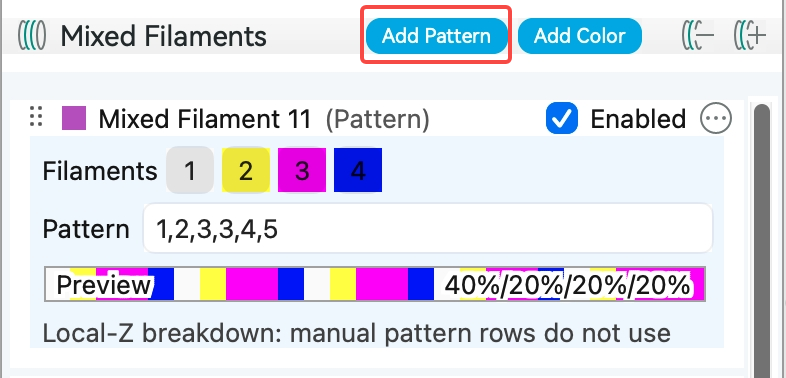
You can enter a sequence of filament numbers (e.g., "1,2") in the "Pattern" input field. The slicing software will alternate feeding according to this sequence during printing. The sequence will repeat cyclically, and the number of times each number appears determines that color's proportion.
-
Input format explanation:
"1,2" → Filament 1 and Filament 2 alternate, each accounting for 50% (displayed as 50%/50% in the preview area)
"1,2,3" → Three colors each account for 1/3, cycling in order -
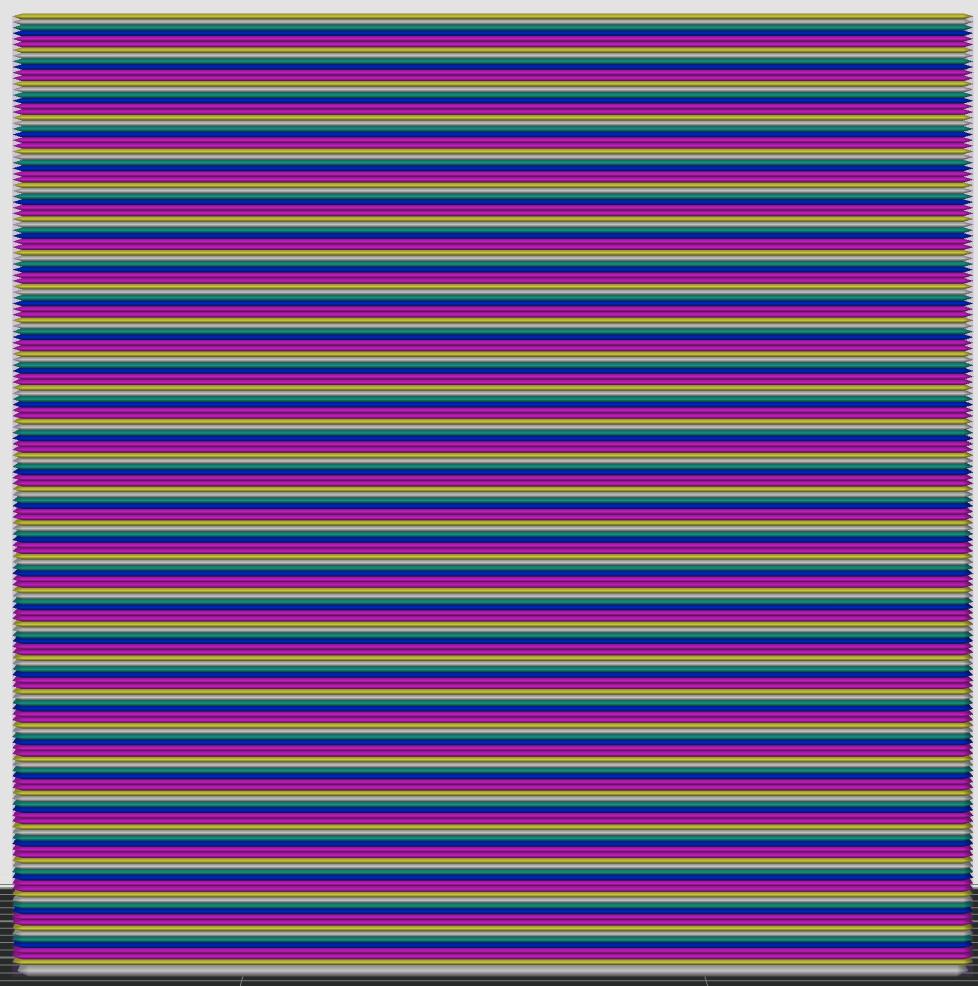
Difference from dual-color/tri-color mixing: Dual-color and tri-color mixing produce gradient transitional colors by adjusting ratios (e.g., red + yellow → orange), while pattern mode feeds filaments in a fixed sequence, producing stripe/layer effects.
¶ 2. Add Color
-
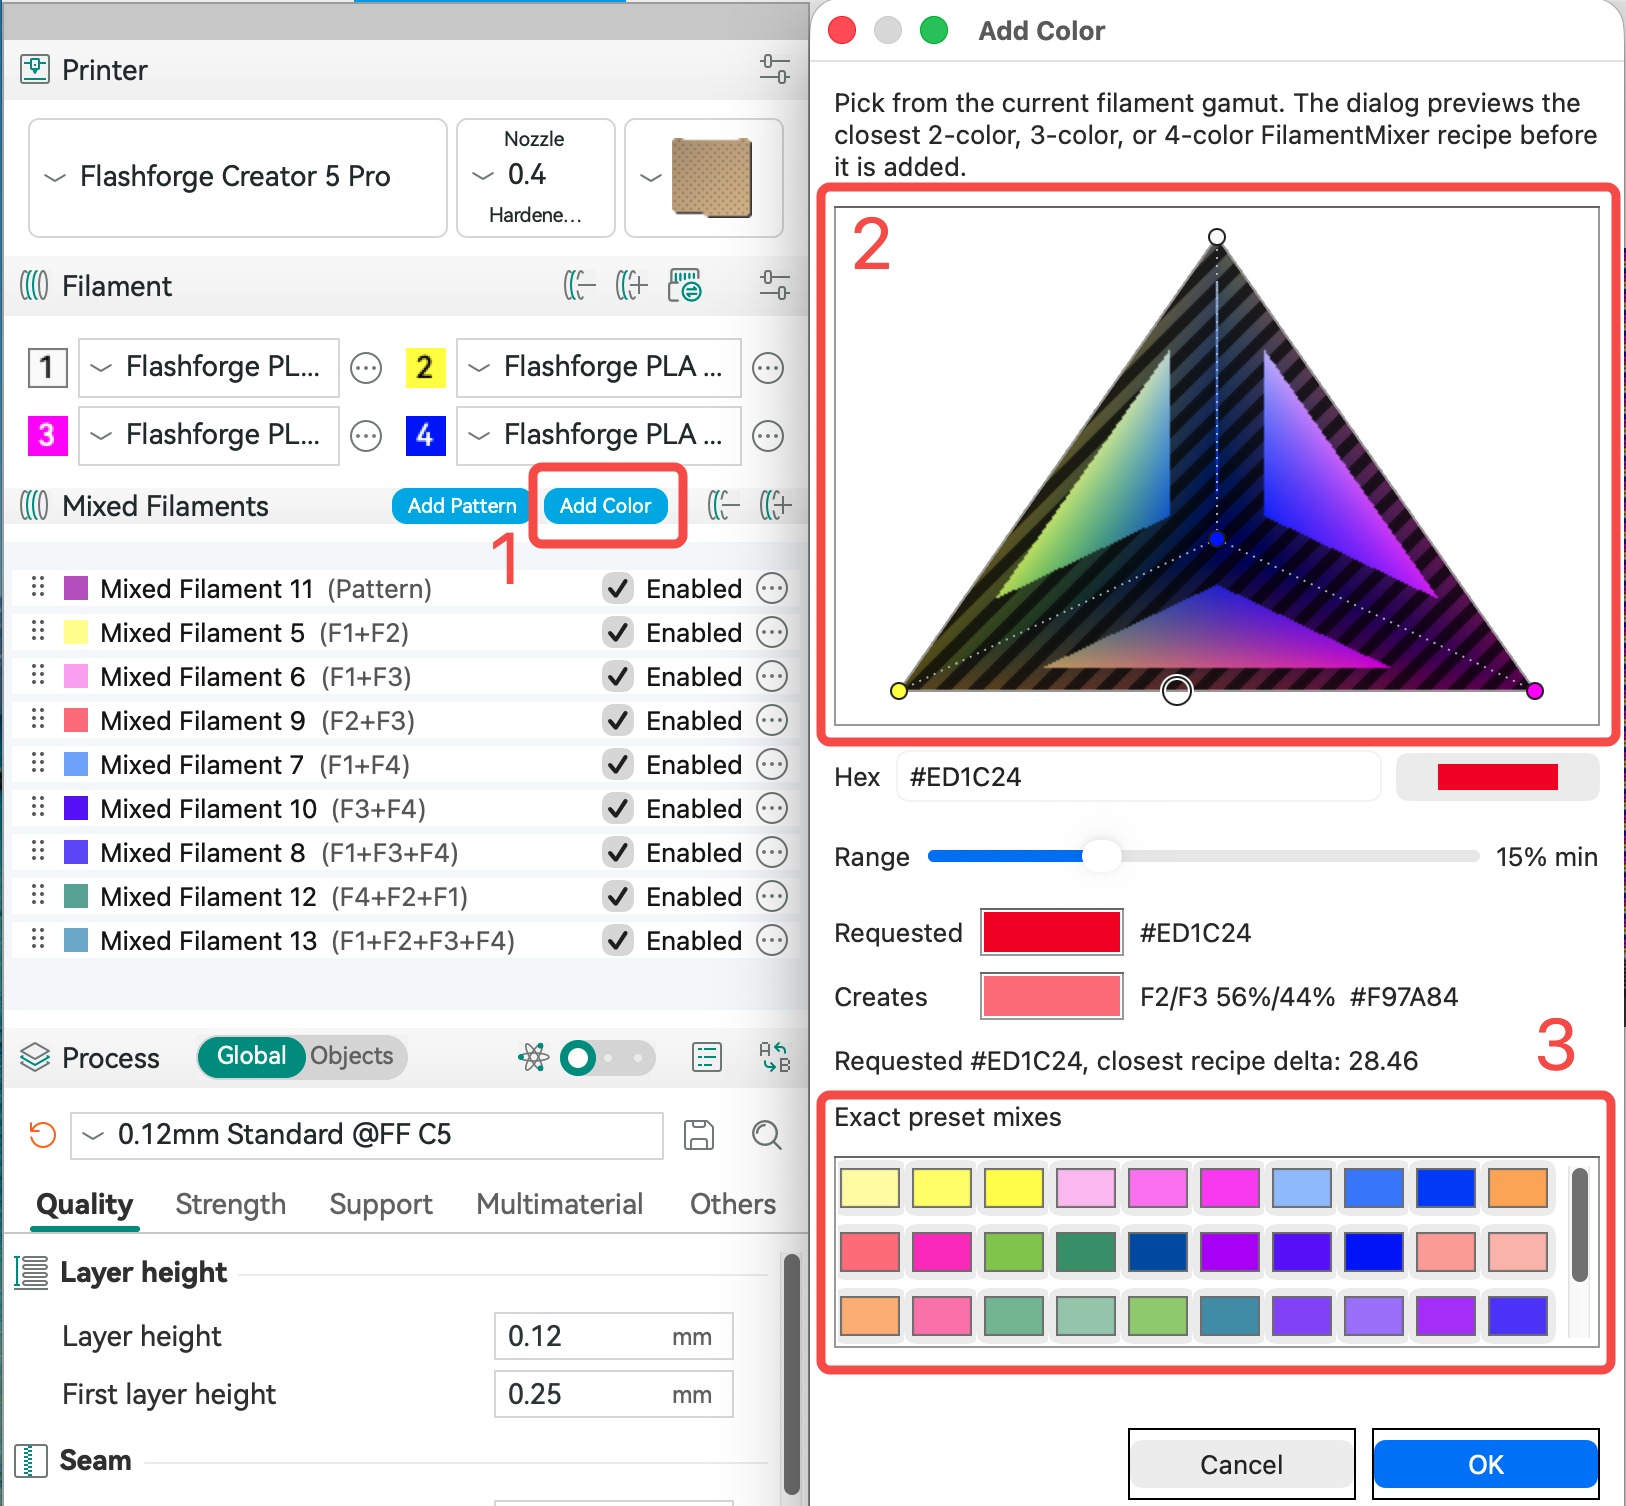
Click "Add Color", and in the pop-up window you can select the color you want. The slicing software will automatically match the corresponding color mixing plan based on the hexadecimal RGB value you enter.
-
Manual mixing: Click the color picker to choose your own color scheme. The result will display the closest calculated mixed color. Click adjust range to set the minimum ratio for each color.
-
Auto mixing: Select from the precise preset mixing options to choose dual-color, tri-color, or quad-color mixing plans automatically generated by the software based on your available filaments.
Note: Only filaments of the same type can be mixed together (e.g., all PLA). Mixing between PLA and PETG or other filament types is not supported.
¶ 3. Add Mixed Filament
Click "Add Mixed Filament", and in the pop-up dropdown you can edit the color mixing effect you want. You can switch the base filaments for mixing, and drag the color wheel slider to adjust the filament mixing ratios.
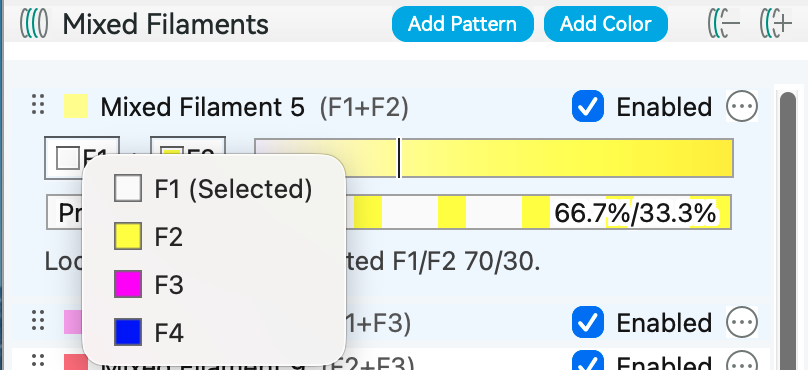
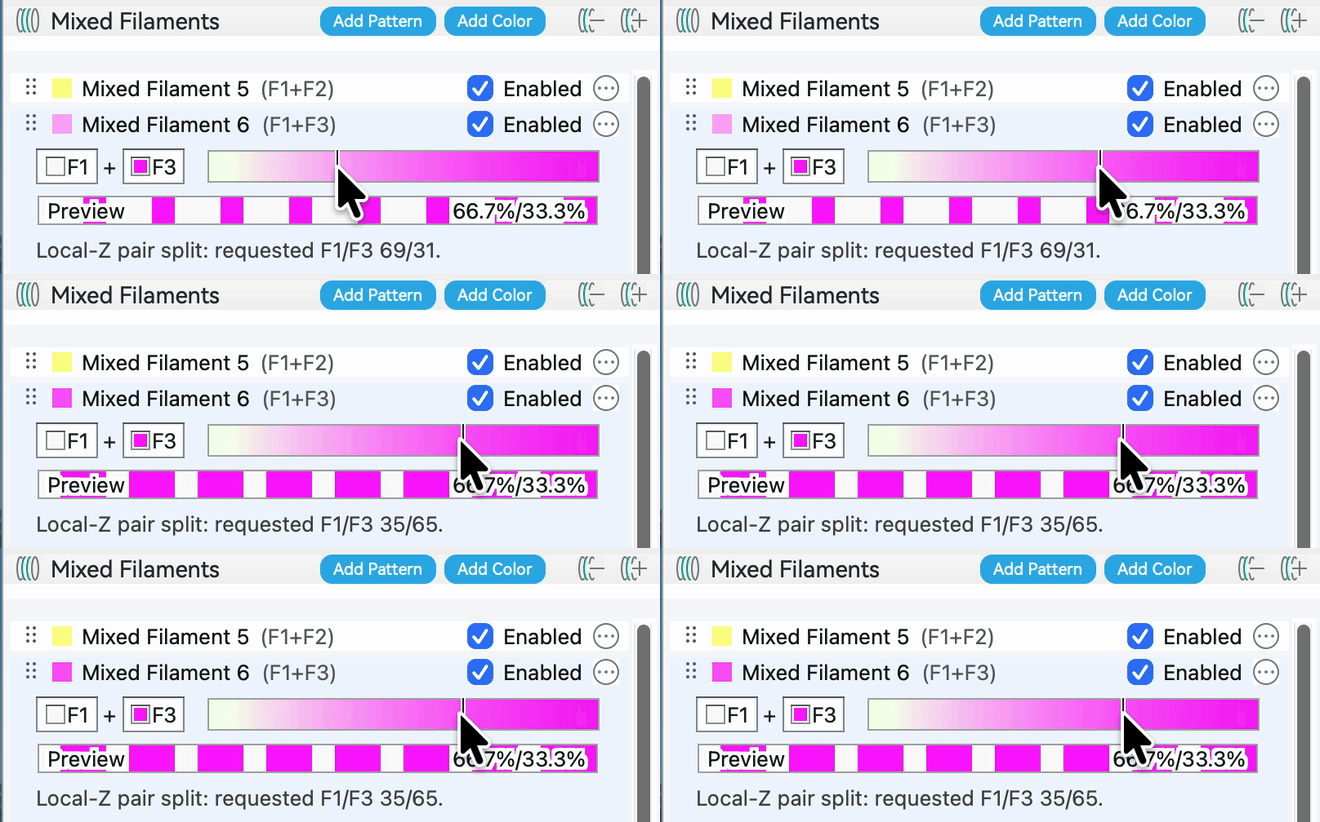
Dual-color mixing: When two filaments are loaded, you can adjust the mixing ratio of the two filaments by dragging the slider;
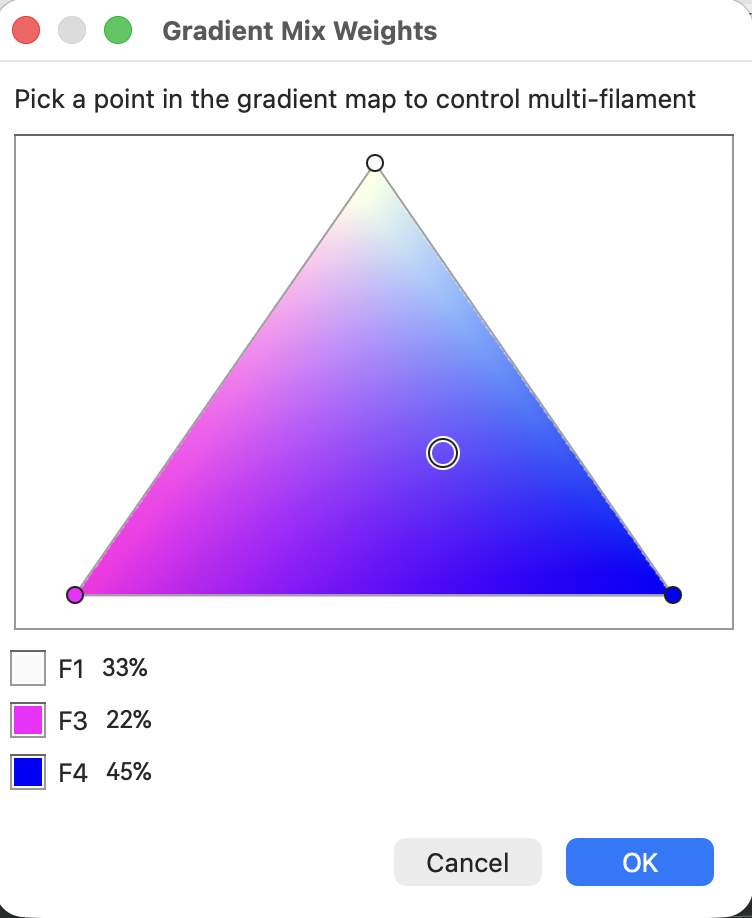
Tri-color mixing: When three filaments are loaded, you can control the mixing ratio of three filaments by clicking and dragging within the triangular coordinate space.
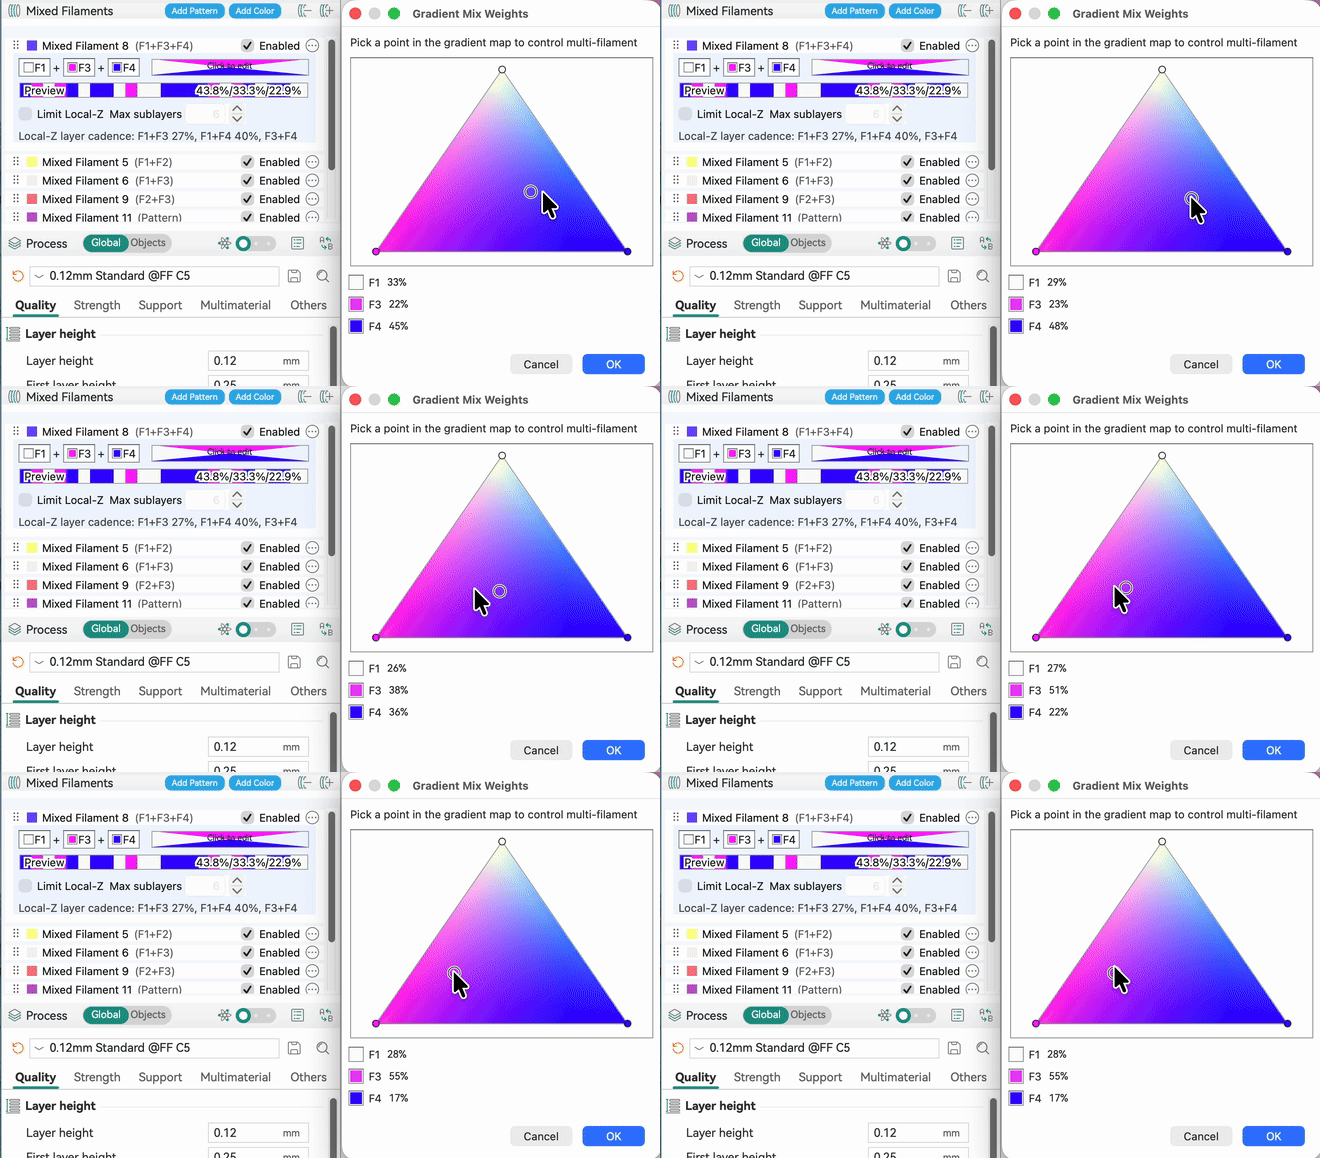
Prefer dual-color mixing: Compared to tri-color and quad-color mixing, dual-color mixing can produce more controllable color effects. Therefore, it is recommended to prioritize dual-color mixing.
¶ Selecting a Color Mixing Plan for the Model
1. Select mixed filament for the model in Process - Object
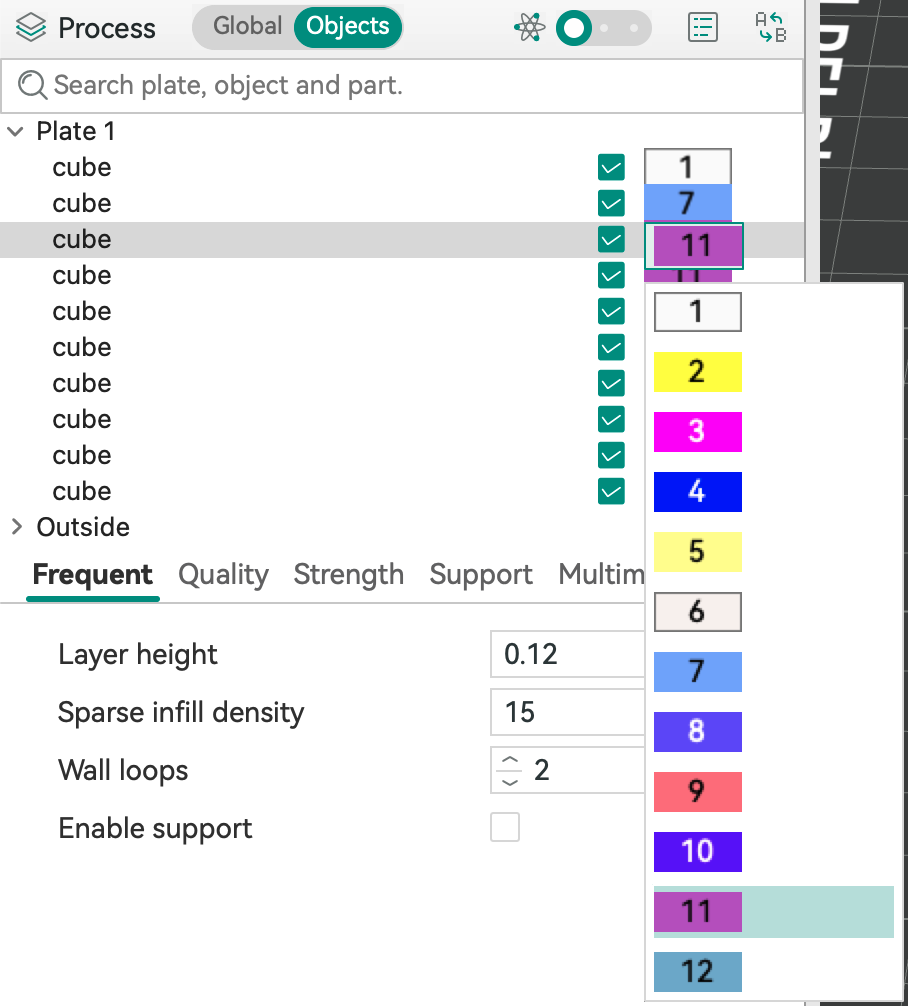
Select the target object in the left object list, then choose the created mixed filament from the filament dropdown menu in the Process panel.
If you are printing a multi-object model, you can select mixed filament for individual objects.
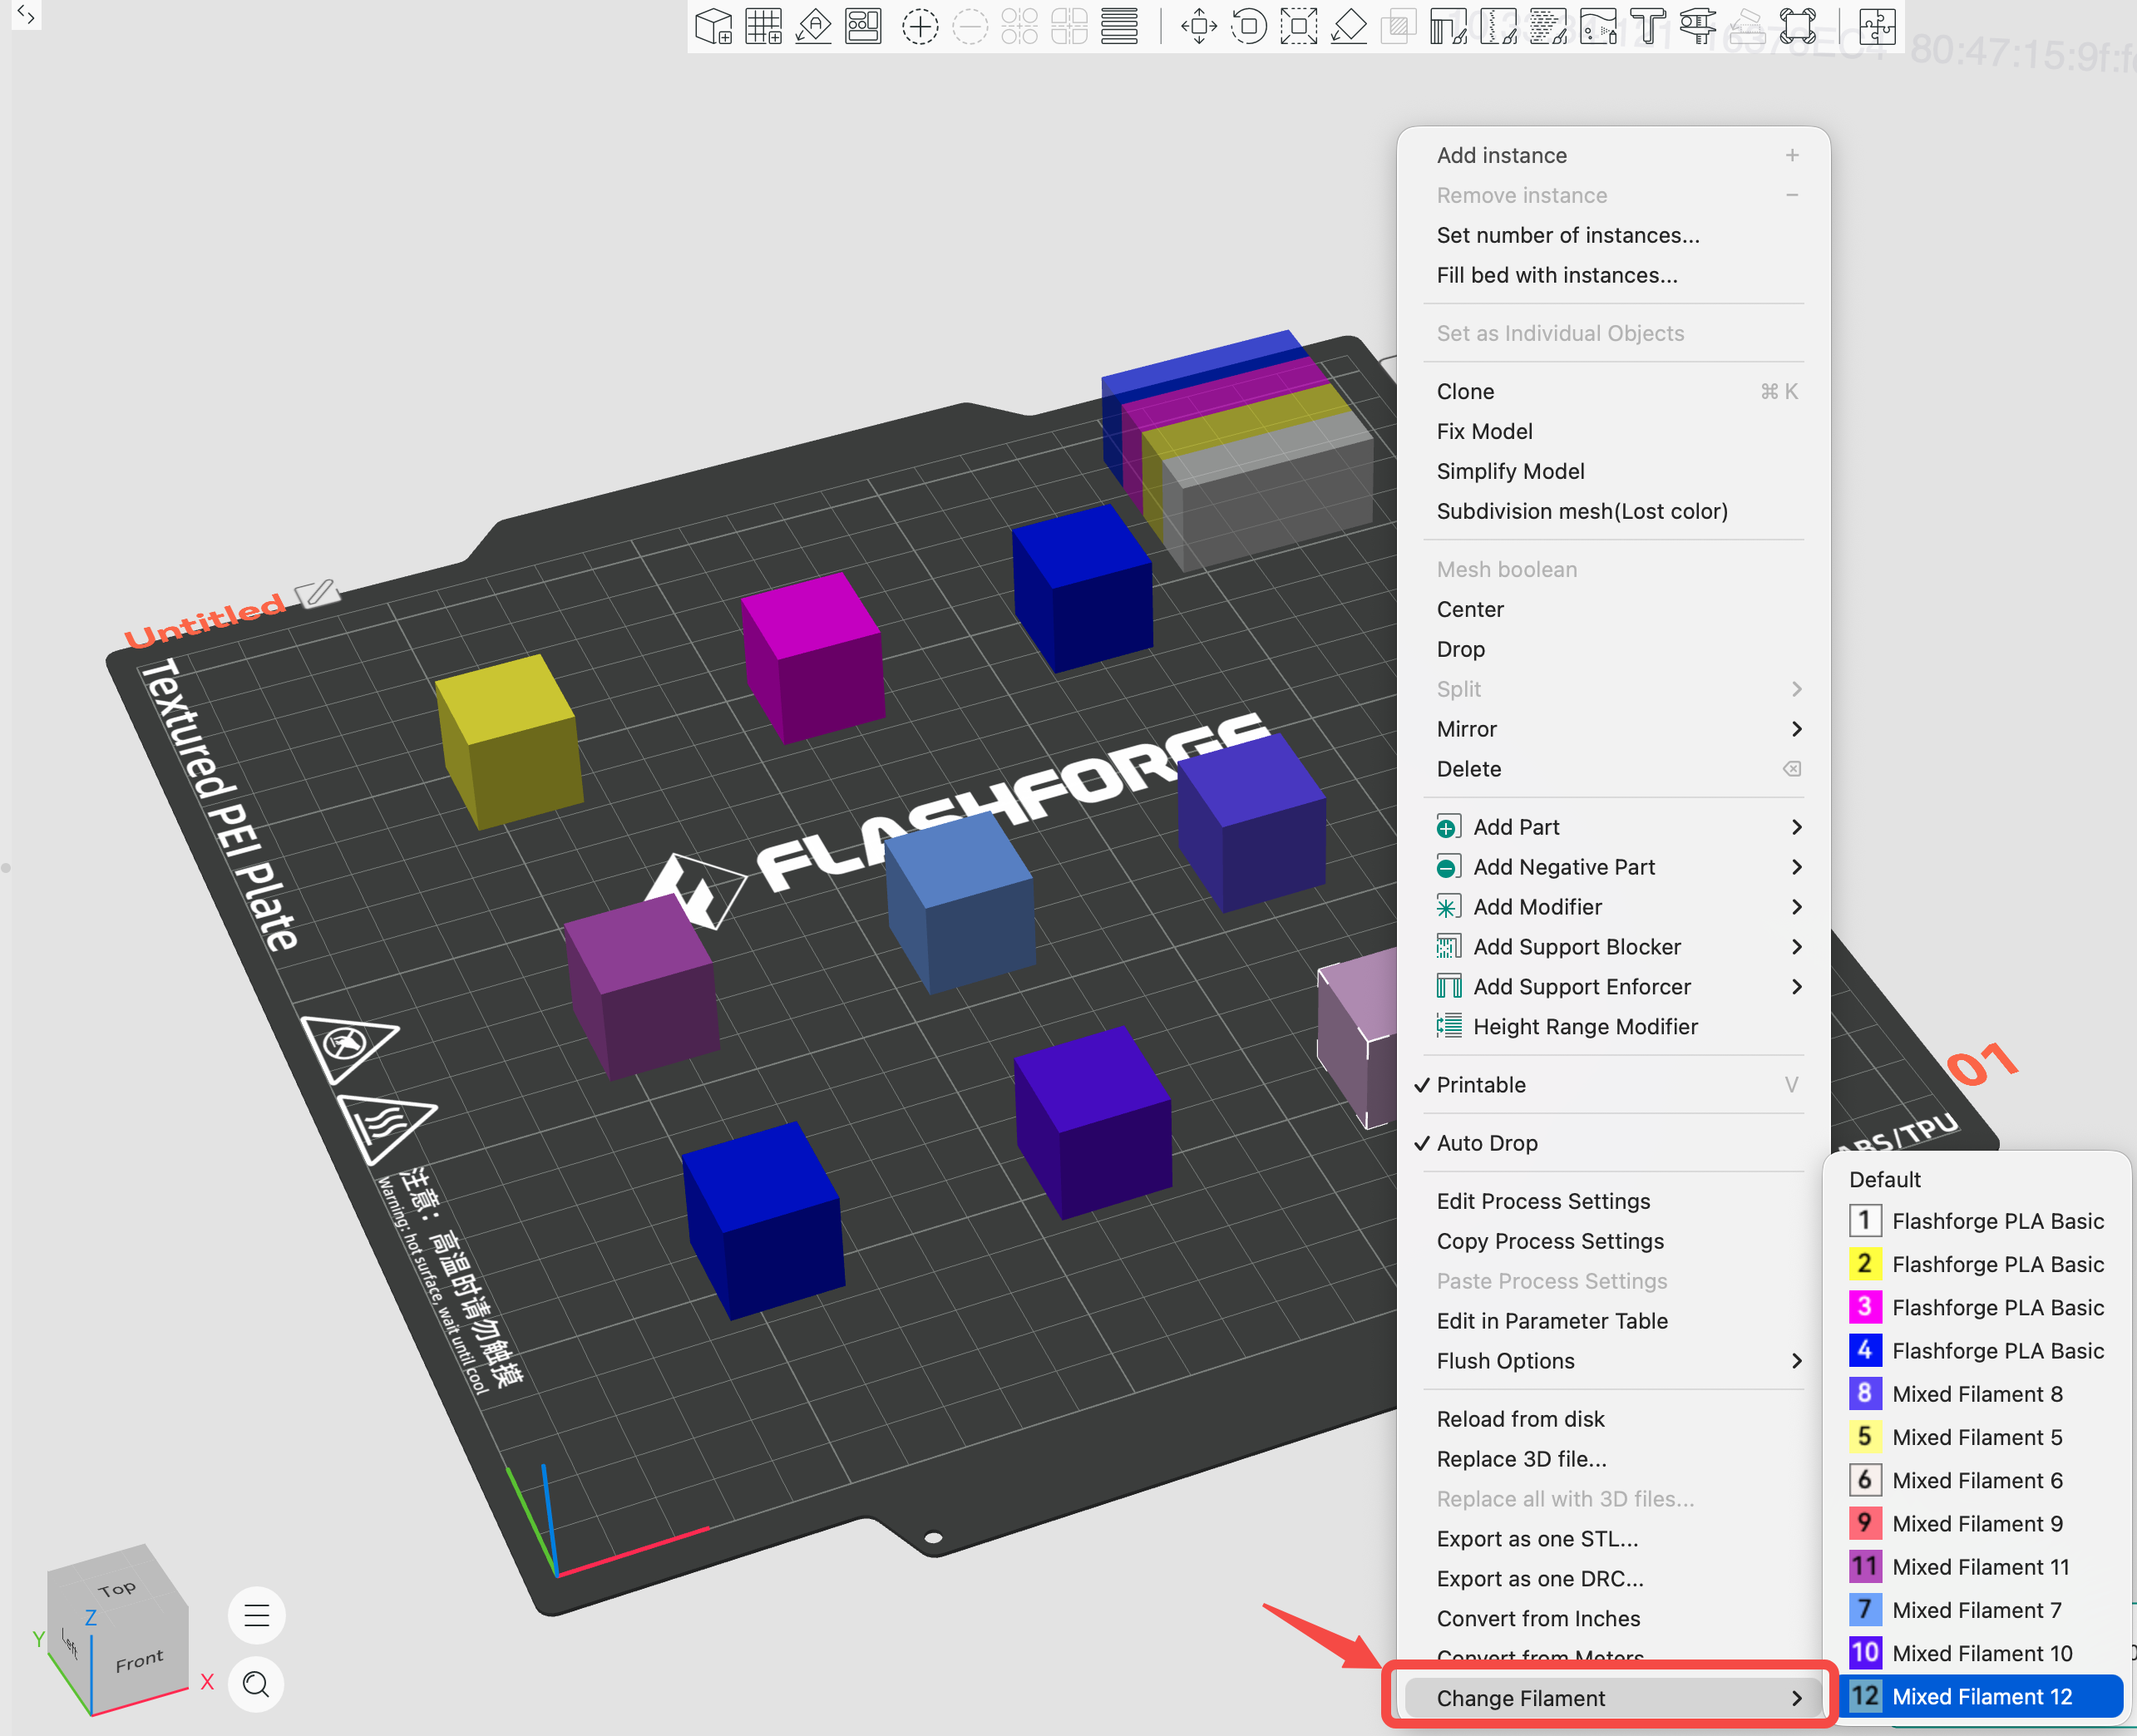
2. Select filament for the model in the 3D Preview interface
You can also right-click on the model in the right 3D Preview interface, and select the corresponding mixed filament from the change filament list to apply it to the current model.
¶ Printing Color Mixed Models
After completing the mixed filament editing and selecting mixed filament for the model, you can print your mixed filament model.
After slicing is complete, enter the 3D Preview interface to check the color mixing effect. Use the layer view to inspect the color distribution layer by layer to ensure it meets your expectations before sending the print task.
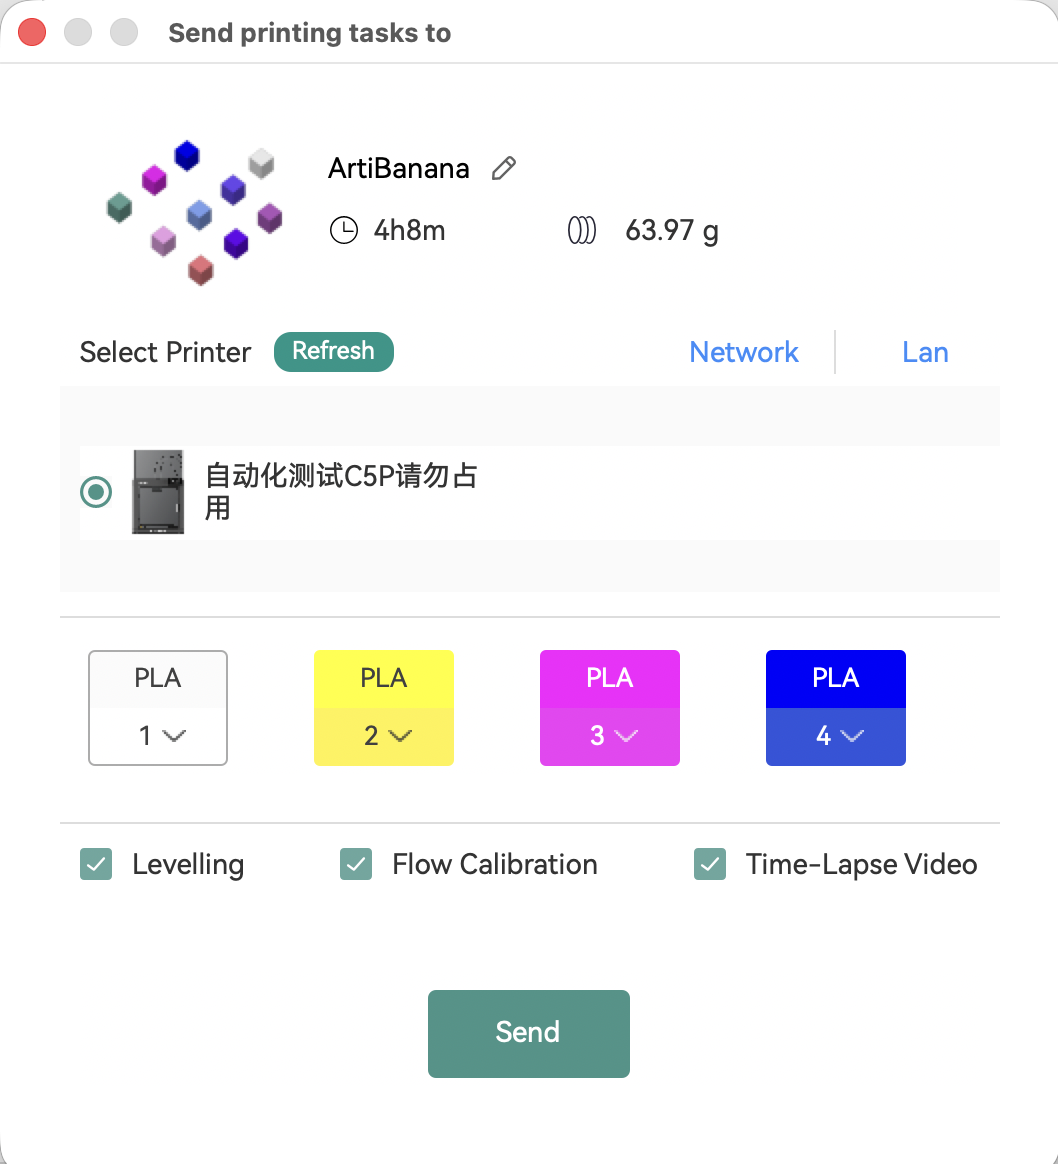
After confirming the slicing result, click the send button to transmit the print task to the printer. Before sending, please confirm that the printer is connected and the IFS system has loaded the corresponding filaments.
¶ Notes
¶ Filament Requirements
Only filaments of the same type can be mixed together. Mixing between PLA and PETG or other filament types is not supported.
¶ Color Distribution After Mixing
Multi-color mixing controls the mixing ratios of multiple colored filaments to produce different color effects during printing.
The image below shows a color mixing plan with red at 63%, green at 18%, and light yellow at 19%. The target color is primarily composed of red filament, with a certain proportion of green and yellow filaments added to create the corresponding color effect.
The higher the mixing ratio, the more obvious the impact on the final color. By adjusting the ratios between different colored filaments, more color variations can be achieved.
In general, darker colors tend to dominate, so the proportion of dark filaments should typically be reduced appropriately to allow lighter filaments to be visually apparent.
¶ Factors Affecting Color Mixing Results
Actual printed color effects may be influenced by the following factors:
The physical color of the filament itself, material properties and transparency of different filaments, mixing ratio settings, printing parameter settings, and model surface structure.
¶ Improving Print Success Rate
If using a multi-nozzle printer, the following preparations are needed before printing:
-
Nozzle offset calibration: Ensure the spatial alignment of multiple nozzles
-
Nozzle cleaning to prevent clogging: Before printing, load filament into each nozzle on the printer to ensure each nozzle extrudes the corresponding color filament, preventing clogs.
-
Print a test model first: It is recommended to print a standard model with the configured color mixing settings to test result accuracy before printing complex color models for the first time.
-
Choose a multi-nozzle printer: Single-nozzle printers generate a large amount of waste during color mixing printing, and printing time will also be significantly extended. Therefore, if you want to use color mixing printing, it is recommended to use a multi-nozzle printer, such as Creator 5 and Creator 5 Pro.
¶ Models Suitable for Color Mixing Print:
Color mixing print results are affected by model structure, surface angle, and print orientation. Choosing appropriate models can achieve more uniform and natural color transitions.
It is recommended to select the following types of models:
- Models with larger continuous surfaces
- Models with relatively flat, near-vertical side walls
- Models with simple top structures
Not recommended:
- Models with many small details or complex textures
- Models with large hollow areas or discontinuous surfaces
- Models with small color display areas
¶ Conclusion
We hope this guide can provide you with clear and useful assistance.
If you have any questions, feel free to contact us through the "Feedback" channel in the software, and please attach your software and device logs. Our technical team will provide assistance as soon as possible.