¶ Use Case
When printing multiple models/multi-object model files on a single plate, you may encounter a situation where one model fails to print while the others print normally. If printing continues, it may cause the other models to fail as well. Typically, we want to keep the other intact models printing while skipping only the failed one — this saves filament and avoids pausing the print. The "Part Skip" feature in Flash Studio can help you solve this problem.
This feature is only applicable to multi-object models / multiple models on a single plate printing scenarios.
¶ Instructions
¶ Operating in Flash Studio Desktop
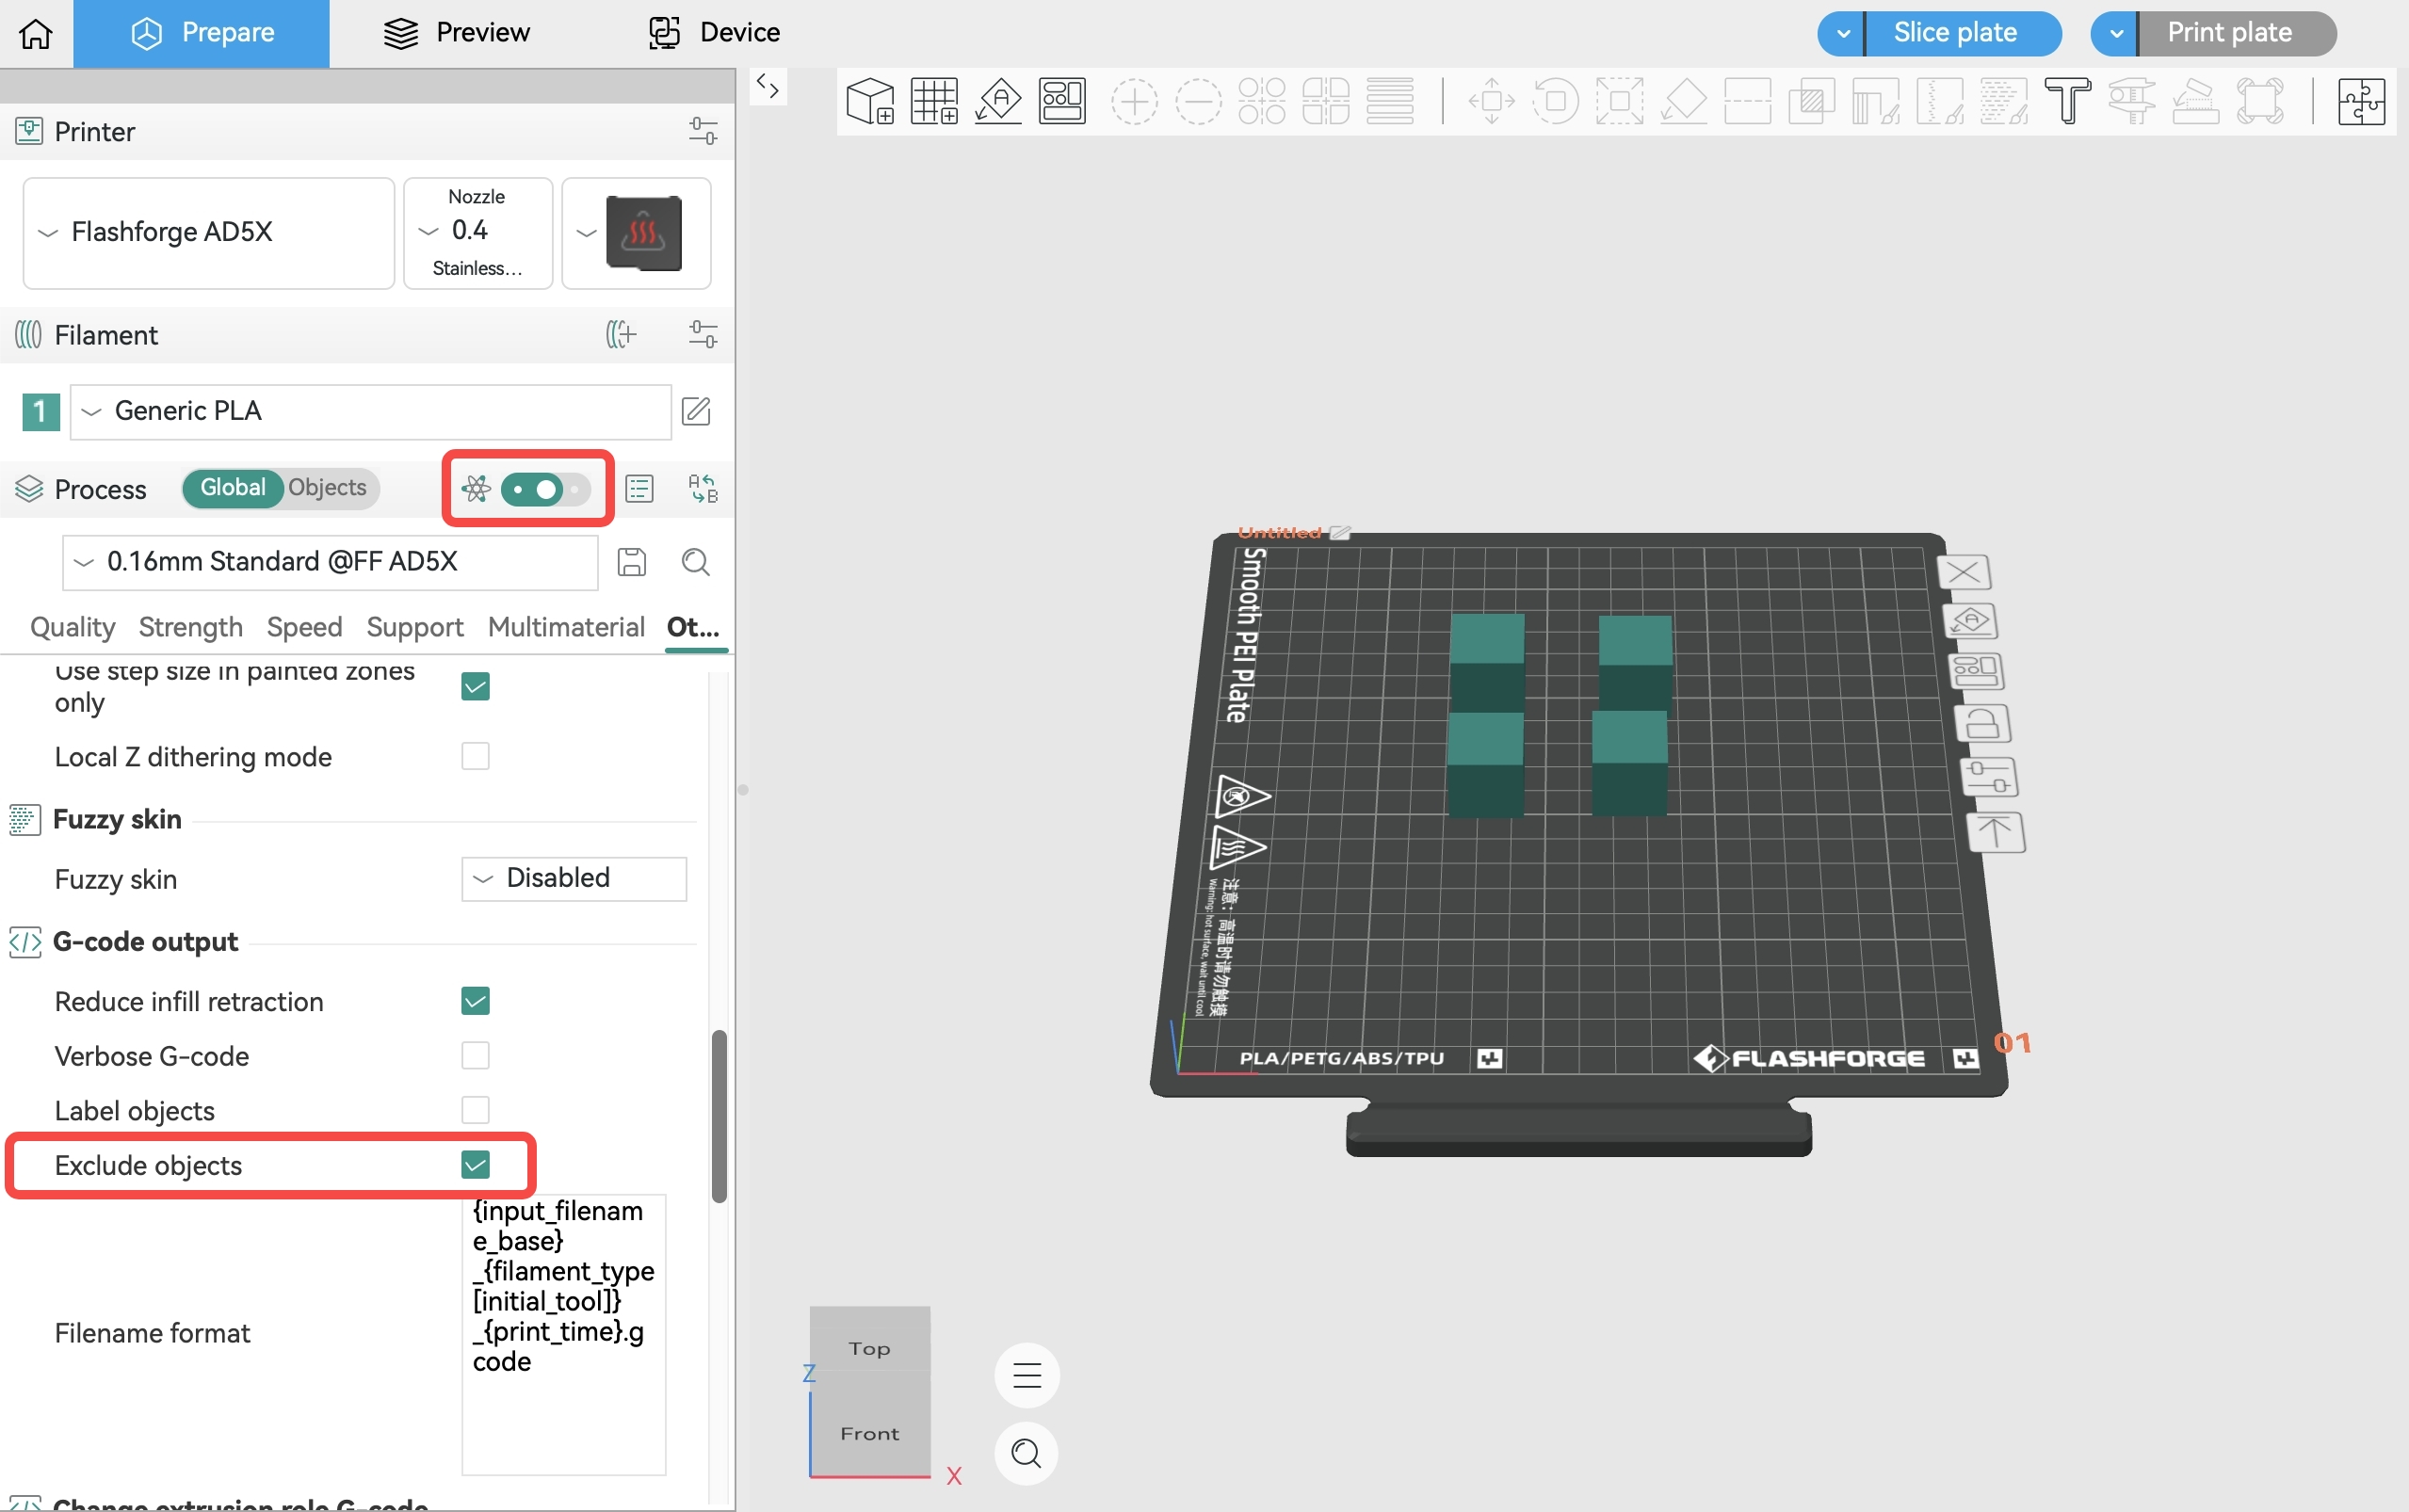
1. First, enable the "Advanced" option in the "Process" panel. Then, on the "Others" page, check the "Exclude Objects" option.
2. Slice and print.
¶ Operating on the Printer Screen
1. After enabling "Exclude Objects" and starting the print, the Part Skip [ ] button will appear on the screen. Tap it as needed.
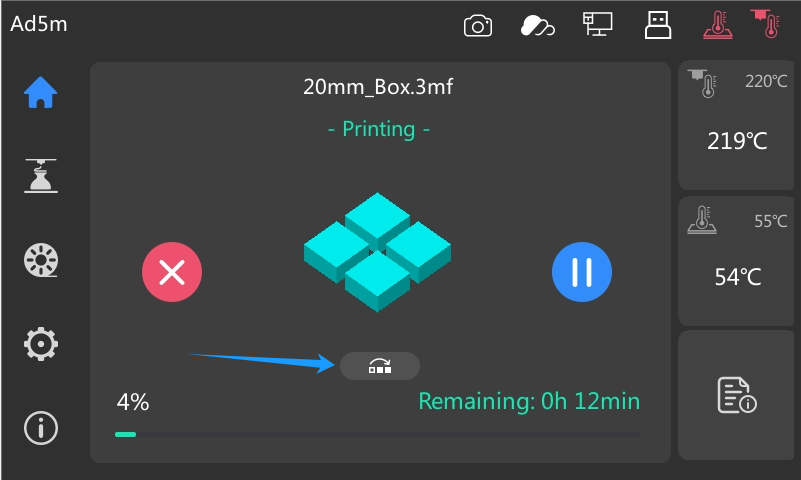
2. Click [] to enter the exclude objects interface, as explained in the following picture:
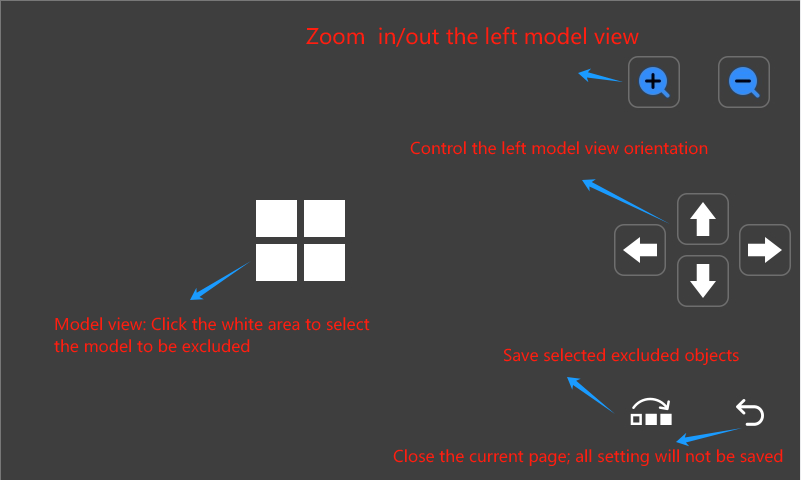
3. Select the model to be excluded.
-
a. Select the model view, click the model to be excluded, and the selected area will be displayed in blue. Click [
], and this function will take effect. -
b. If you click the wrong area when selecting the model, you can click [
 ] to reset.
 -
c. After successful saving, the excluded area will be displayed in red.
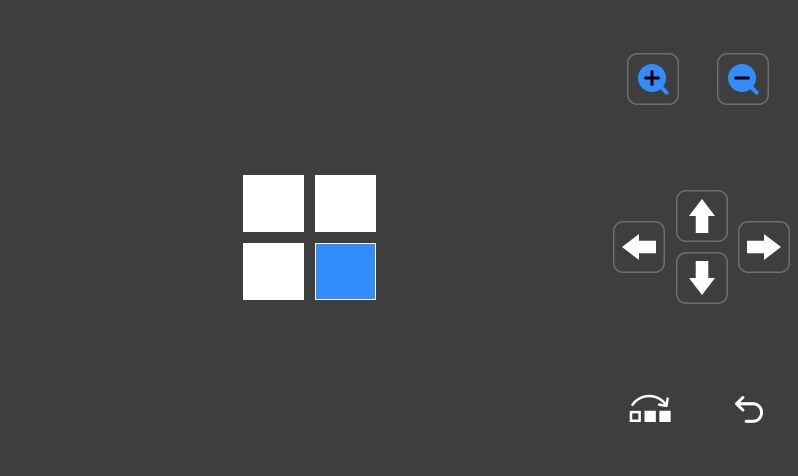
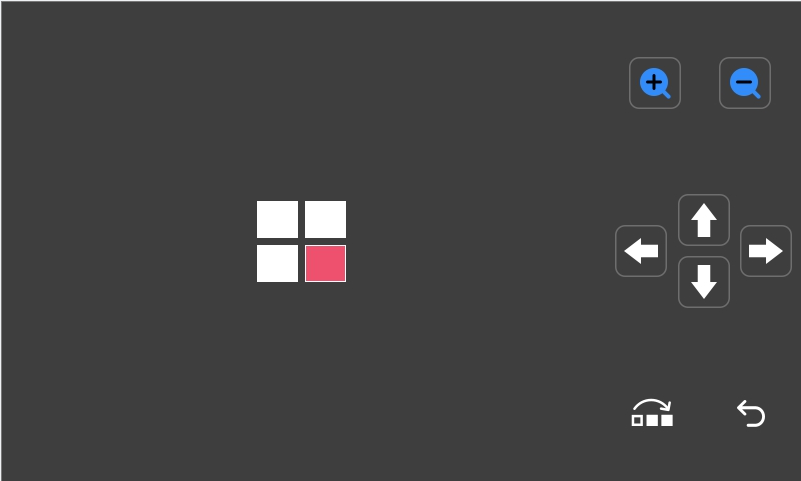
4. To cancel printing other models during the print, repeat the above steps.
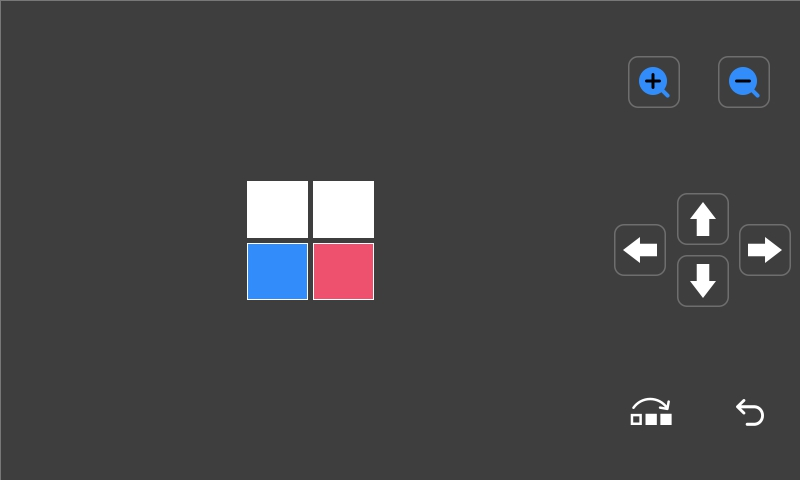
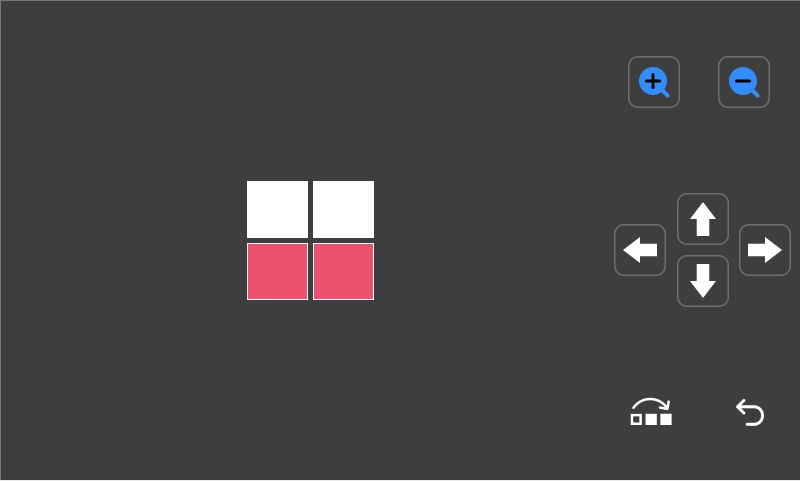
5. Print result after enabling the "Part Skip" feature:
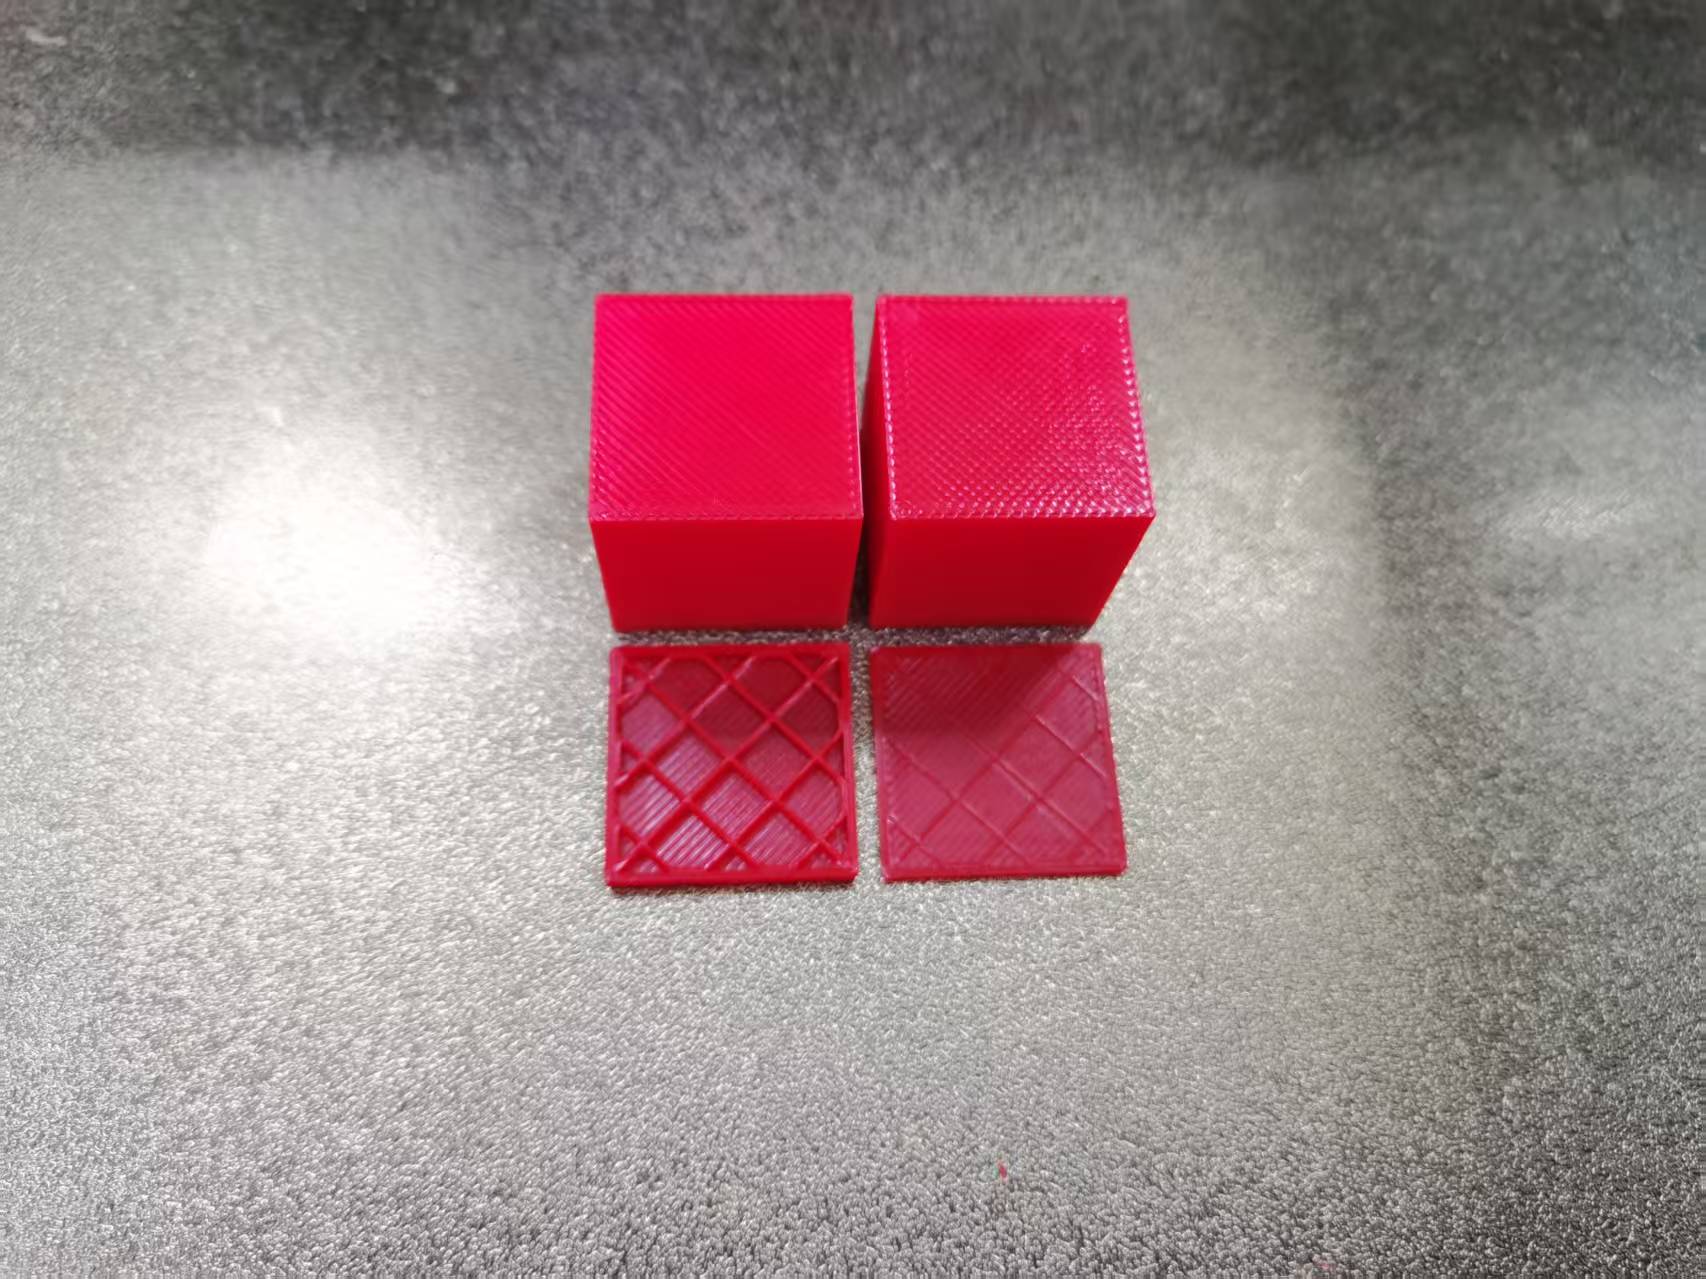
After performing Part Skip, although the printer will skip a certain model and not print it, the toolhead may still perform some additional idle movements, so the skipped model may still have partial bottom layers printed.
¶ Operating in Flash Studio Mobile
-
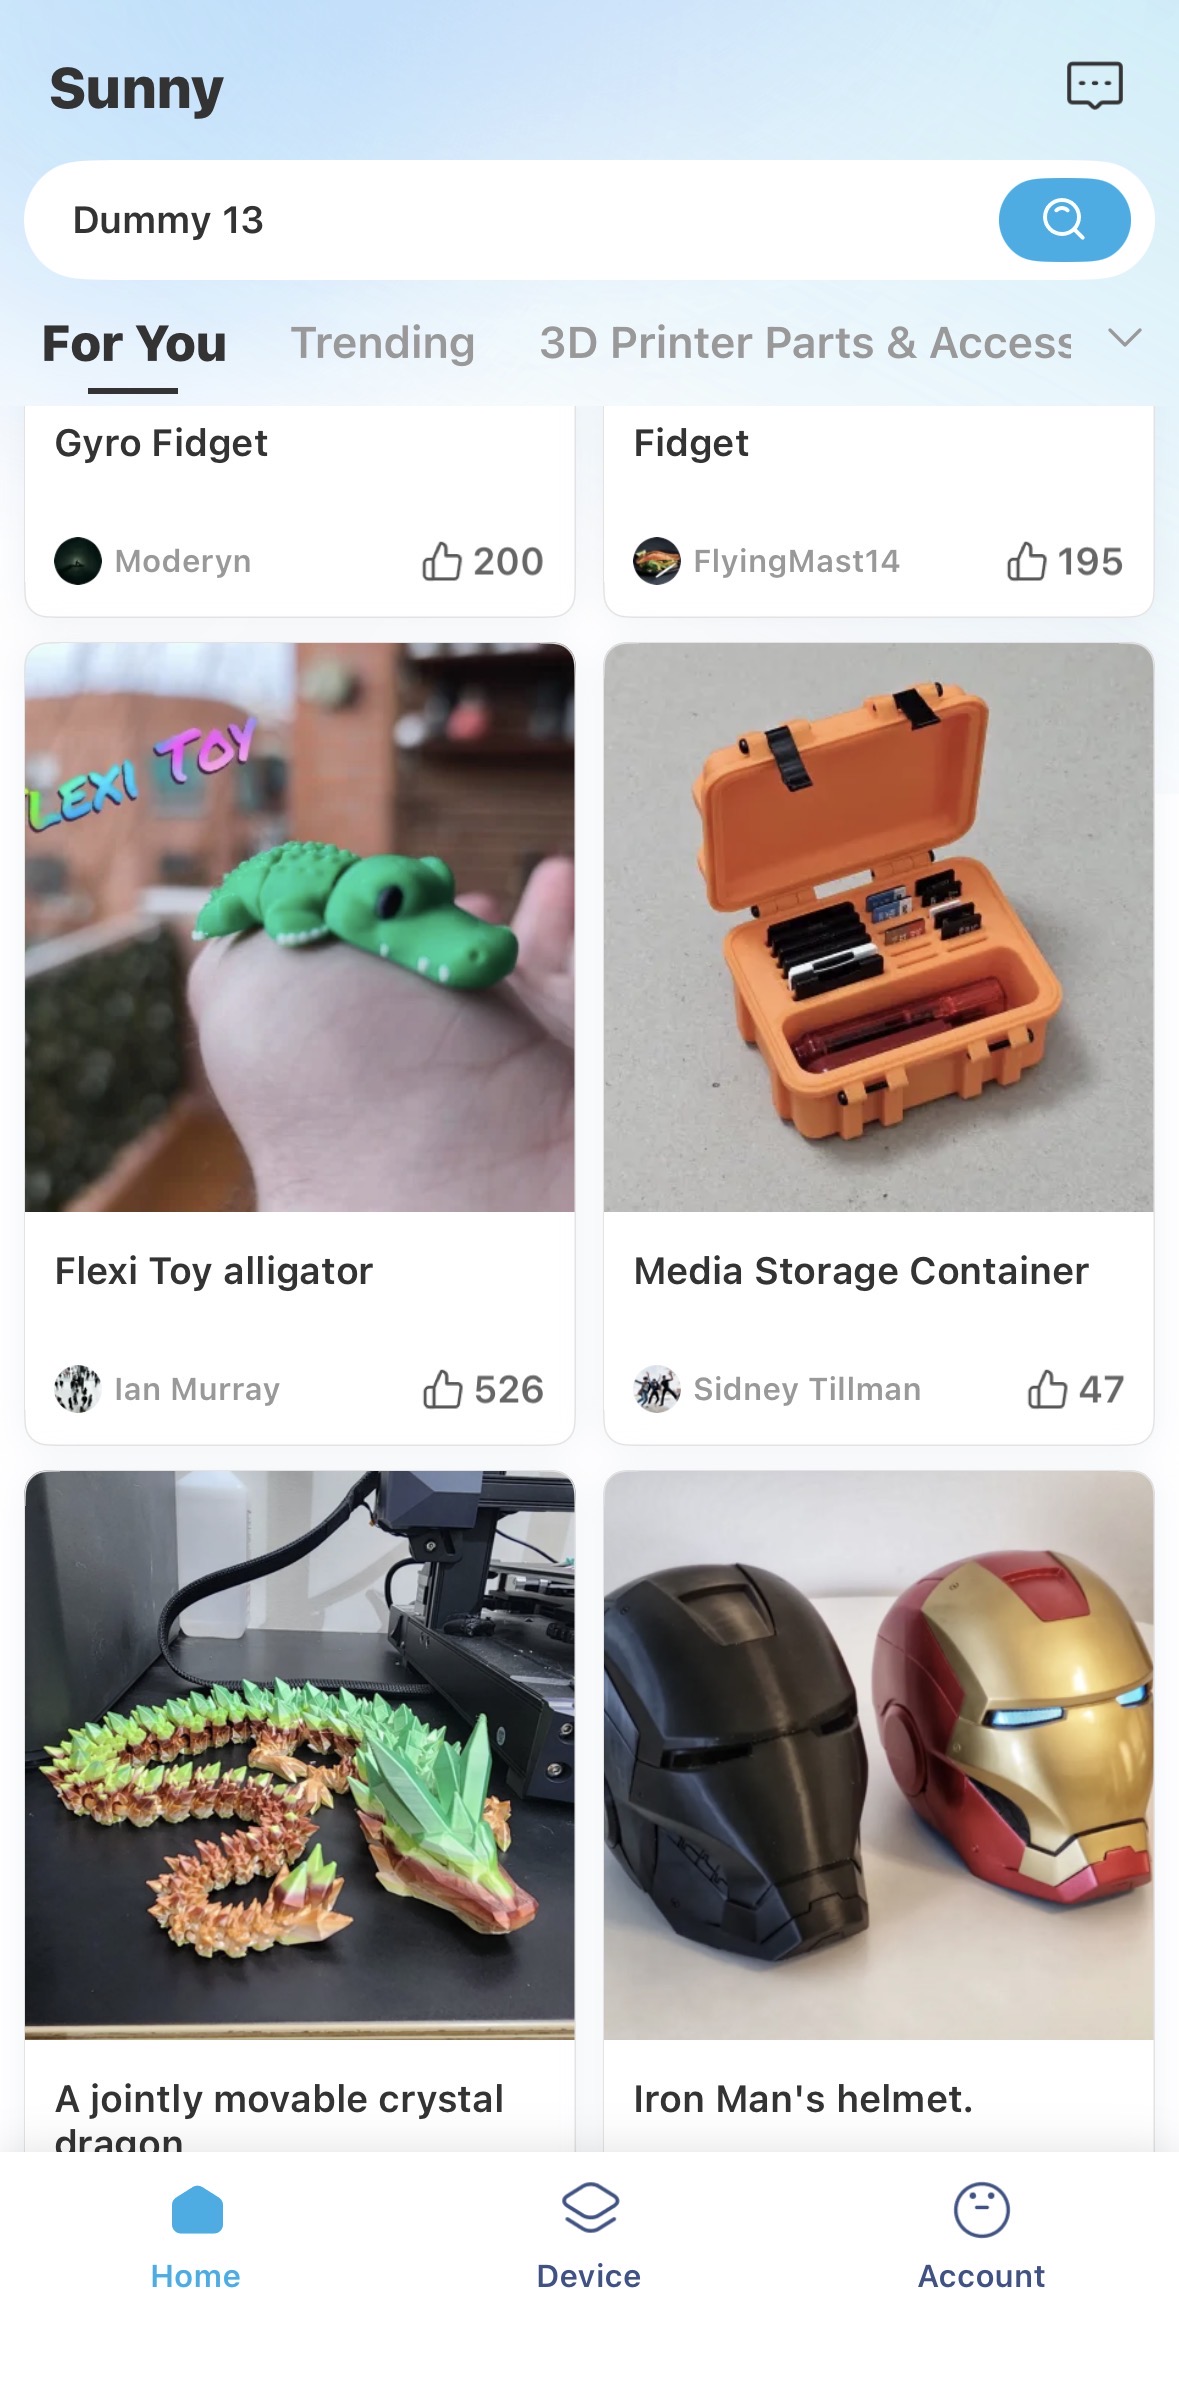
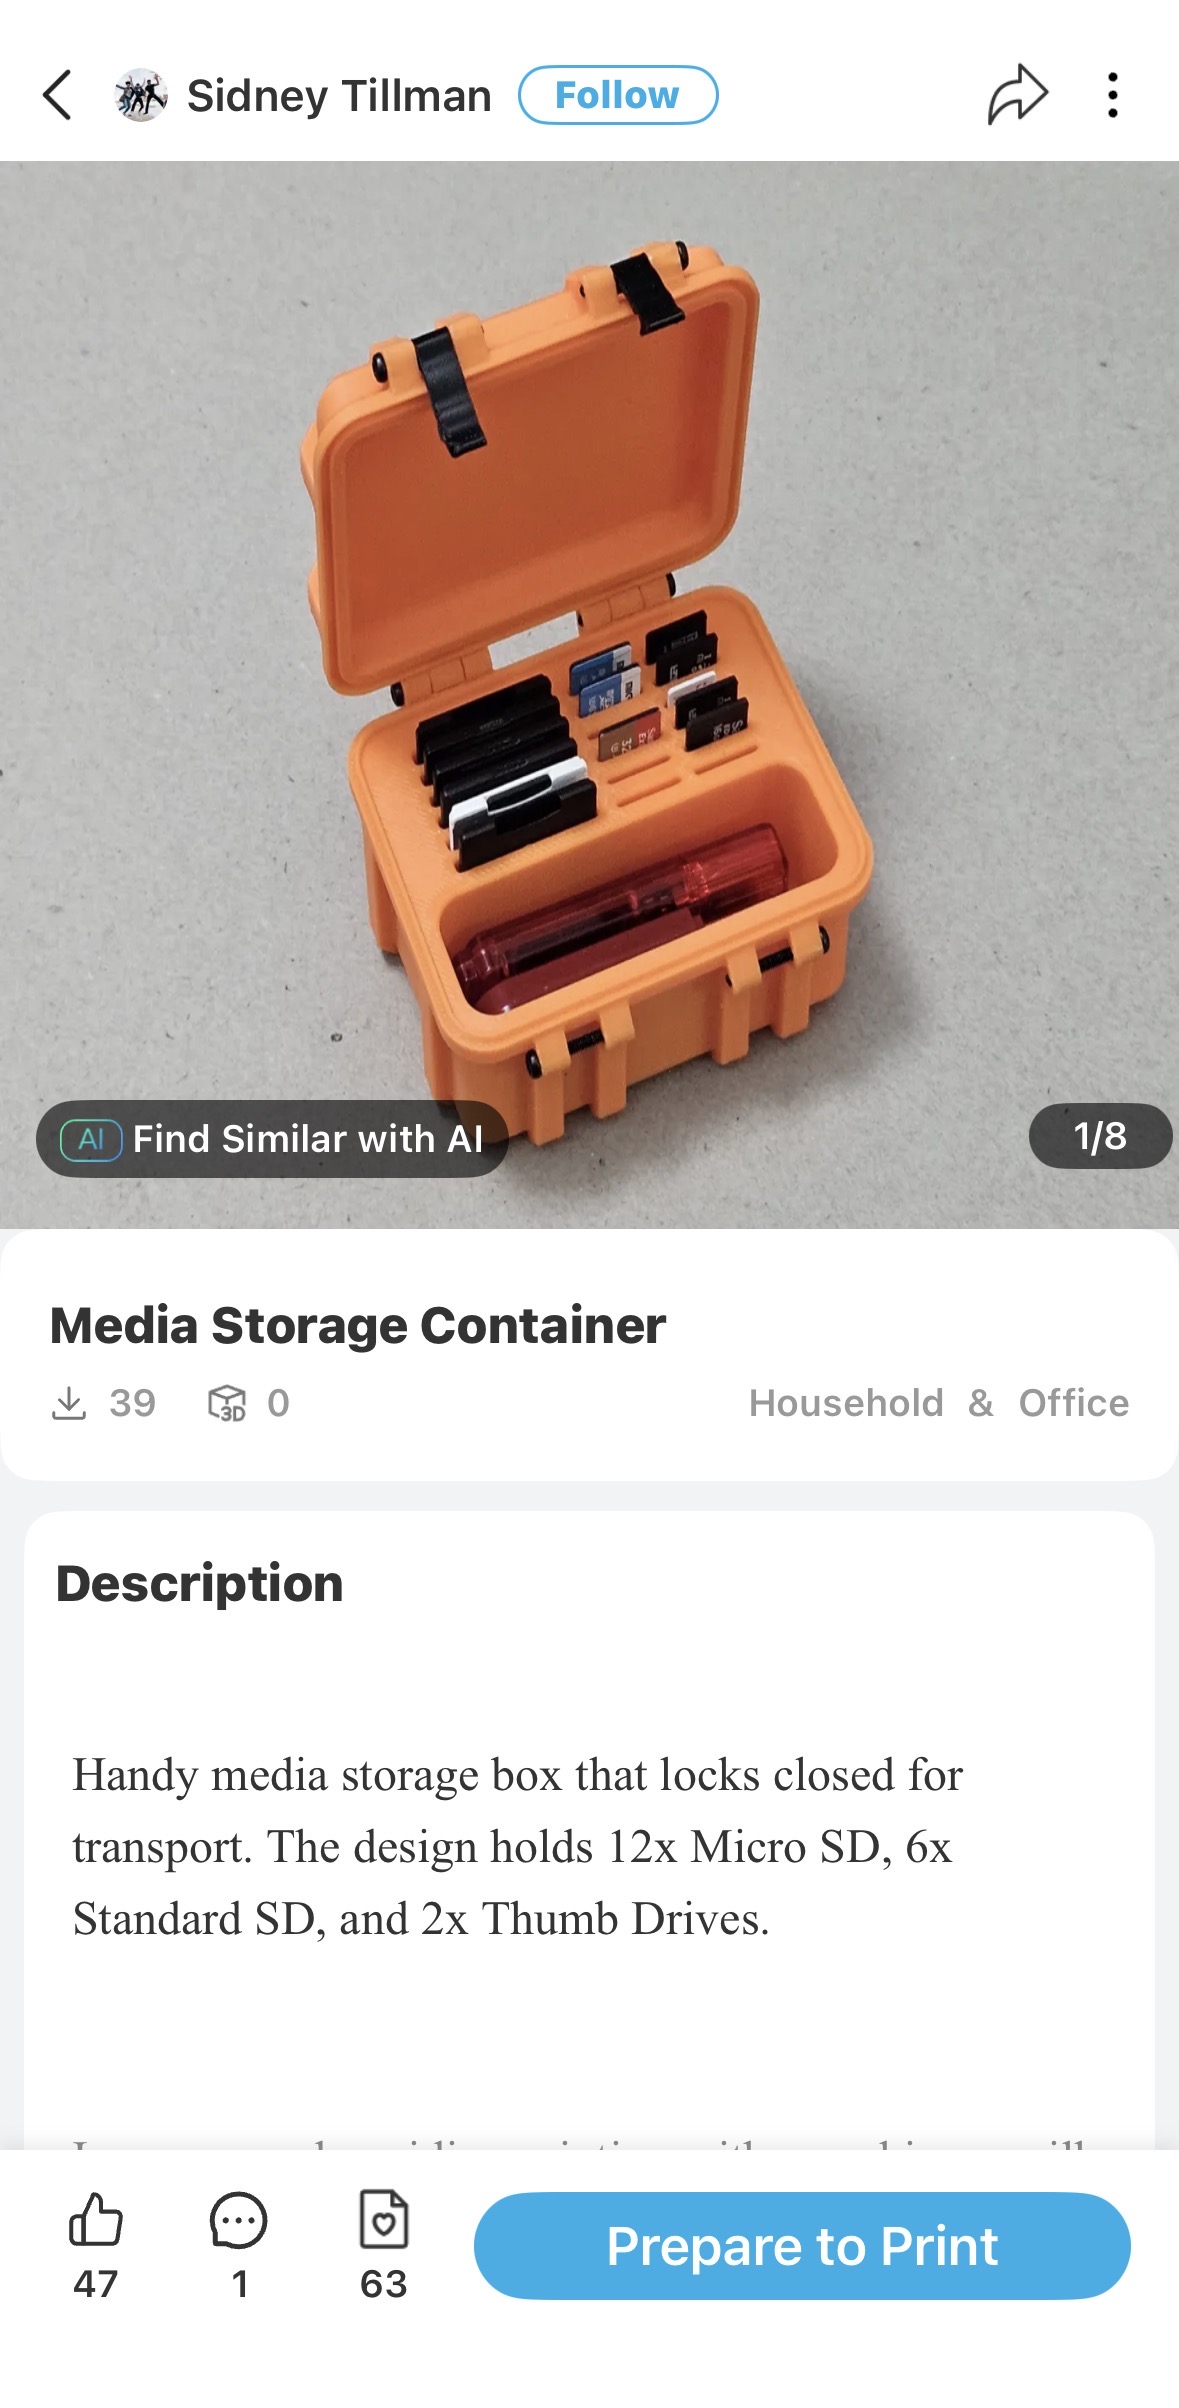
Step 1: Browse or search for models on the home page. After entering the model detail page, tap the "Prepare to Print" button at the bottom.
Alternatively, import a local STL file to enter the prepare-to-print page. -
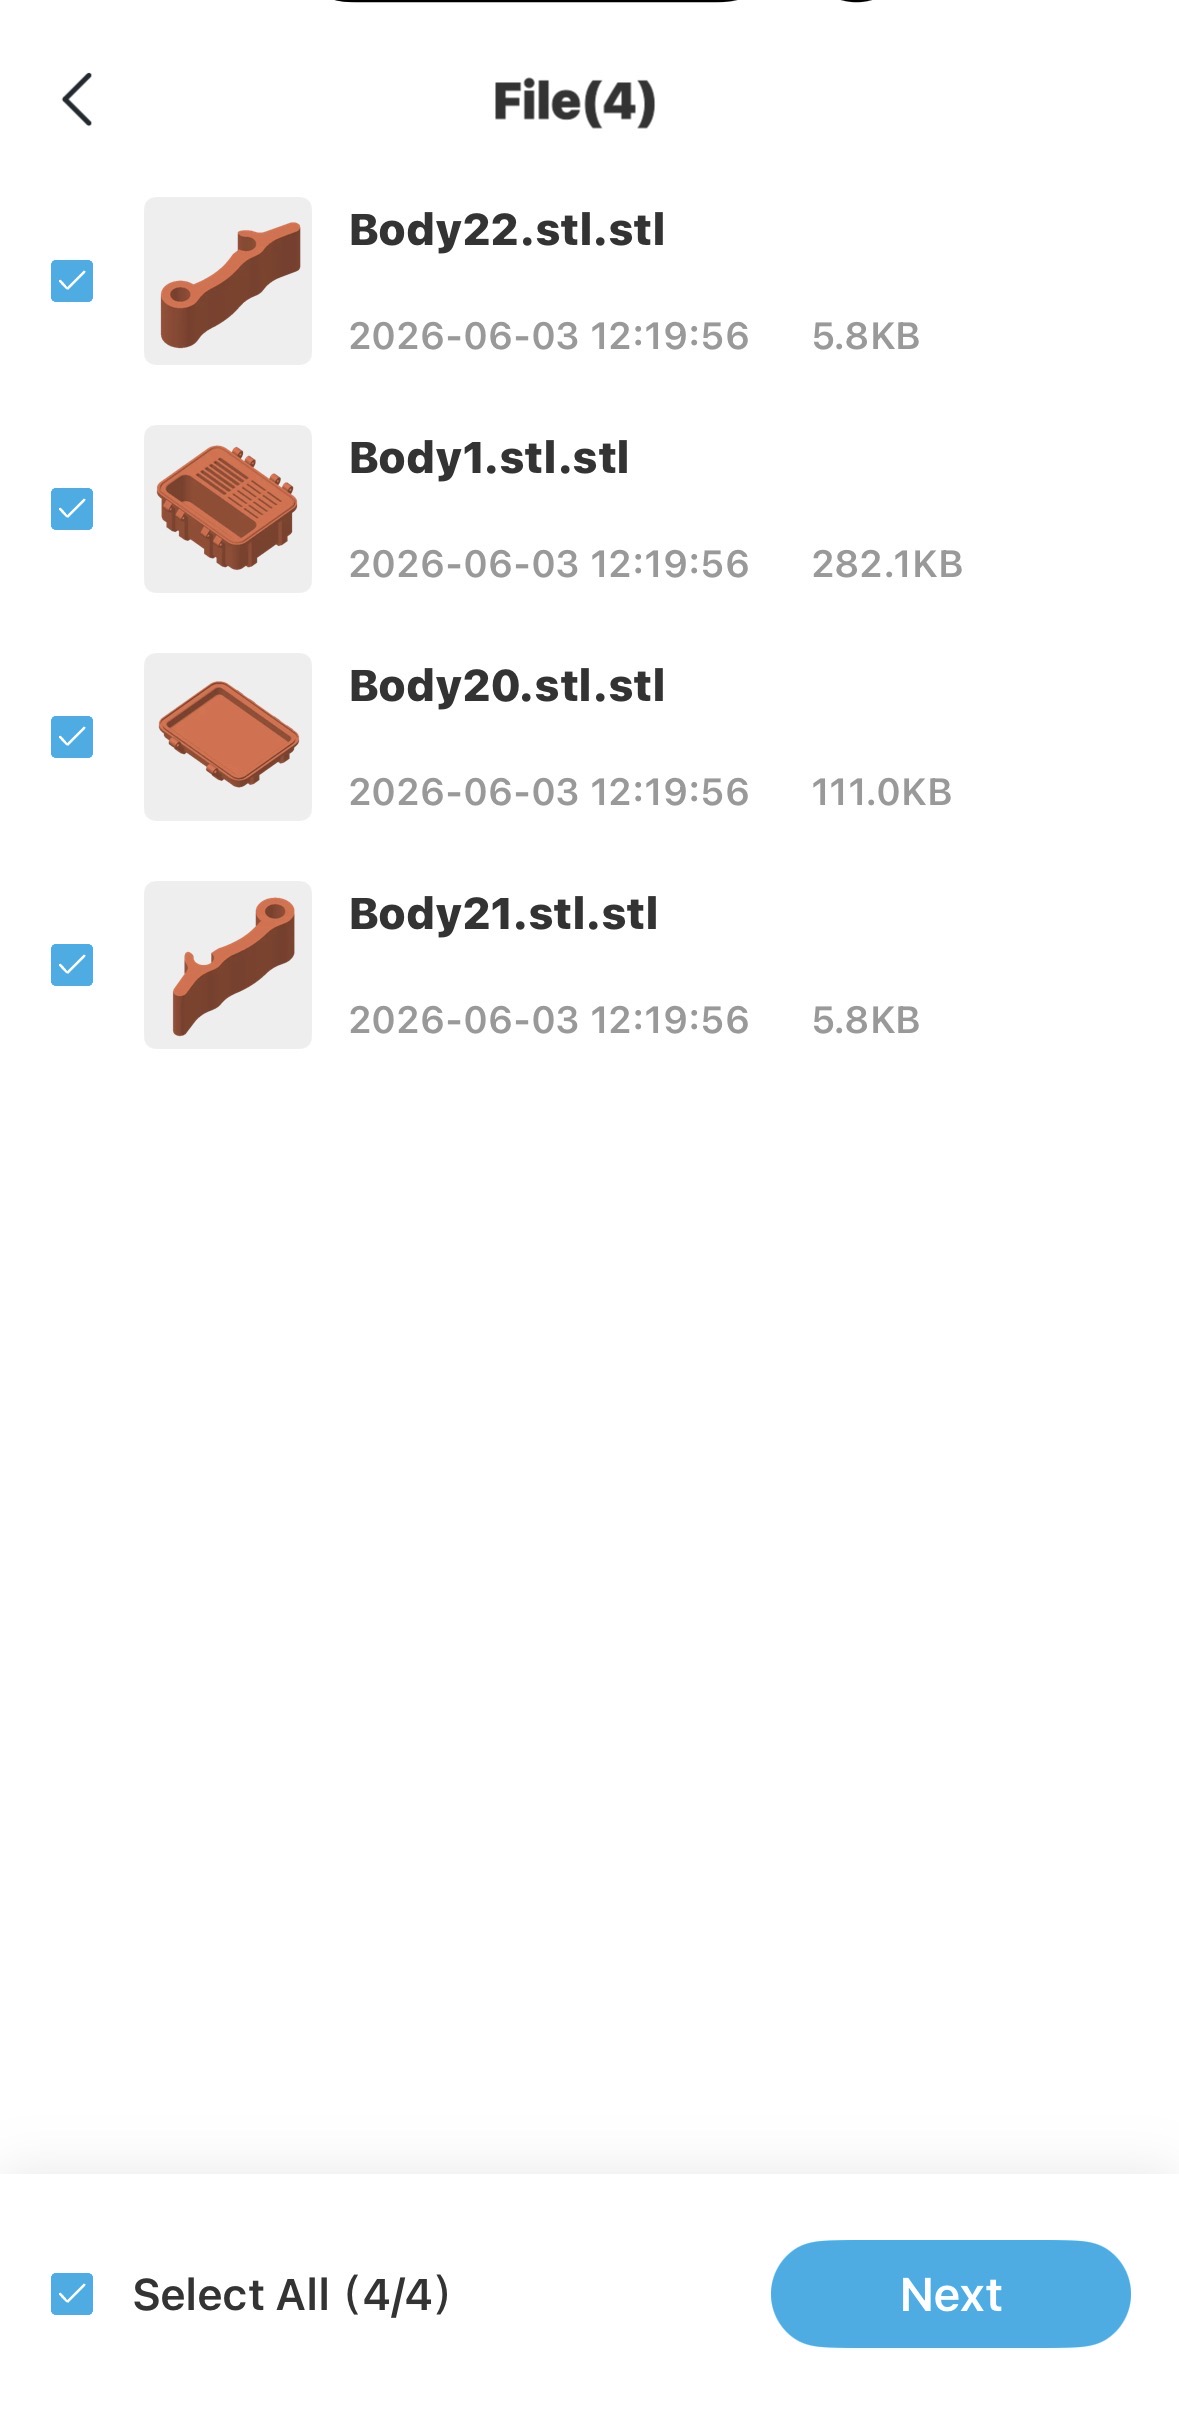
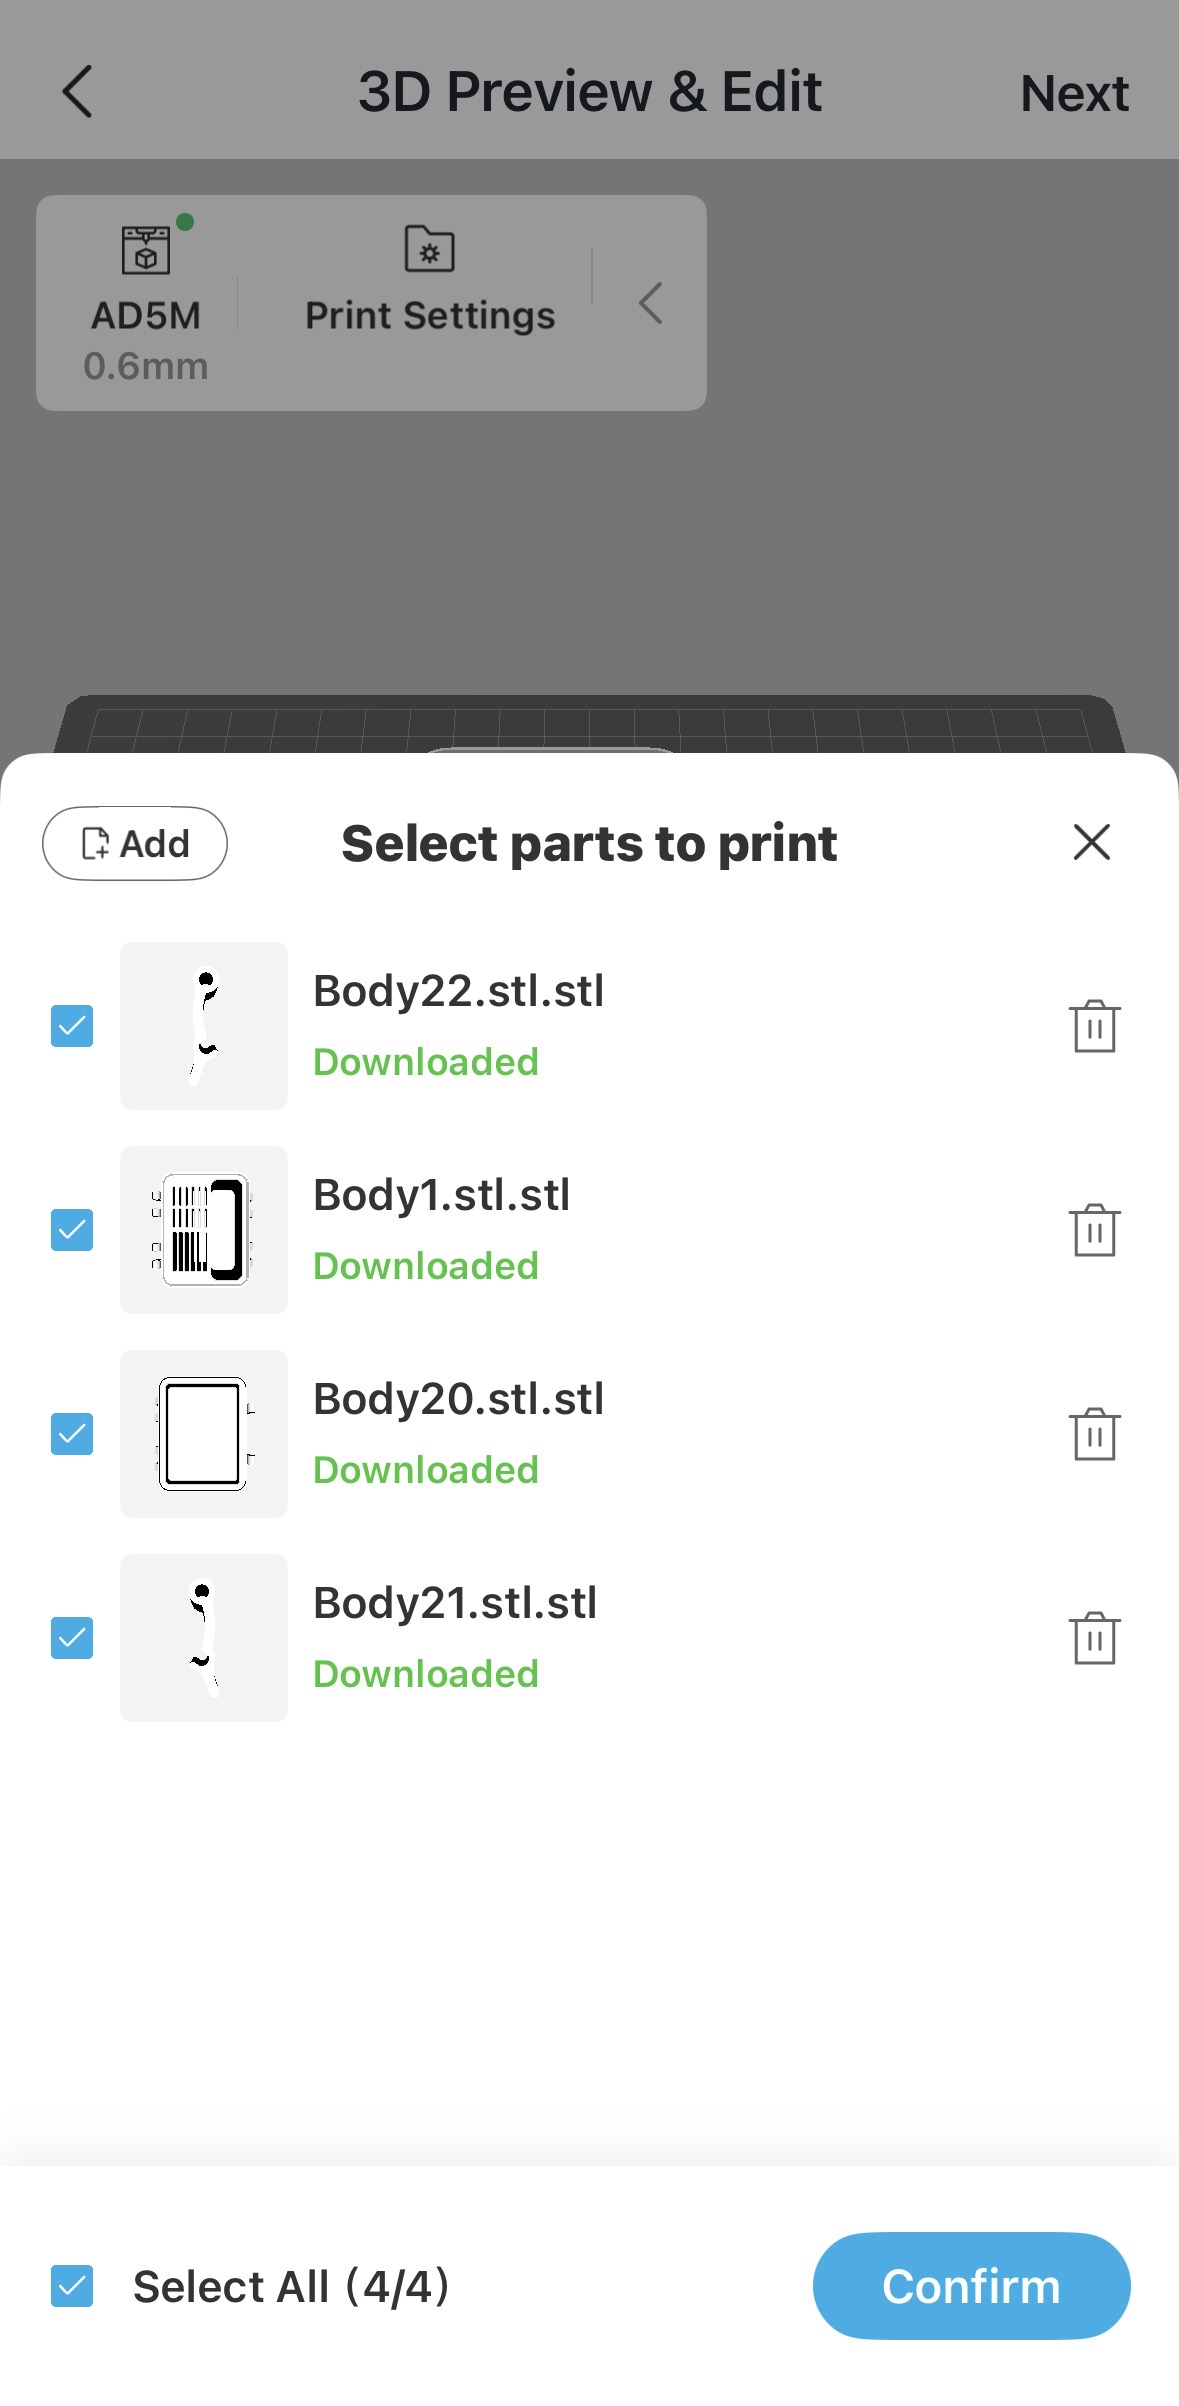
Step 2: Check the files to be printed.
If the model contains multiple STL files, the system will enter the file selection page. Check the files you want to print; unchecked files will be skipped during printing. The current selection count is displayed at the bottom, and you can also tap "Select All" to select all files at once. -
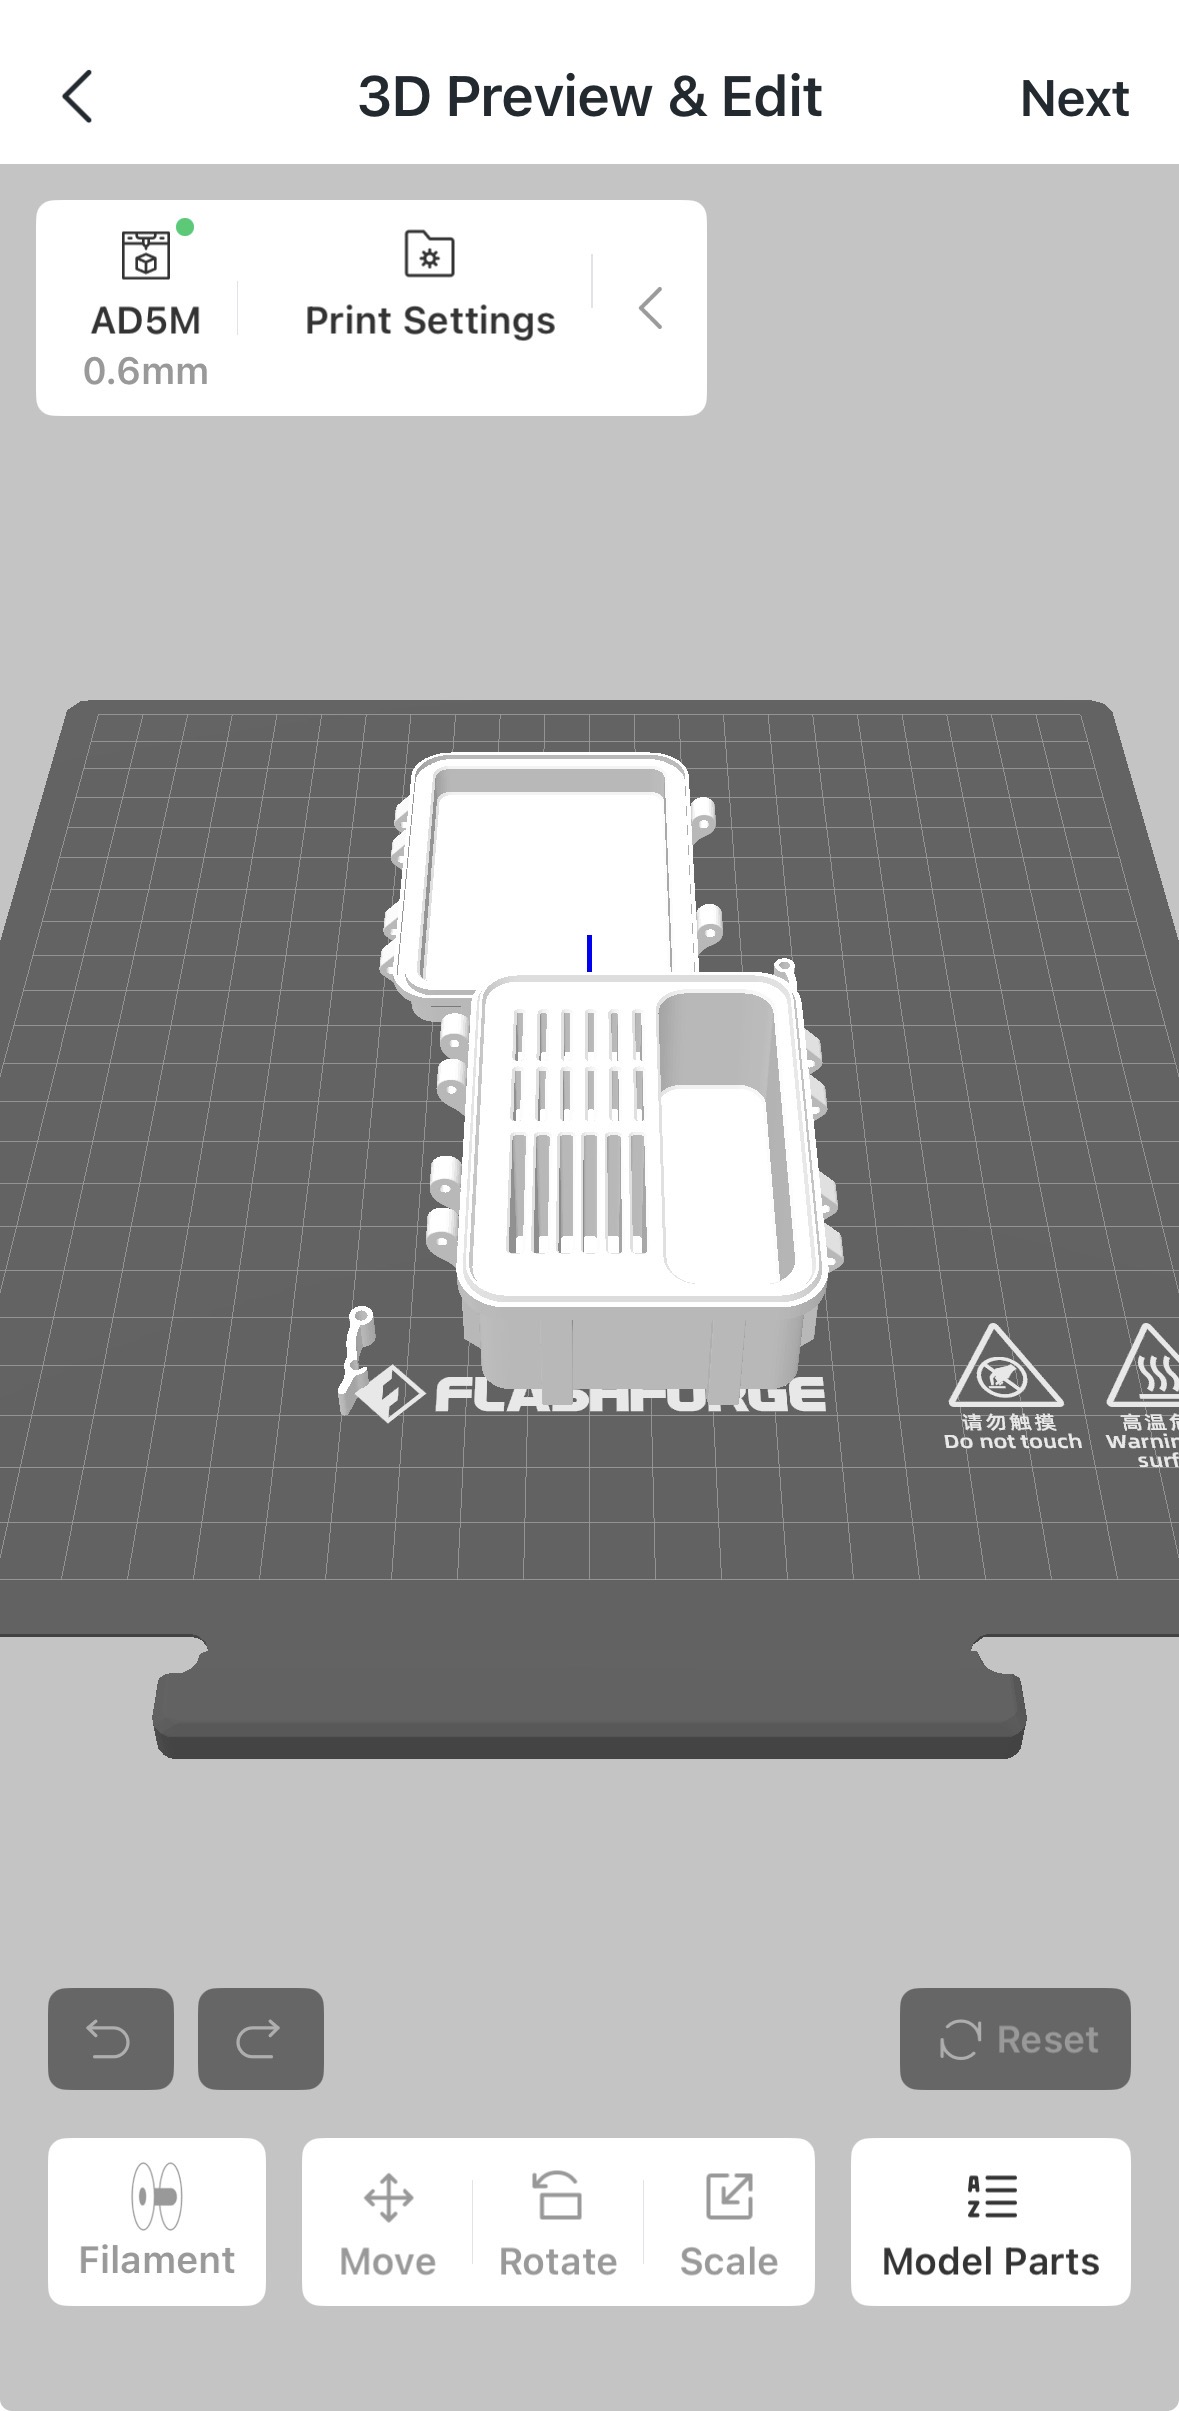
Step 3: 3D Preview and Editing
The selected parts will be loaded into the 3D preview page, where you can move, rotate, scale, and perform other operations. To adjust the part list, tap the "Model Parts" button at the bottom to reselect. -
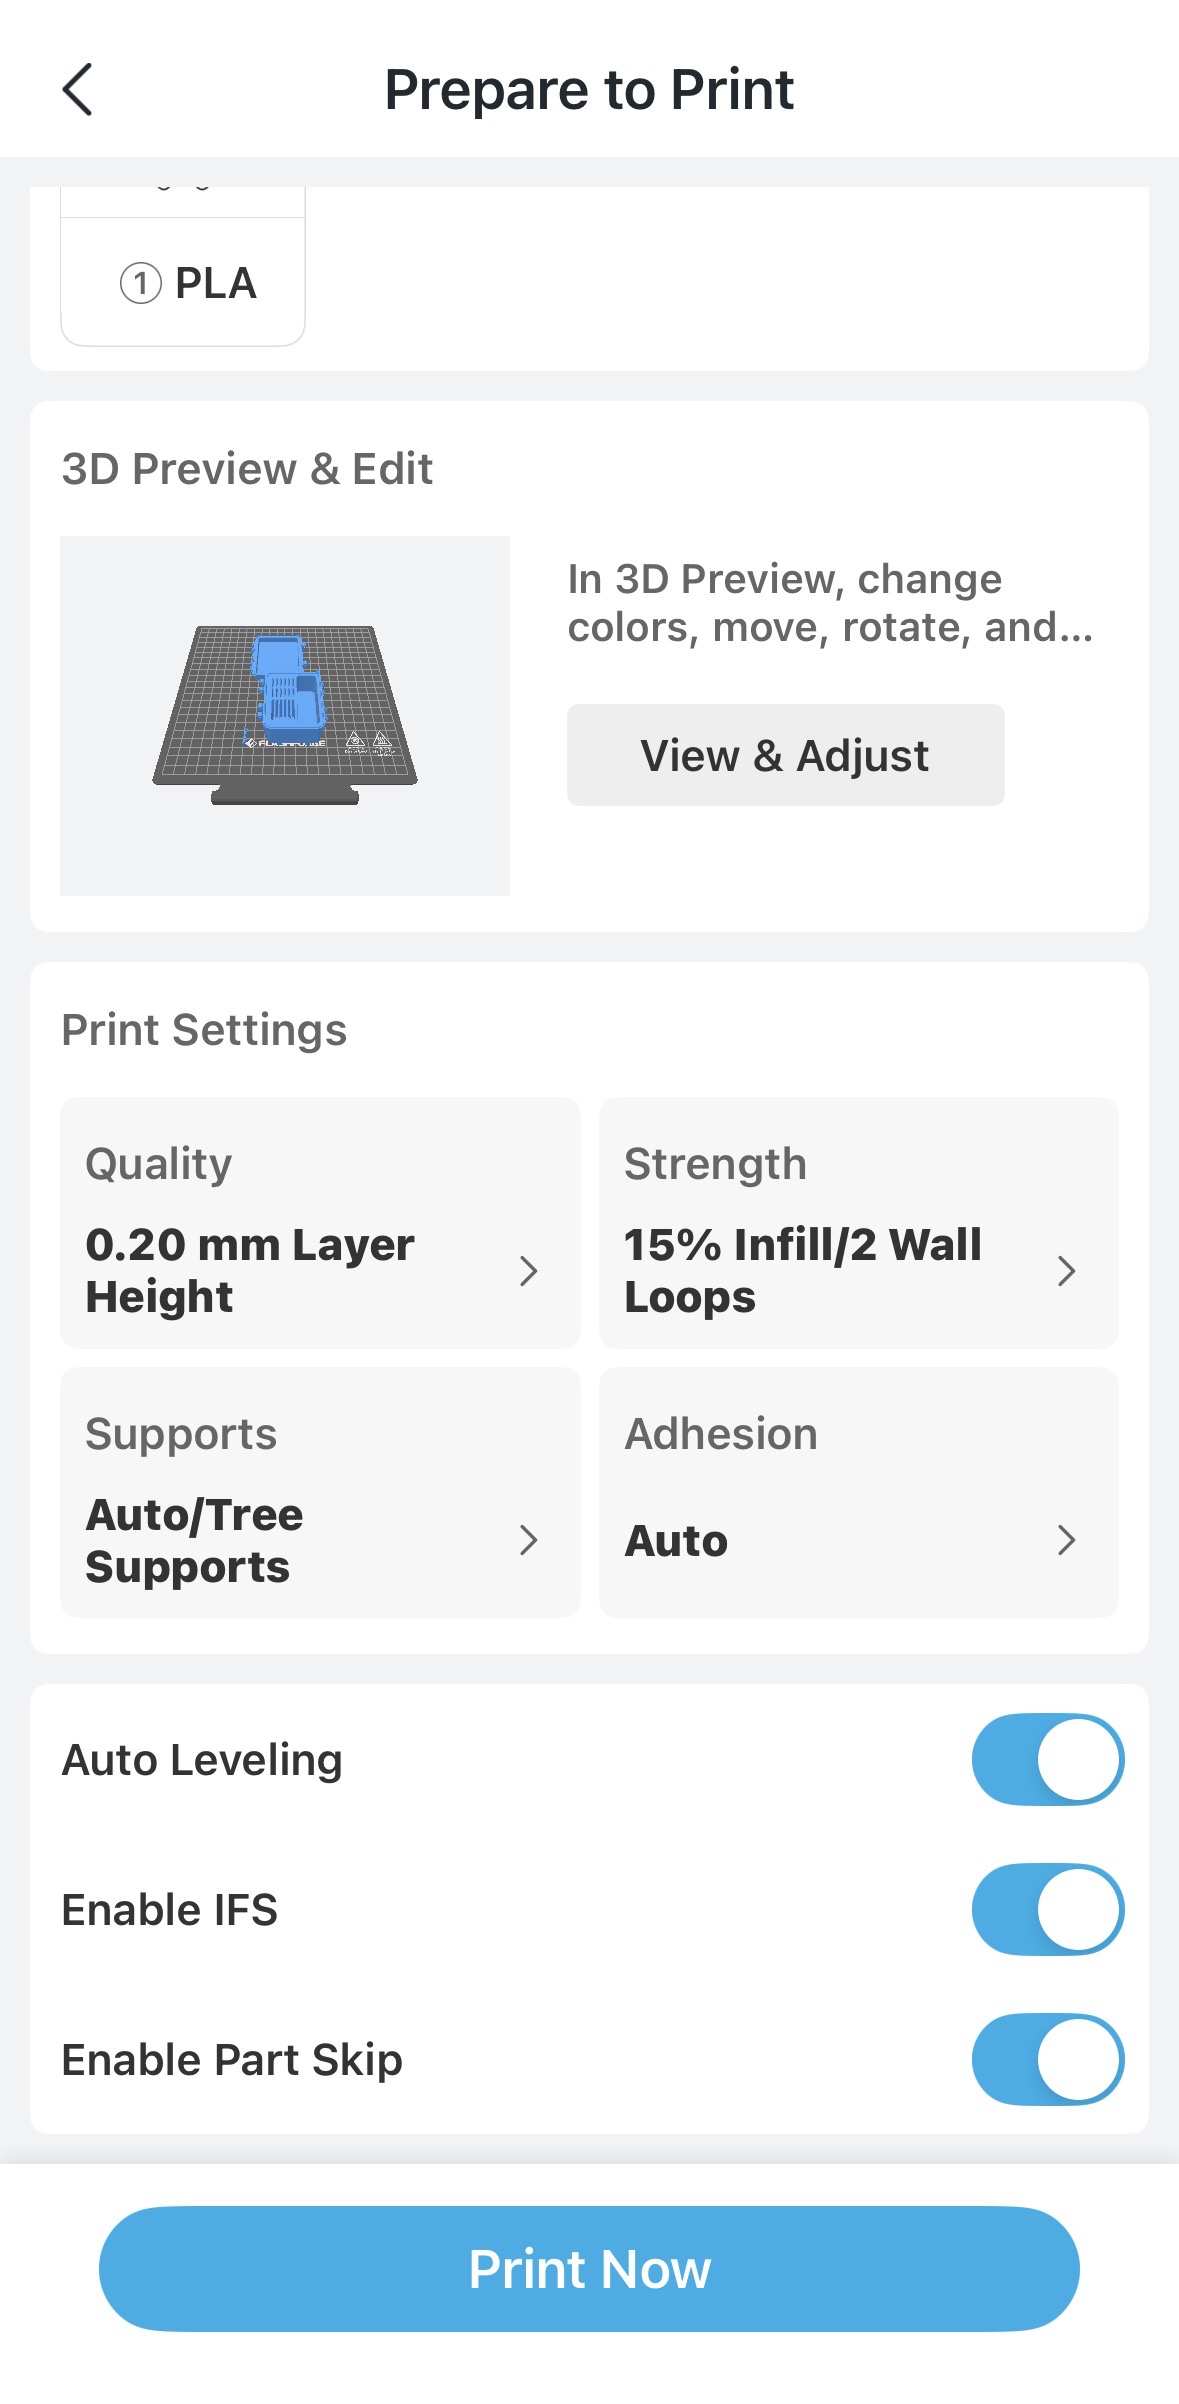
Step 4: Select Printer and Confirm Settings
Tap "Next" to select the target printer. In the print settings area on the prepare-to-print page, a "Support Part Skip" toggle is provided at the bottom. Enable it to use the Part Skip feature.
 |
 |
 |
| Tap model / Open local STL file | Tap "Prepare to Print" | Tap "Next" |
 |
 |
 |
| Tap Next | Select device AD5X | Click "Enable Part Skip" |
This feature currently only supports AD5X on the mobile app. More printer models will be supported in the future.