¶ What is Flash Studio Desktop?
Flash Studio Desktop is a slicing software programme developed on the basis of Orca Slicer, specifically tailored for the Adventurer 5M series and similar models. With its extensive range of features, convenient connectivity, optimised slicing algorithms and user-friendly interface, it delivers a seamless printing experience.
¶ System Requirements
- Windows 10 and later versions
- macOS version 10.15 and later
- Intel® Core 2 or AMD Athlon® 64 processor; 2 GHz or faster processor
- RAM requirements: 8GB or more
- Disk space requirements: 80GB or more
¶ Download and Installation
1. Doenload Flash Studio Desktop
2.Follow the steps below to install Orca-Flashforge.
¶ Setup Wizard
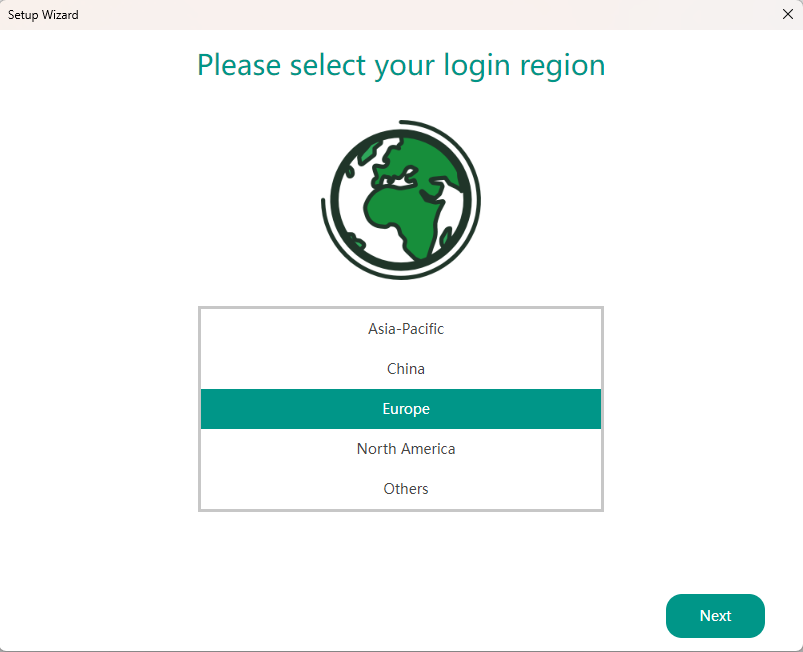
¶ 1. Select a login region
Please select your region. For example: China.
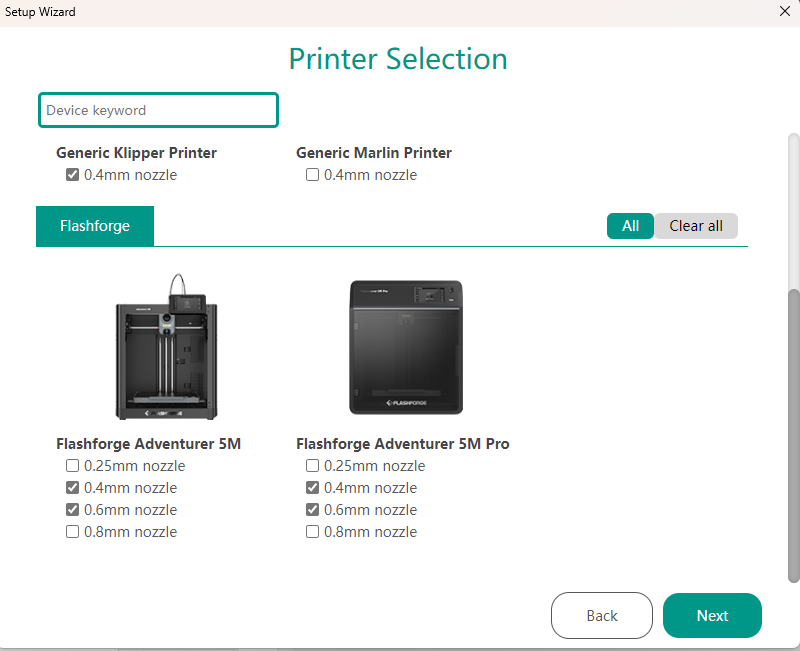
¶ 2. Select a printer
Select the printer(s) or printhead(s) you wish to display from the operations menu. You may select any one or all of the available options. If you only wish to select one for now and intend to change the printhead size later, you can do so via the menu at a later date.
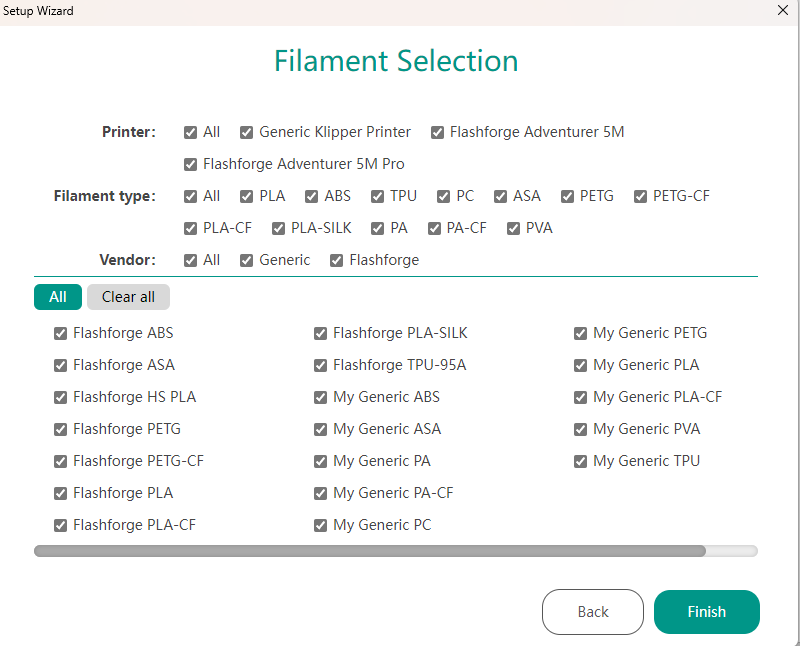
¶ 3. Select Filament
Choose the filaments you want to see listed in the filament preset list. You can select as many filaments as possible.
¶ Connection and Transmission
There are two connection modes: external network mode and local area network mode;
1. External network mode: Files are transferred to the device via a cloud server;
2. Local Area Network (LAN) mode: Files are transferred via the local area network, thereby bypassing the cloud server.
¶ Connect via WAN mode
The device and the computer must be connected to the same network.
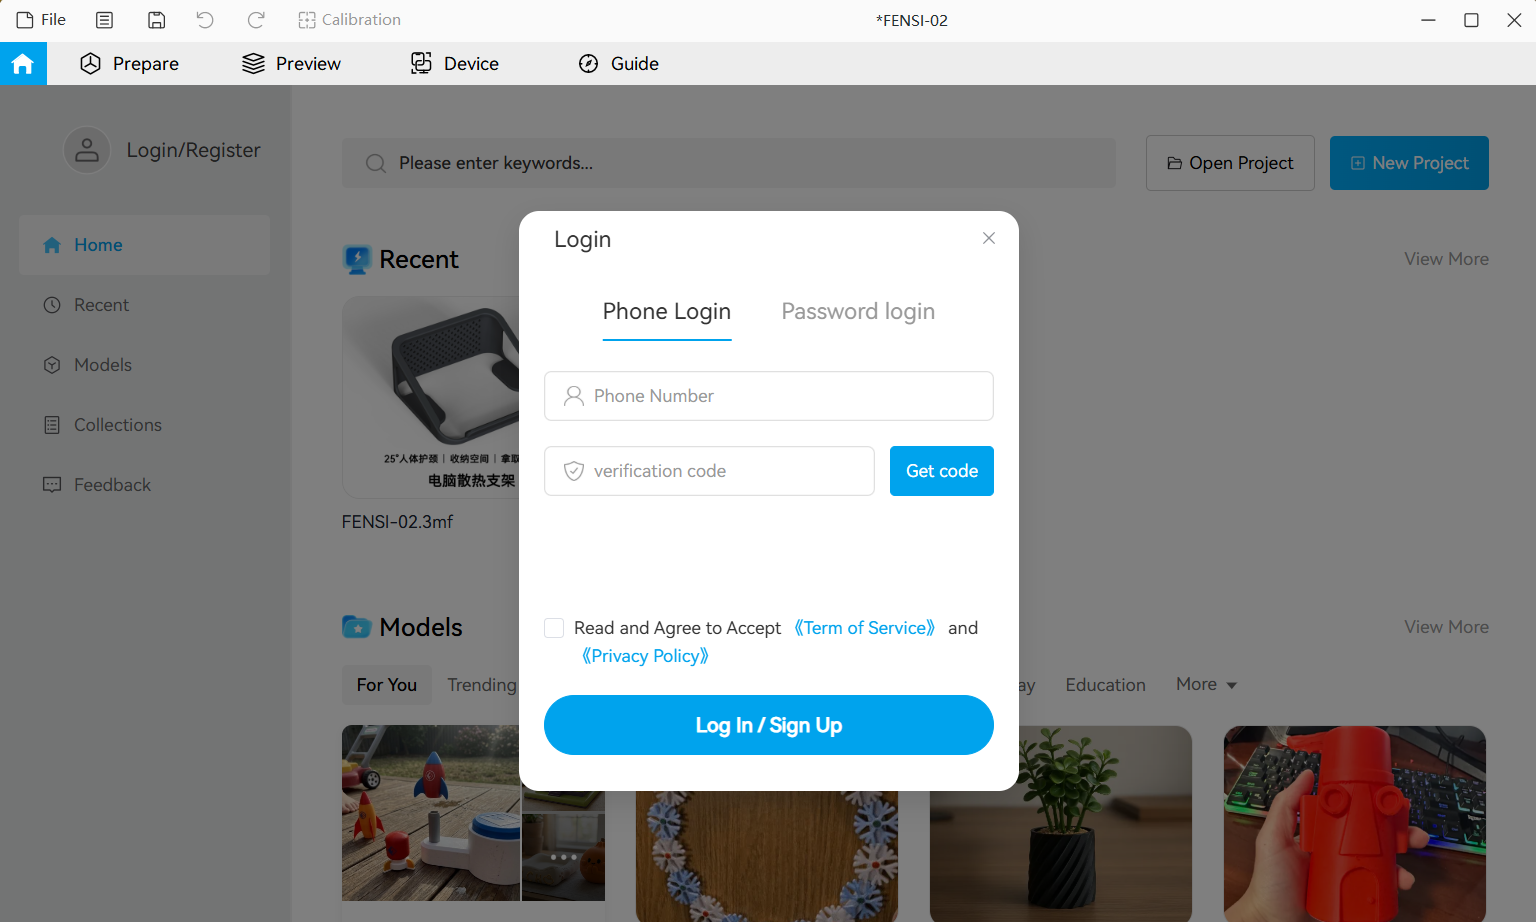
¶ 1. Account Login
Before logging into the printer on the same network, you need to log in to your Flashforge account. If you don't have an account, please click [Register] to sign up.
¶ 2. Connect the printer
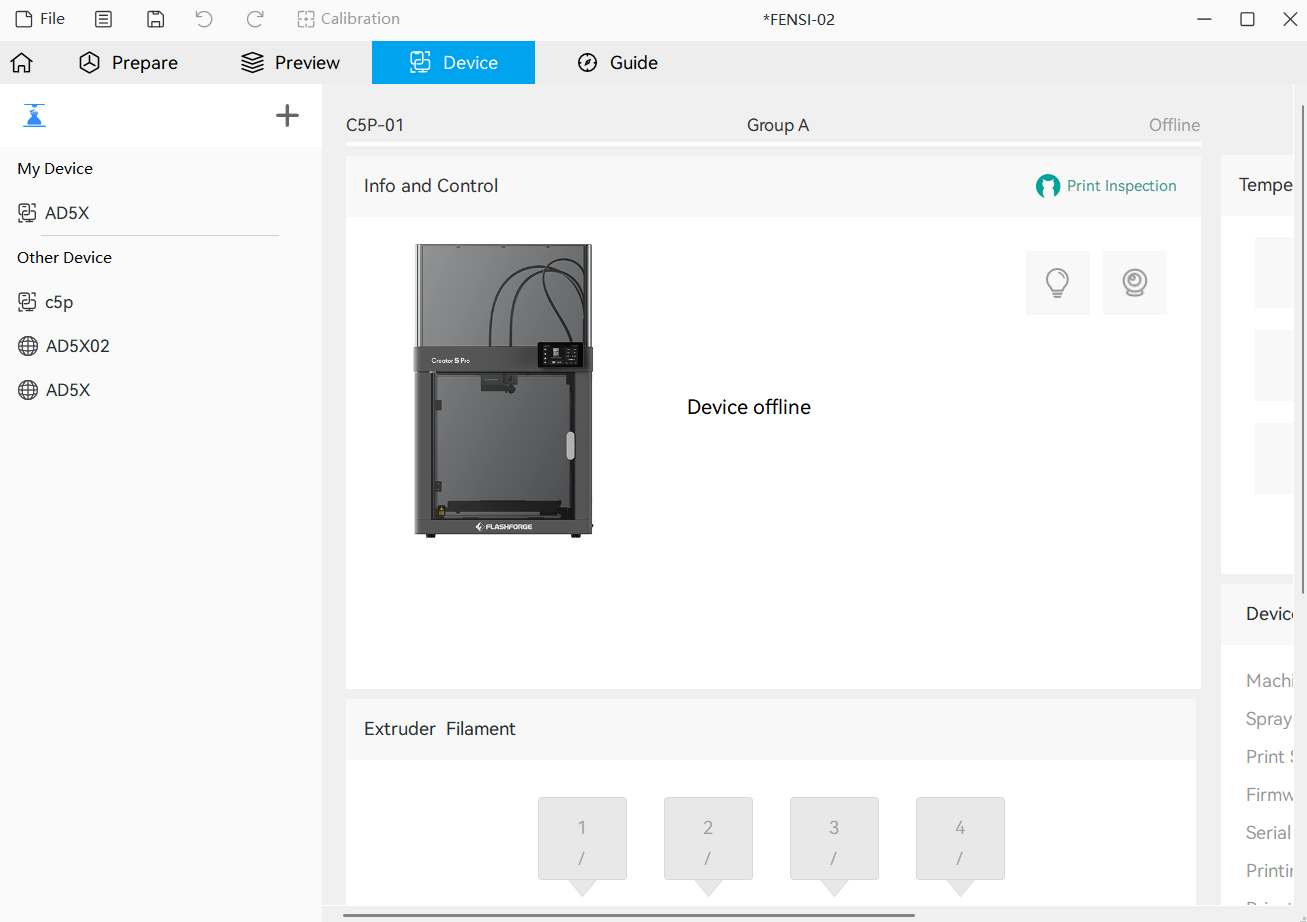
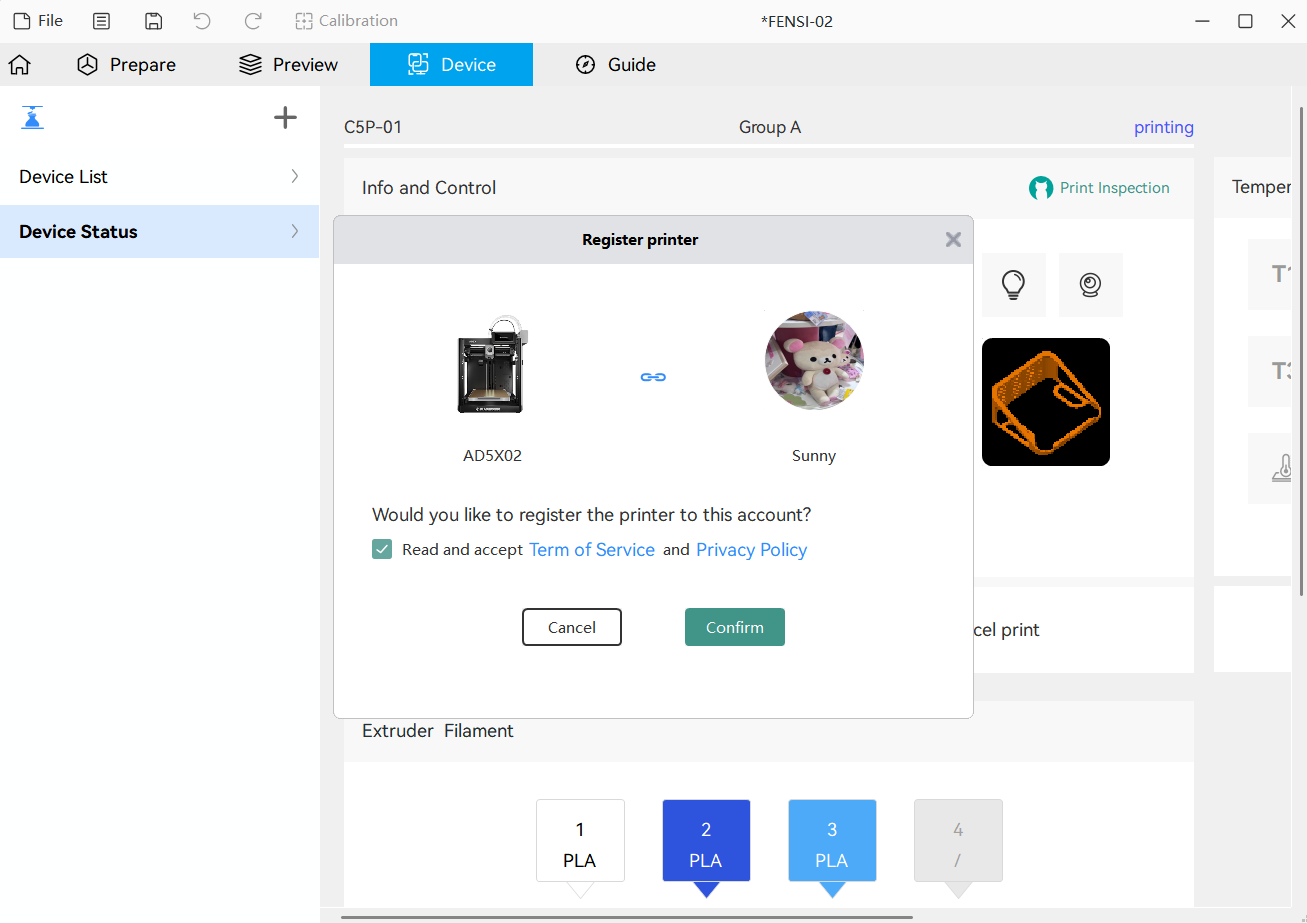
On the Device page,click [+] on the device page to open the search list and select the device to connect.
¶ 3. Unbind
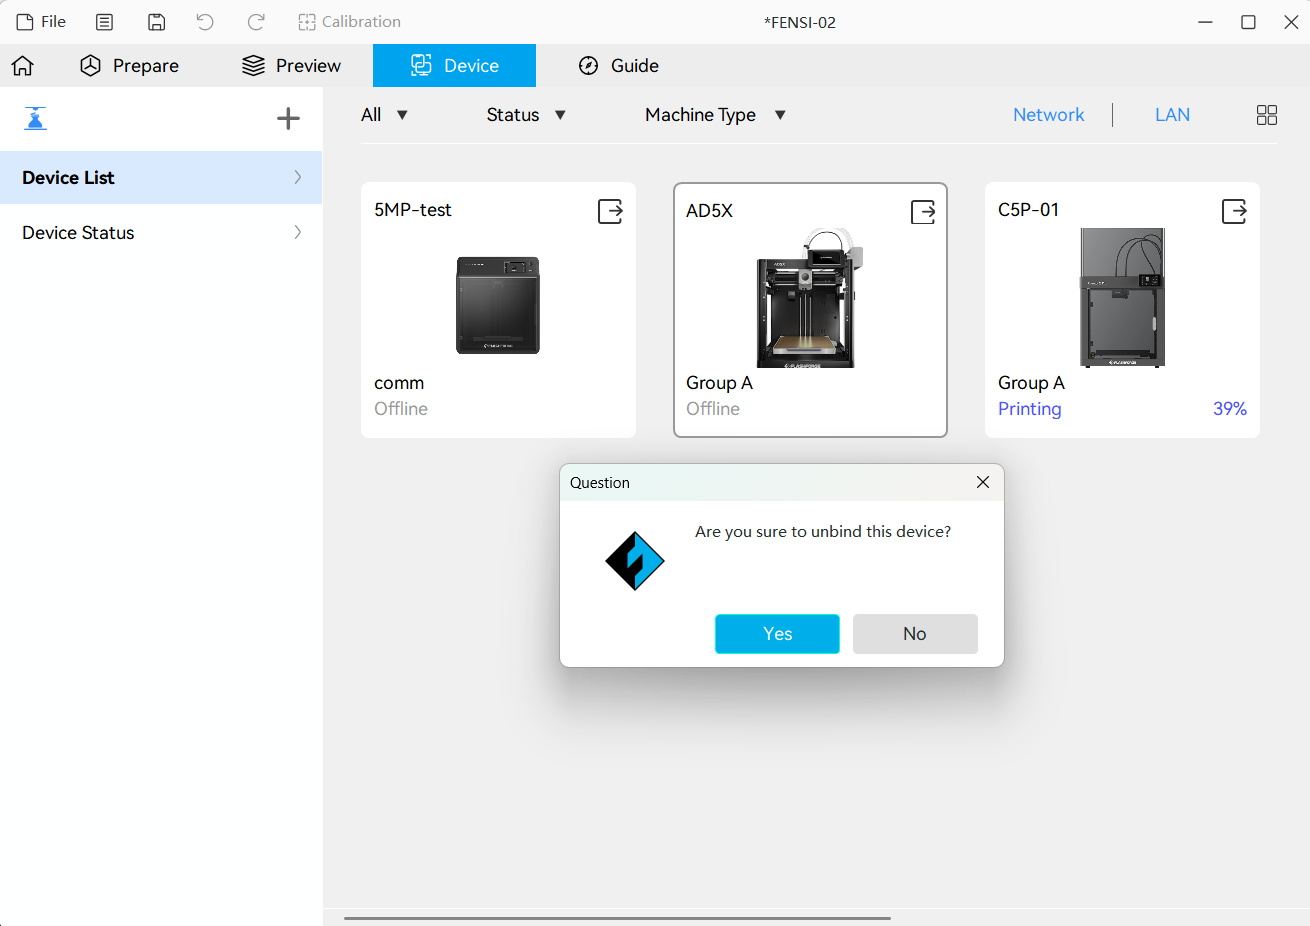
Click the ‘Unbind’ button in the top right-hand corner of the device list, then click "YES" to unbind this printer.
¶ Connect via LAN Only Mode
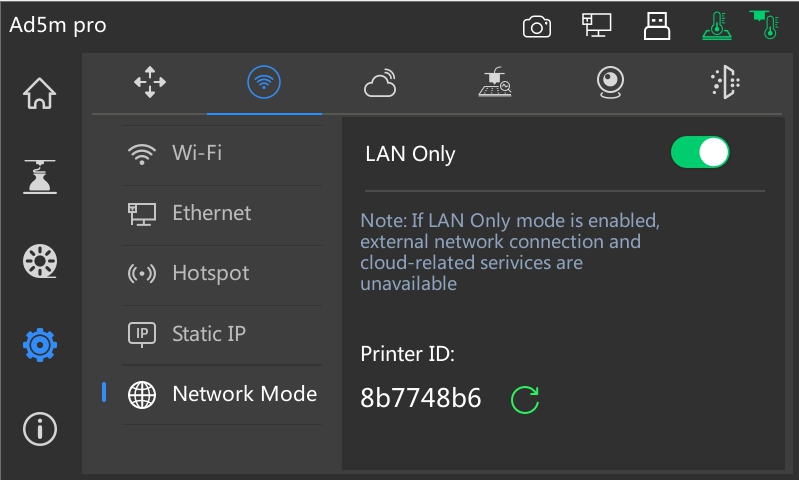
¶ 1. In the slicing software, click the ‘+’ button on the Devices page to locate the relevant printer.
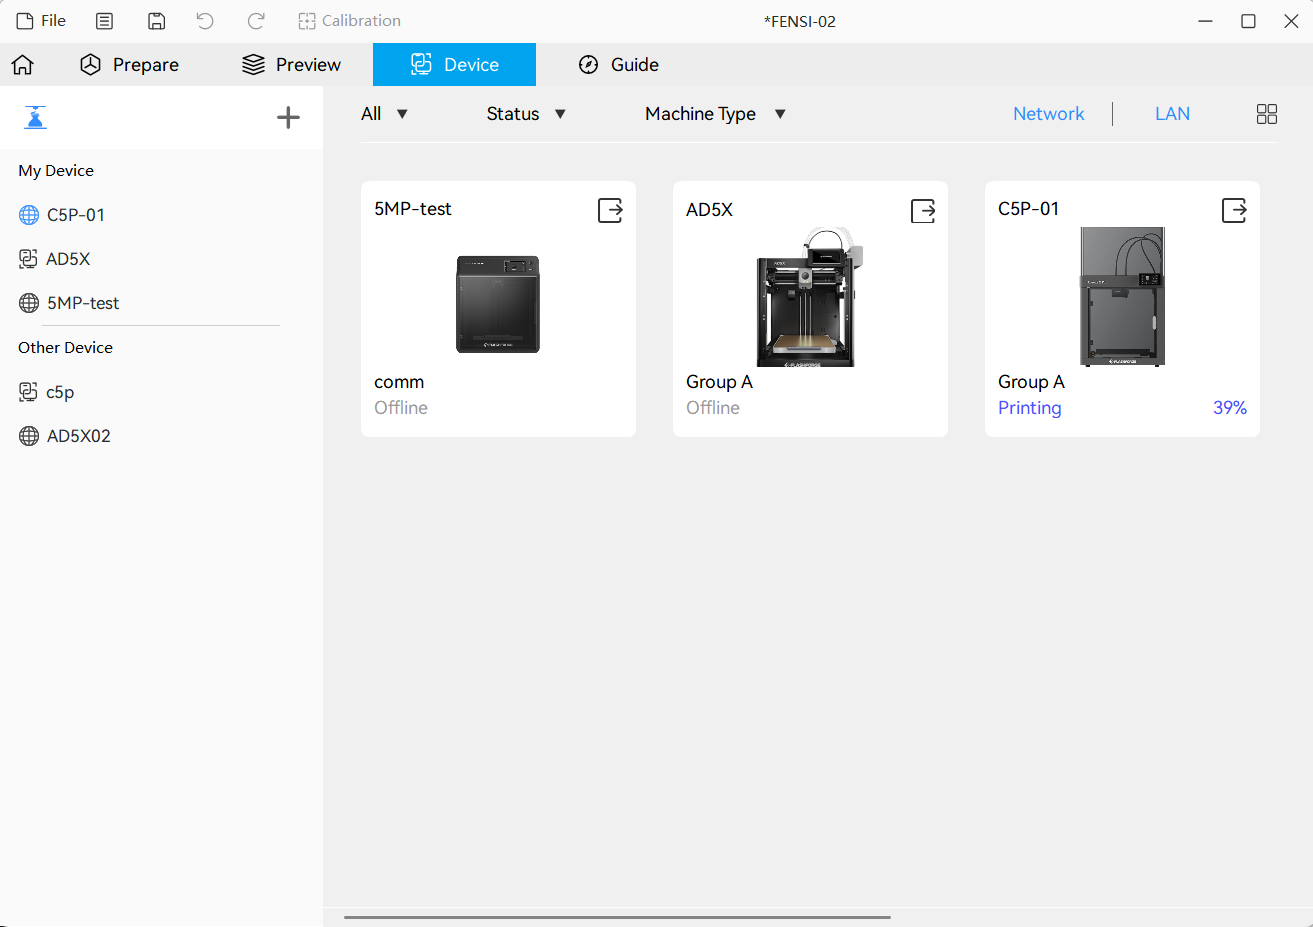
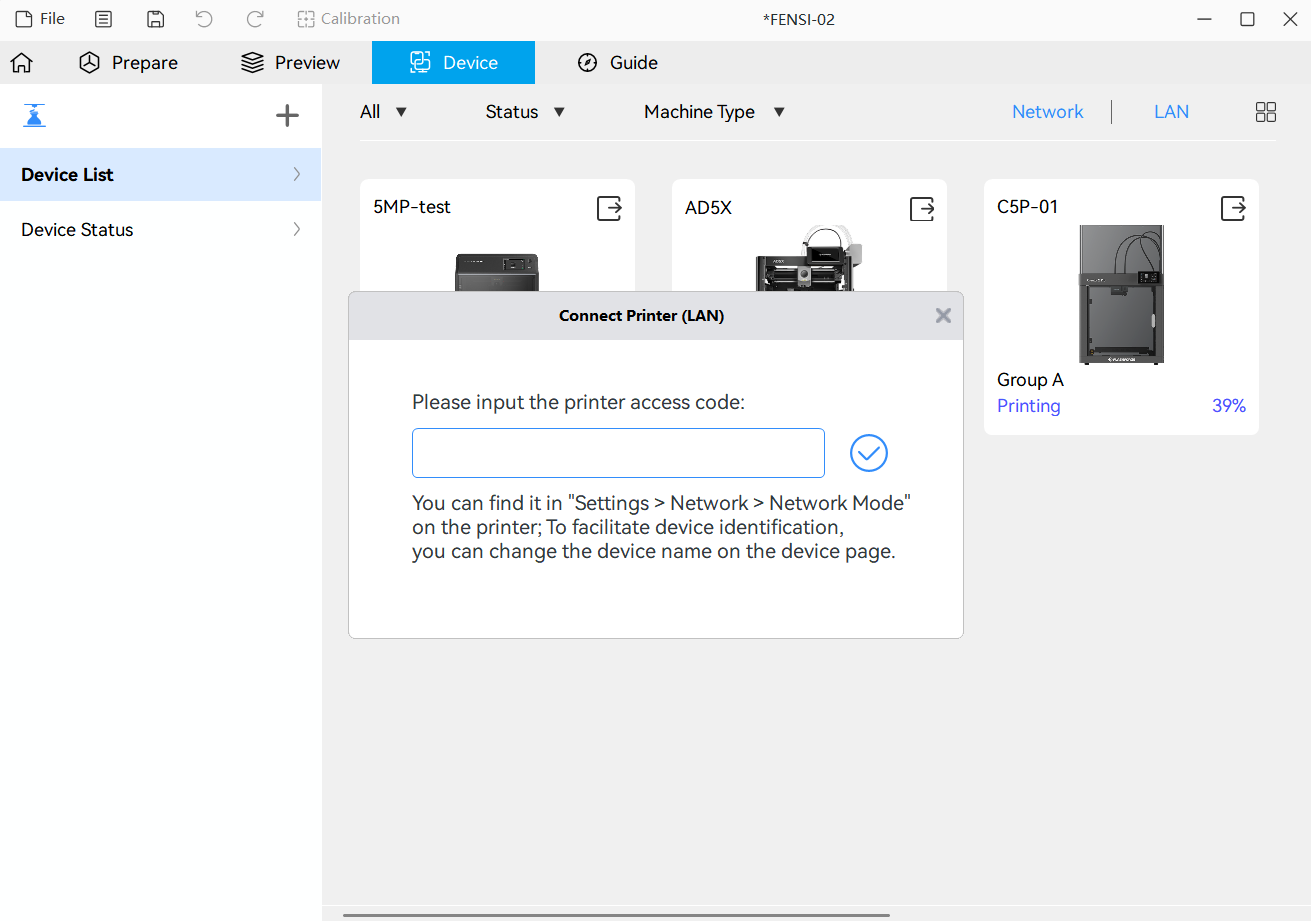
¶ 2. Select the printer and enter the Printer ID displayed on the printer.
¶ Remote control
Once the device is connected, remote control is available via Orca-Flashforge. The device menu contains device list and device status.
¶ Device List
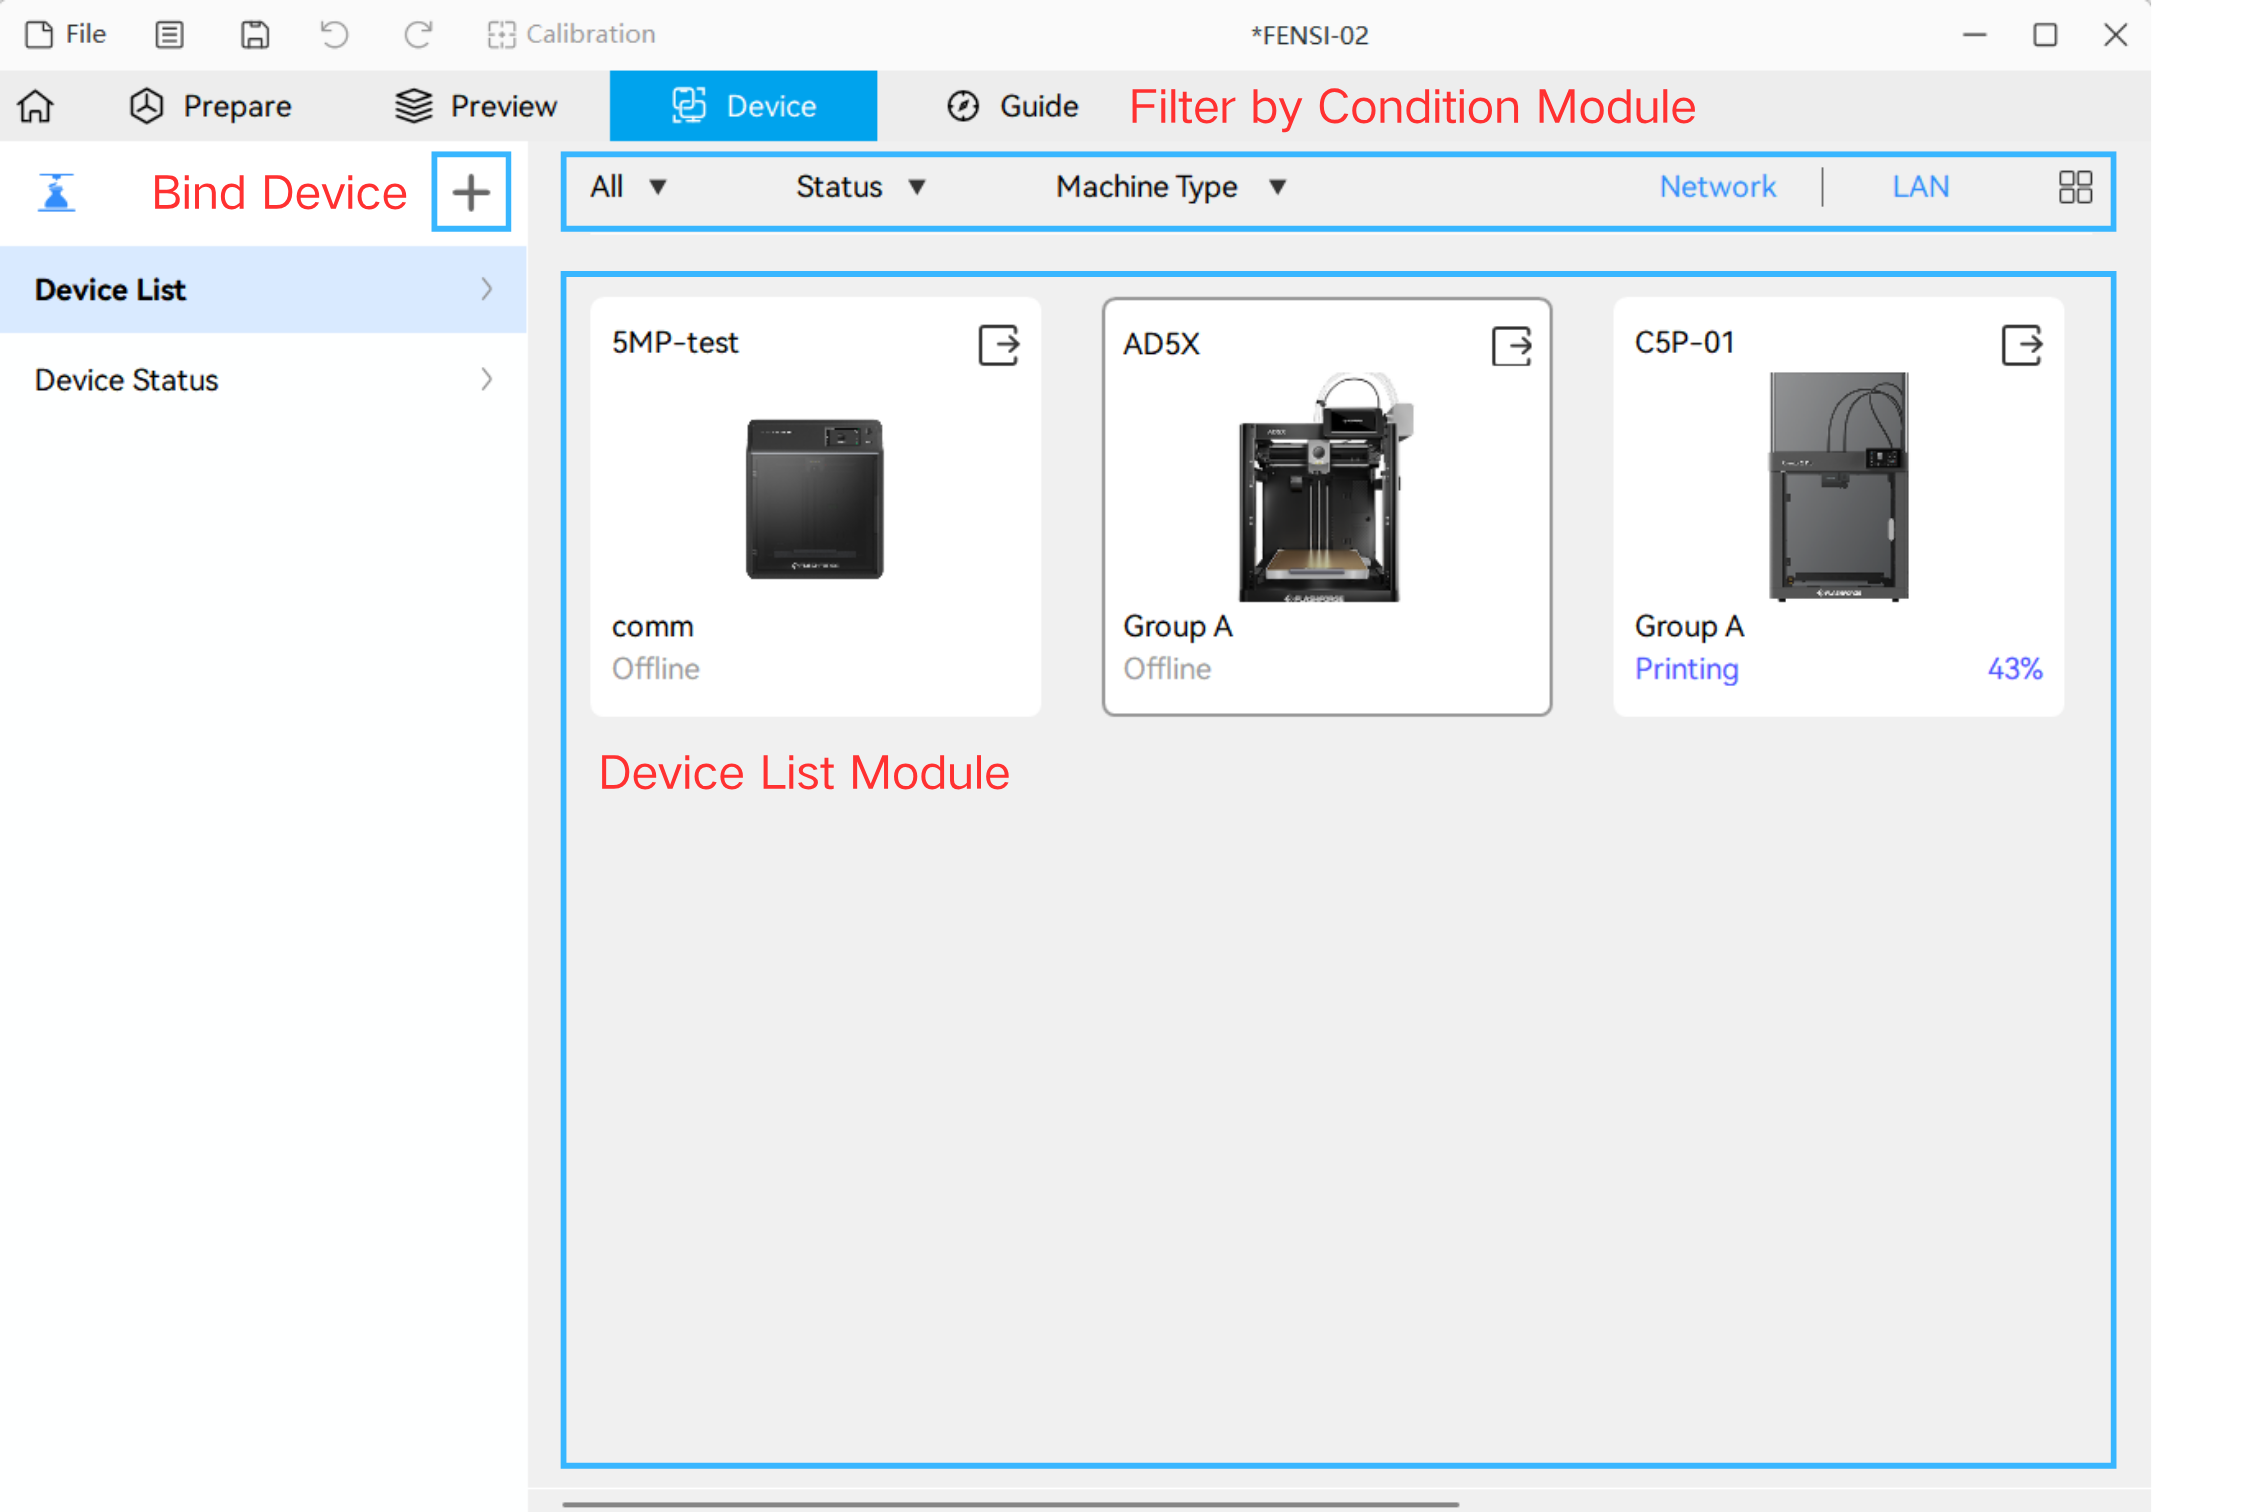
Device List Module::You can view all the devices bound to your account and their current statuses. Select a device to view detailed status information on the device status page.
Filter by Condition Module: :You can filter devices based on different conditions, such as group, device status, device type, network connection method.
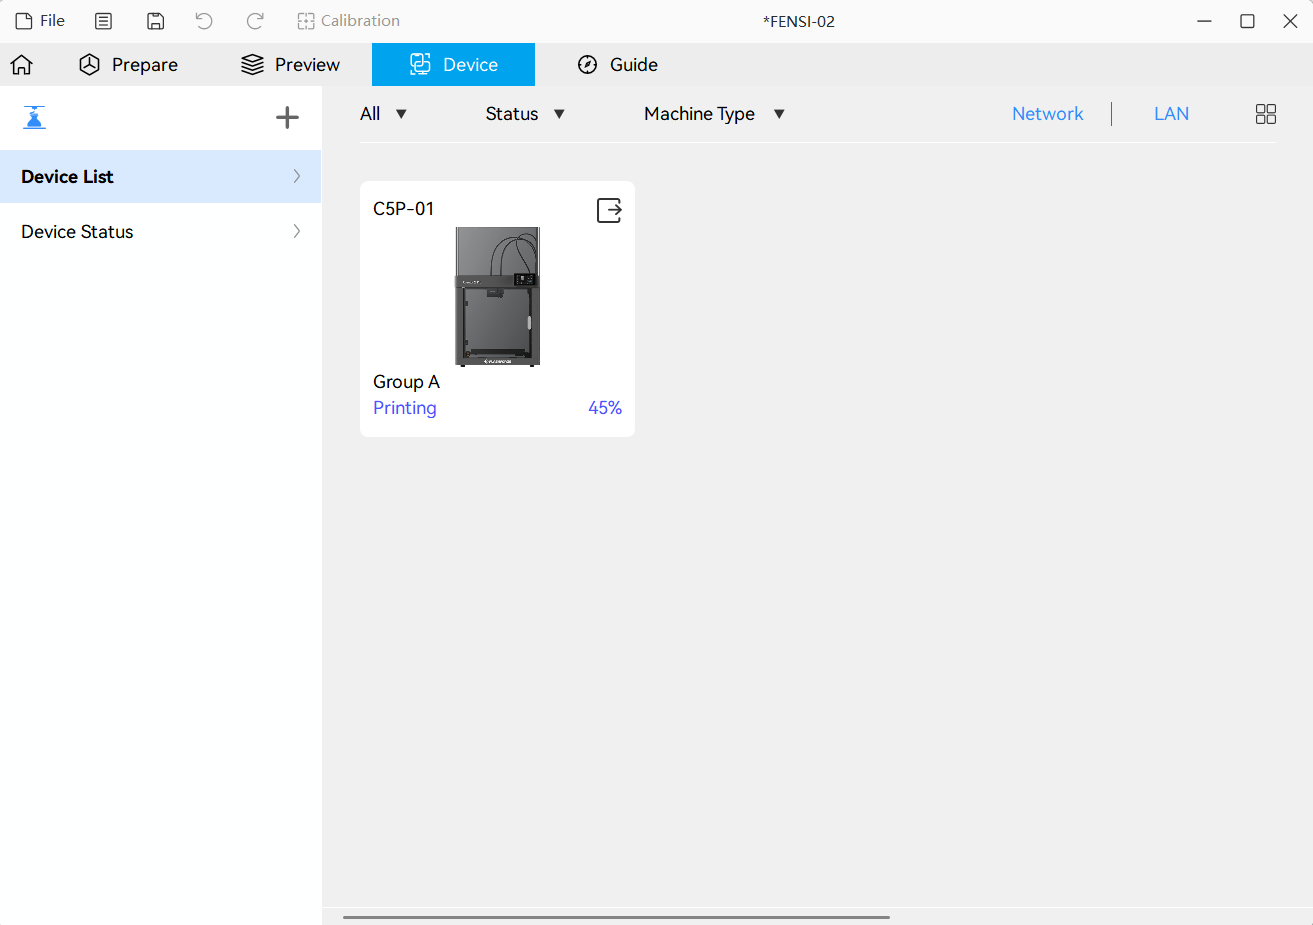
Bind Device:Click [+] to display all devices on the same network as the PC (as shown below). Select a device to bind it to your account. (If the device is already bound, it cannot be bound again.)
¶ Device Status
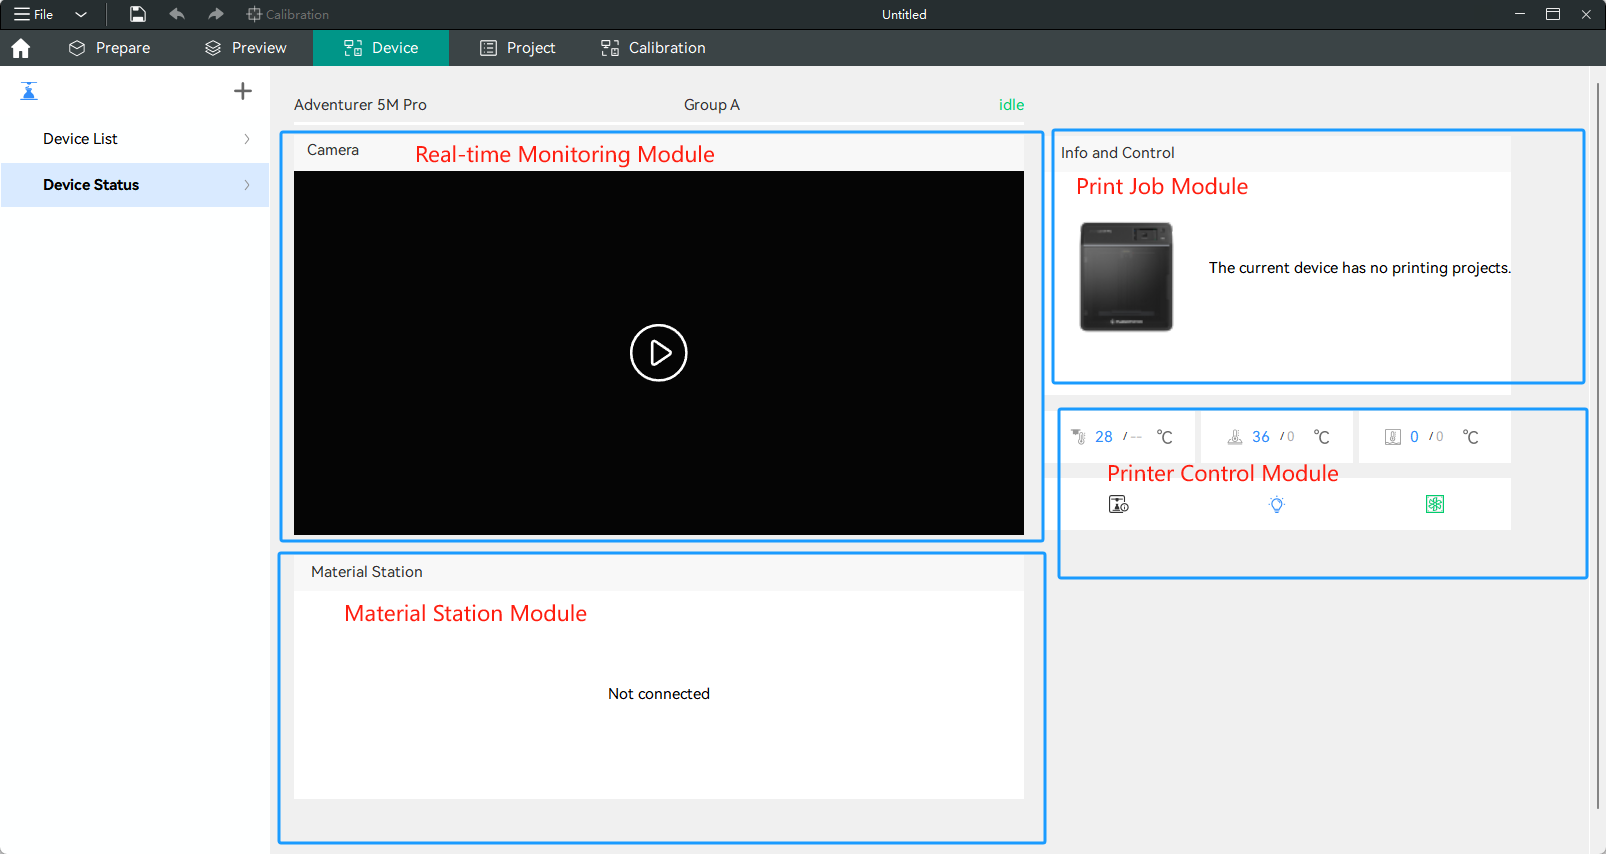
Real-time monitoring mode
Click the play button to view the live video feed, whether the printer is idle or printing. Please note: this feature requires a printer equipped with a camera. The Explorer 5M does not have a camera, but you can purchase one and fit it to your Explorer 5M.
Print Job Mode
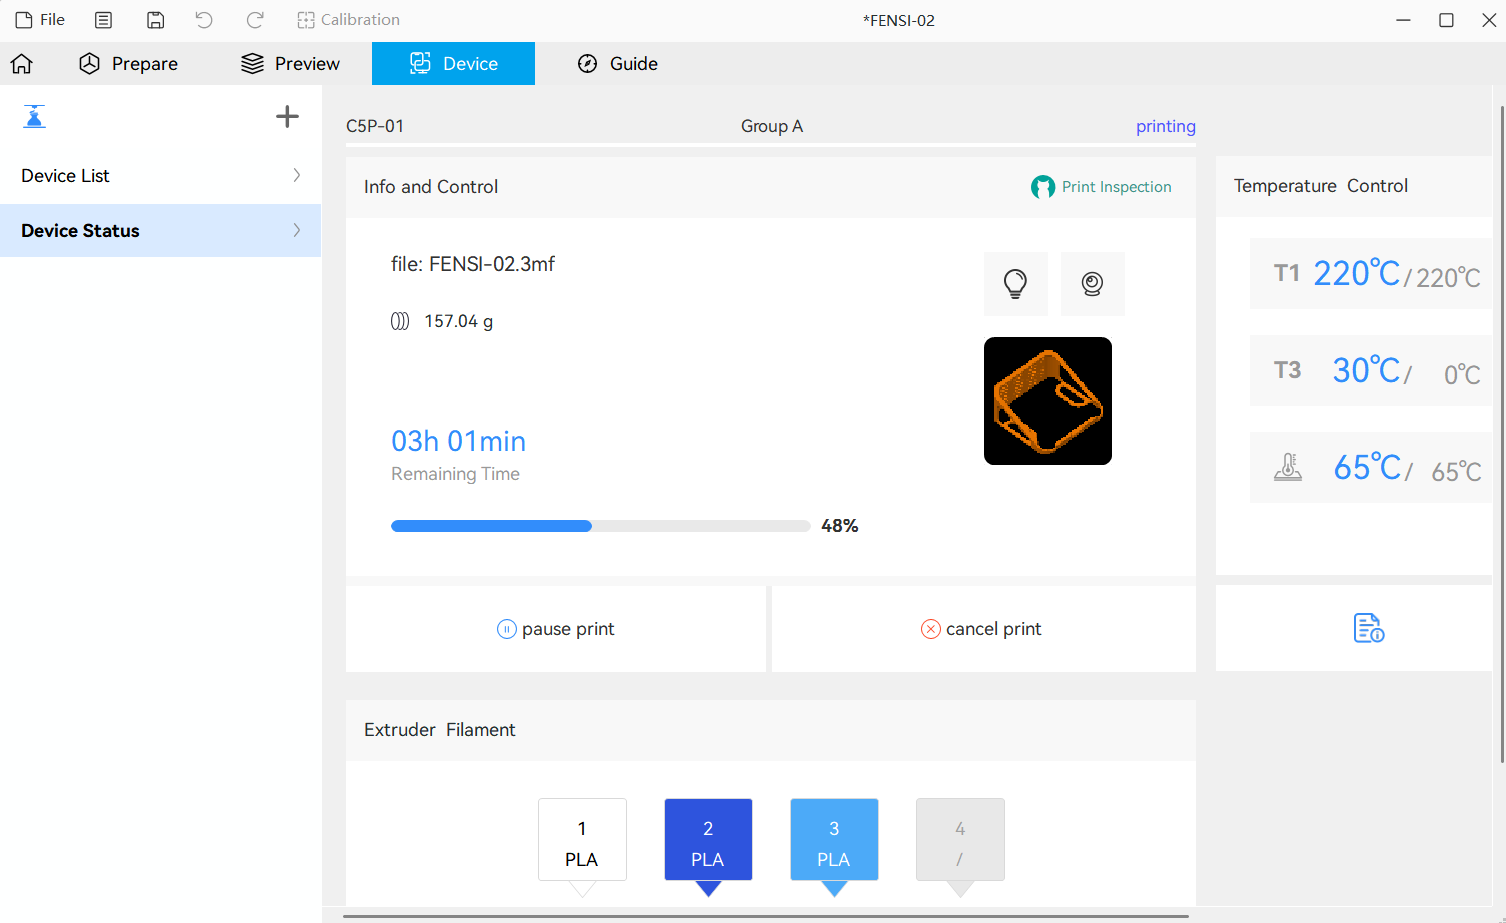
This module displays the model name, a model image, the total filament usage (depending on whether this information is included in the uploaded slice file), the print progress, and buttons for pausing or cancelling the print whilst the printer is printing.
¶ Printer Control Module

Displays and controls the temperature; tap to adjust the extruder and build plate temperatures in real time.

Adventurer 5M Pro intraoral light control button; blue indicates the light is on; grey indicates the light is off.

Adventurer 5M Pro internal/external circulation air filter fan control button; tap to activate the internal or external circulation filter function.

When the device is idle, a device icon is displayed—click it to view basic printer information; when printing a document, a document icon is displayed—click it to view and edit the detailed settings for the document being printed.
¶ Printing
There are two ways to print a document:
1. Remote file printing
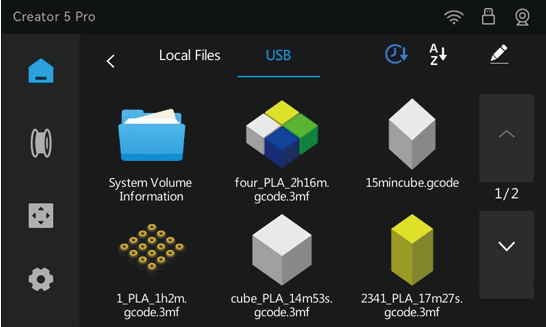
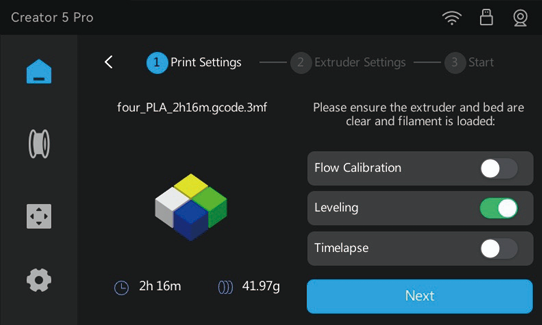
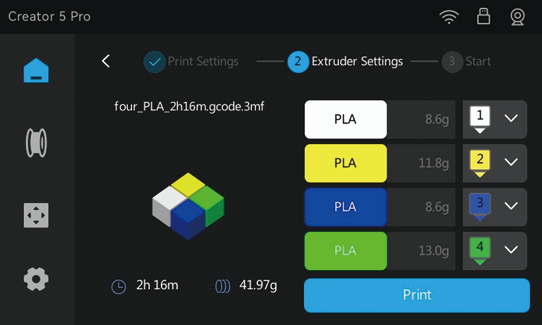
2. Printing from a USB stick
¶ Create a new project
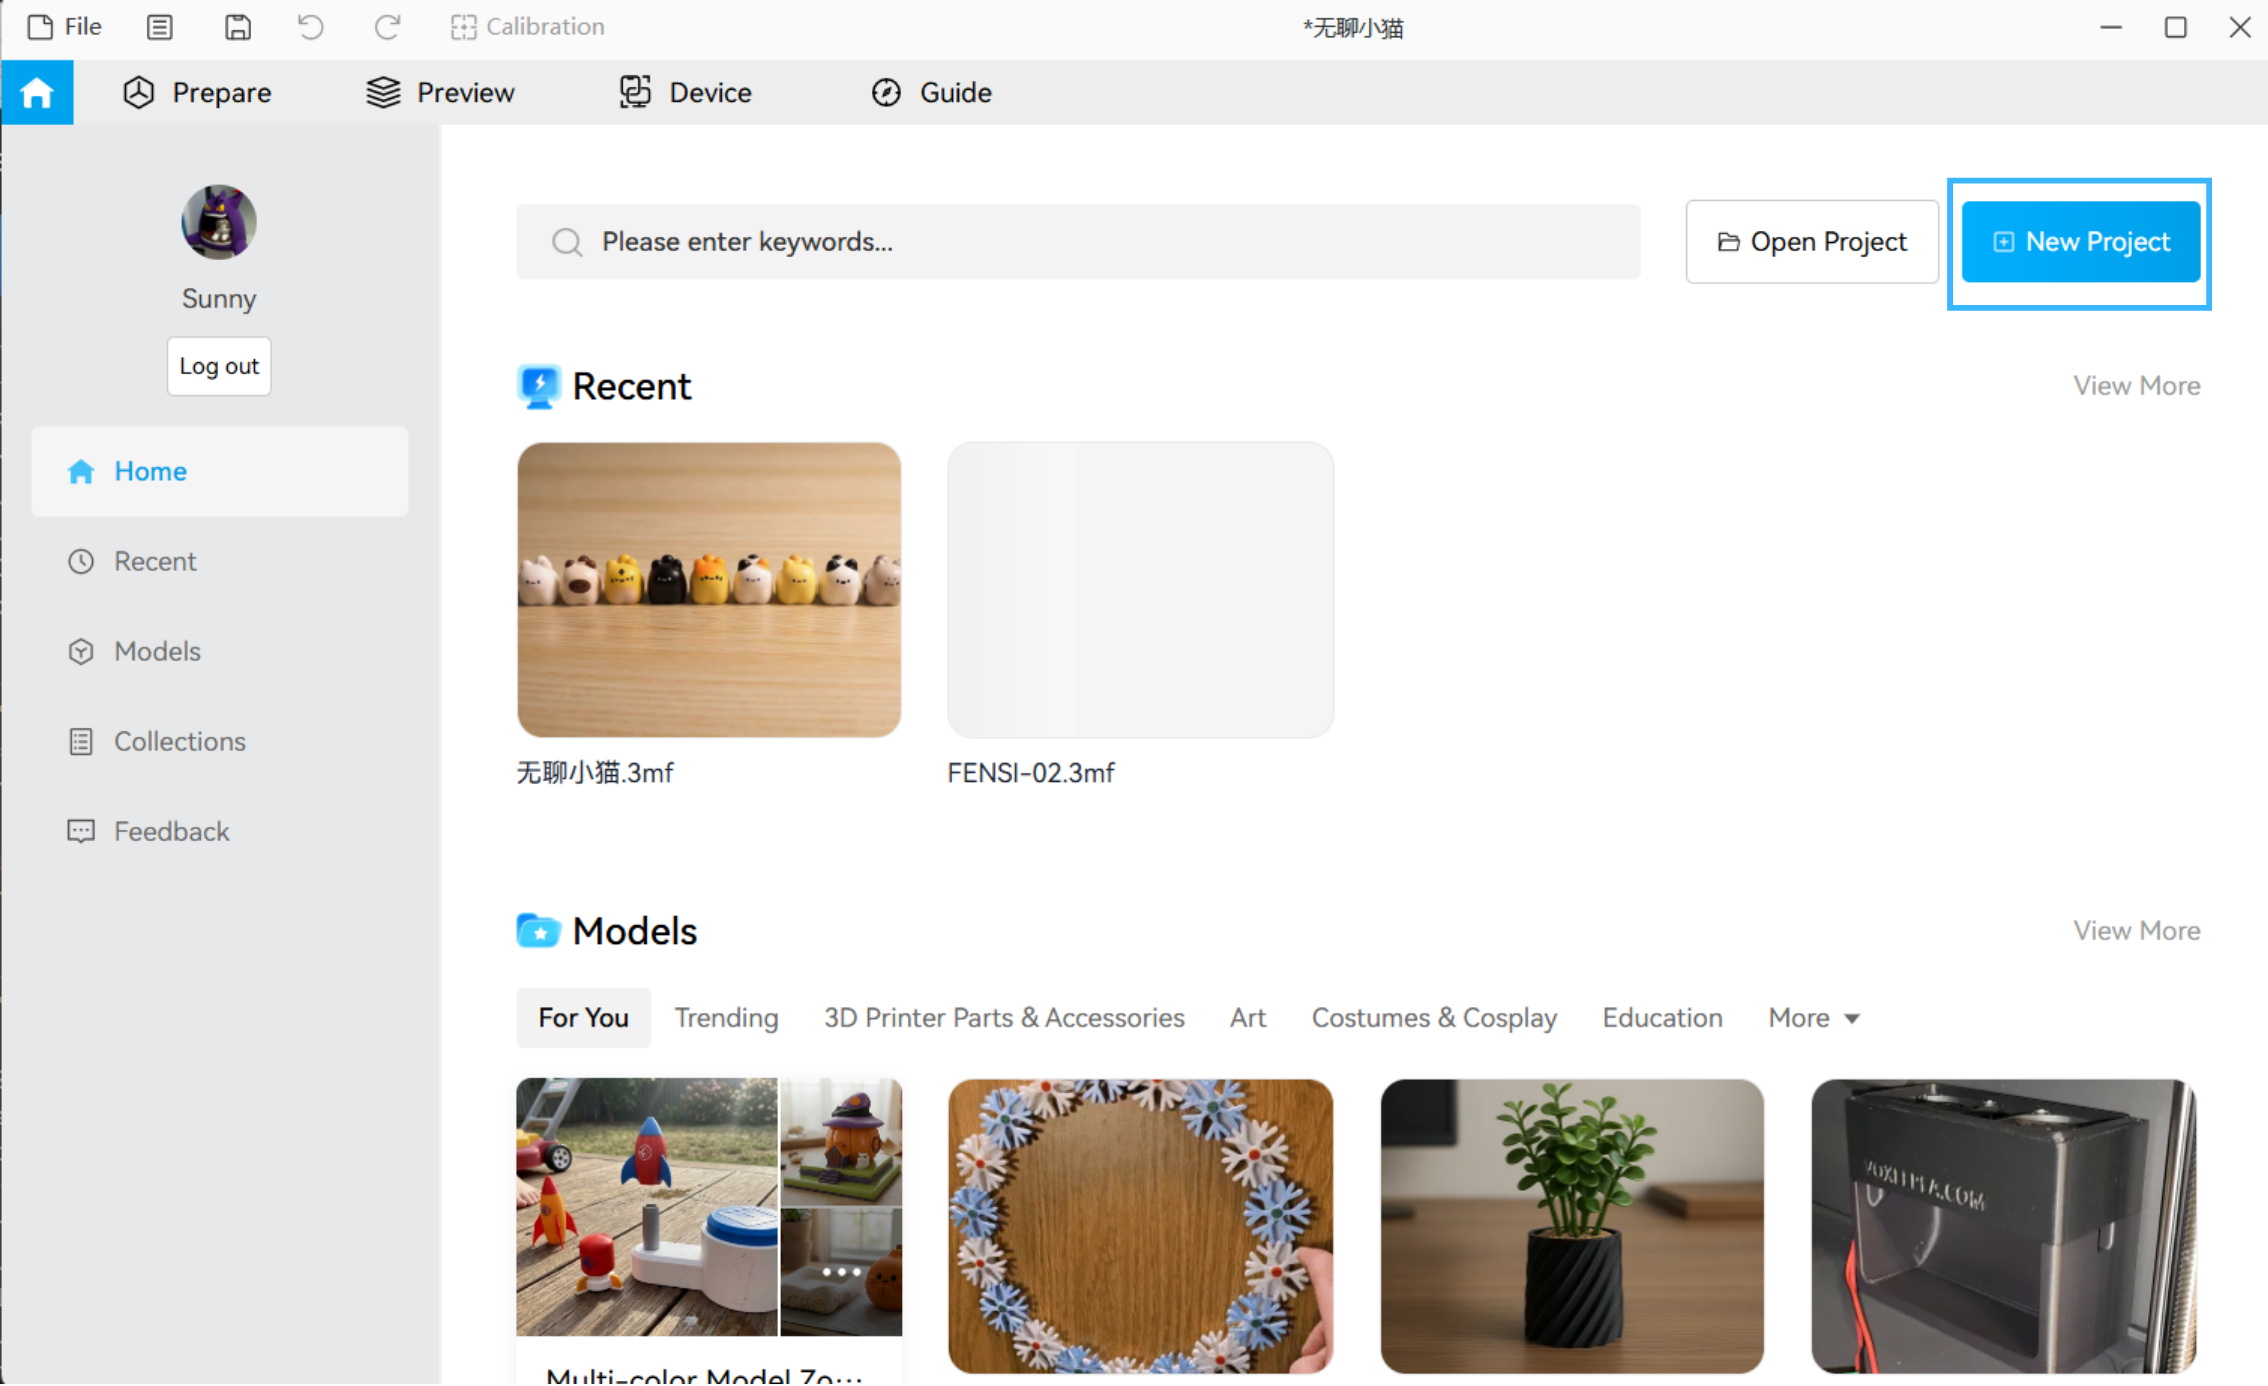
To begin segmenting the model, click ‘New Project’.
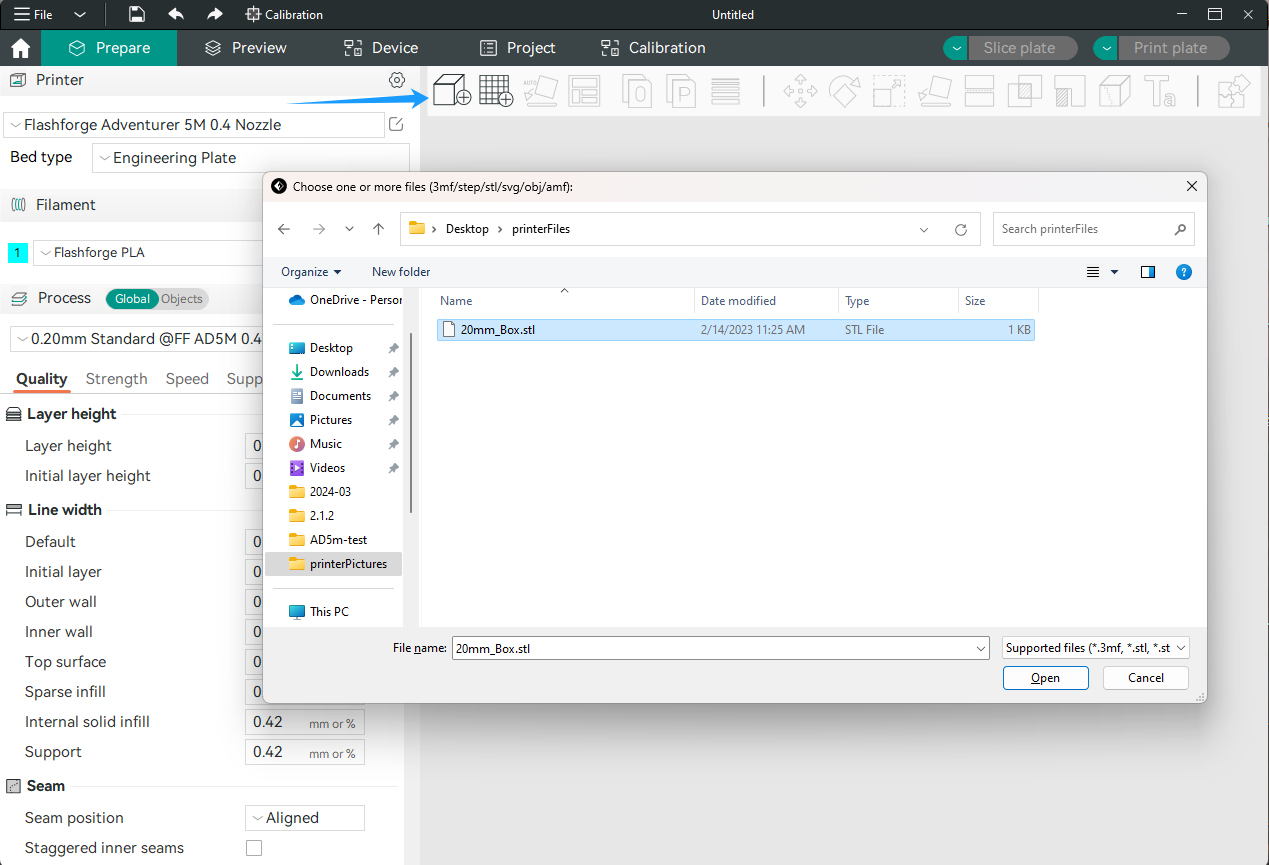
¶ Loade file
In the top menu bar of the preparation page, click[

¶ Select printer/material/process presets
Before you start cutting the model, you will need to set up the relevant printer, printing material and print parameters.
1. Select the printer and nozzle size you wish to use from the drop-down list under ‘[Printer]’.
2. Select the type of filament you wish to use from the drop-down list below ‘[Filament]’.
3. Finally, select the layer height for printing the model from the drop-down menu under the ‘[Process]’ option. Note: The smaller the layer height, the longer the print will take. The standard layer height for printing most models using a 0.4 mm nozzle is 0.20 mm.
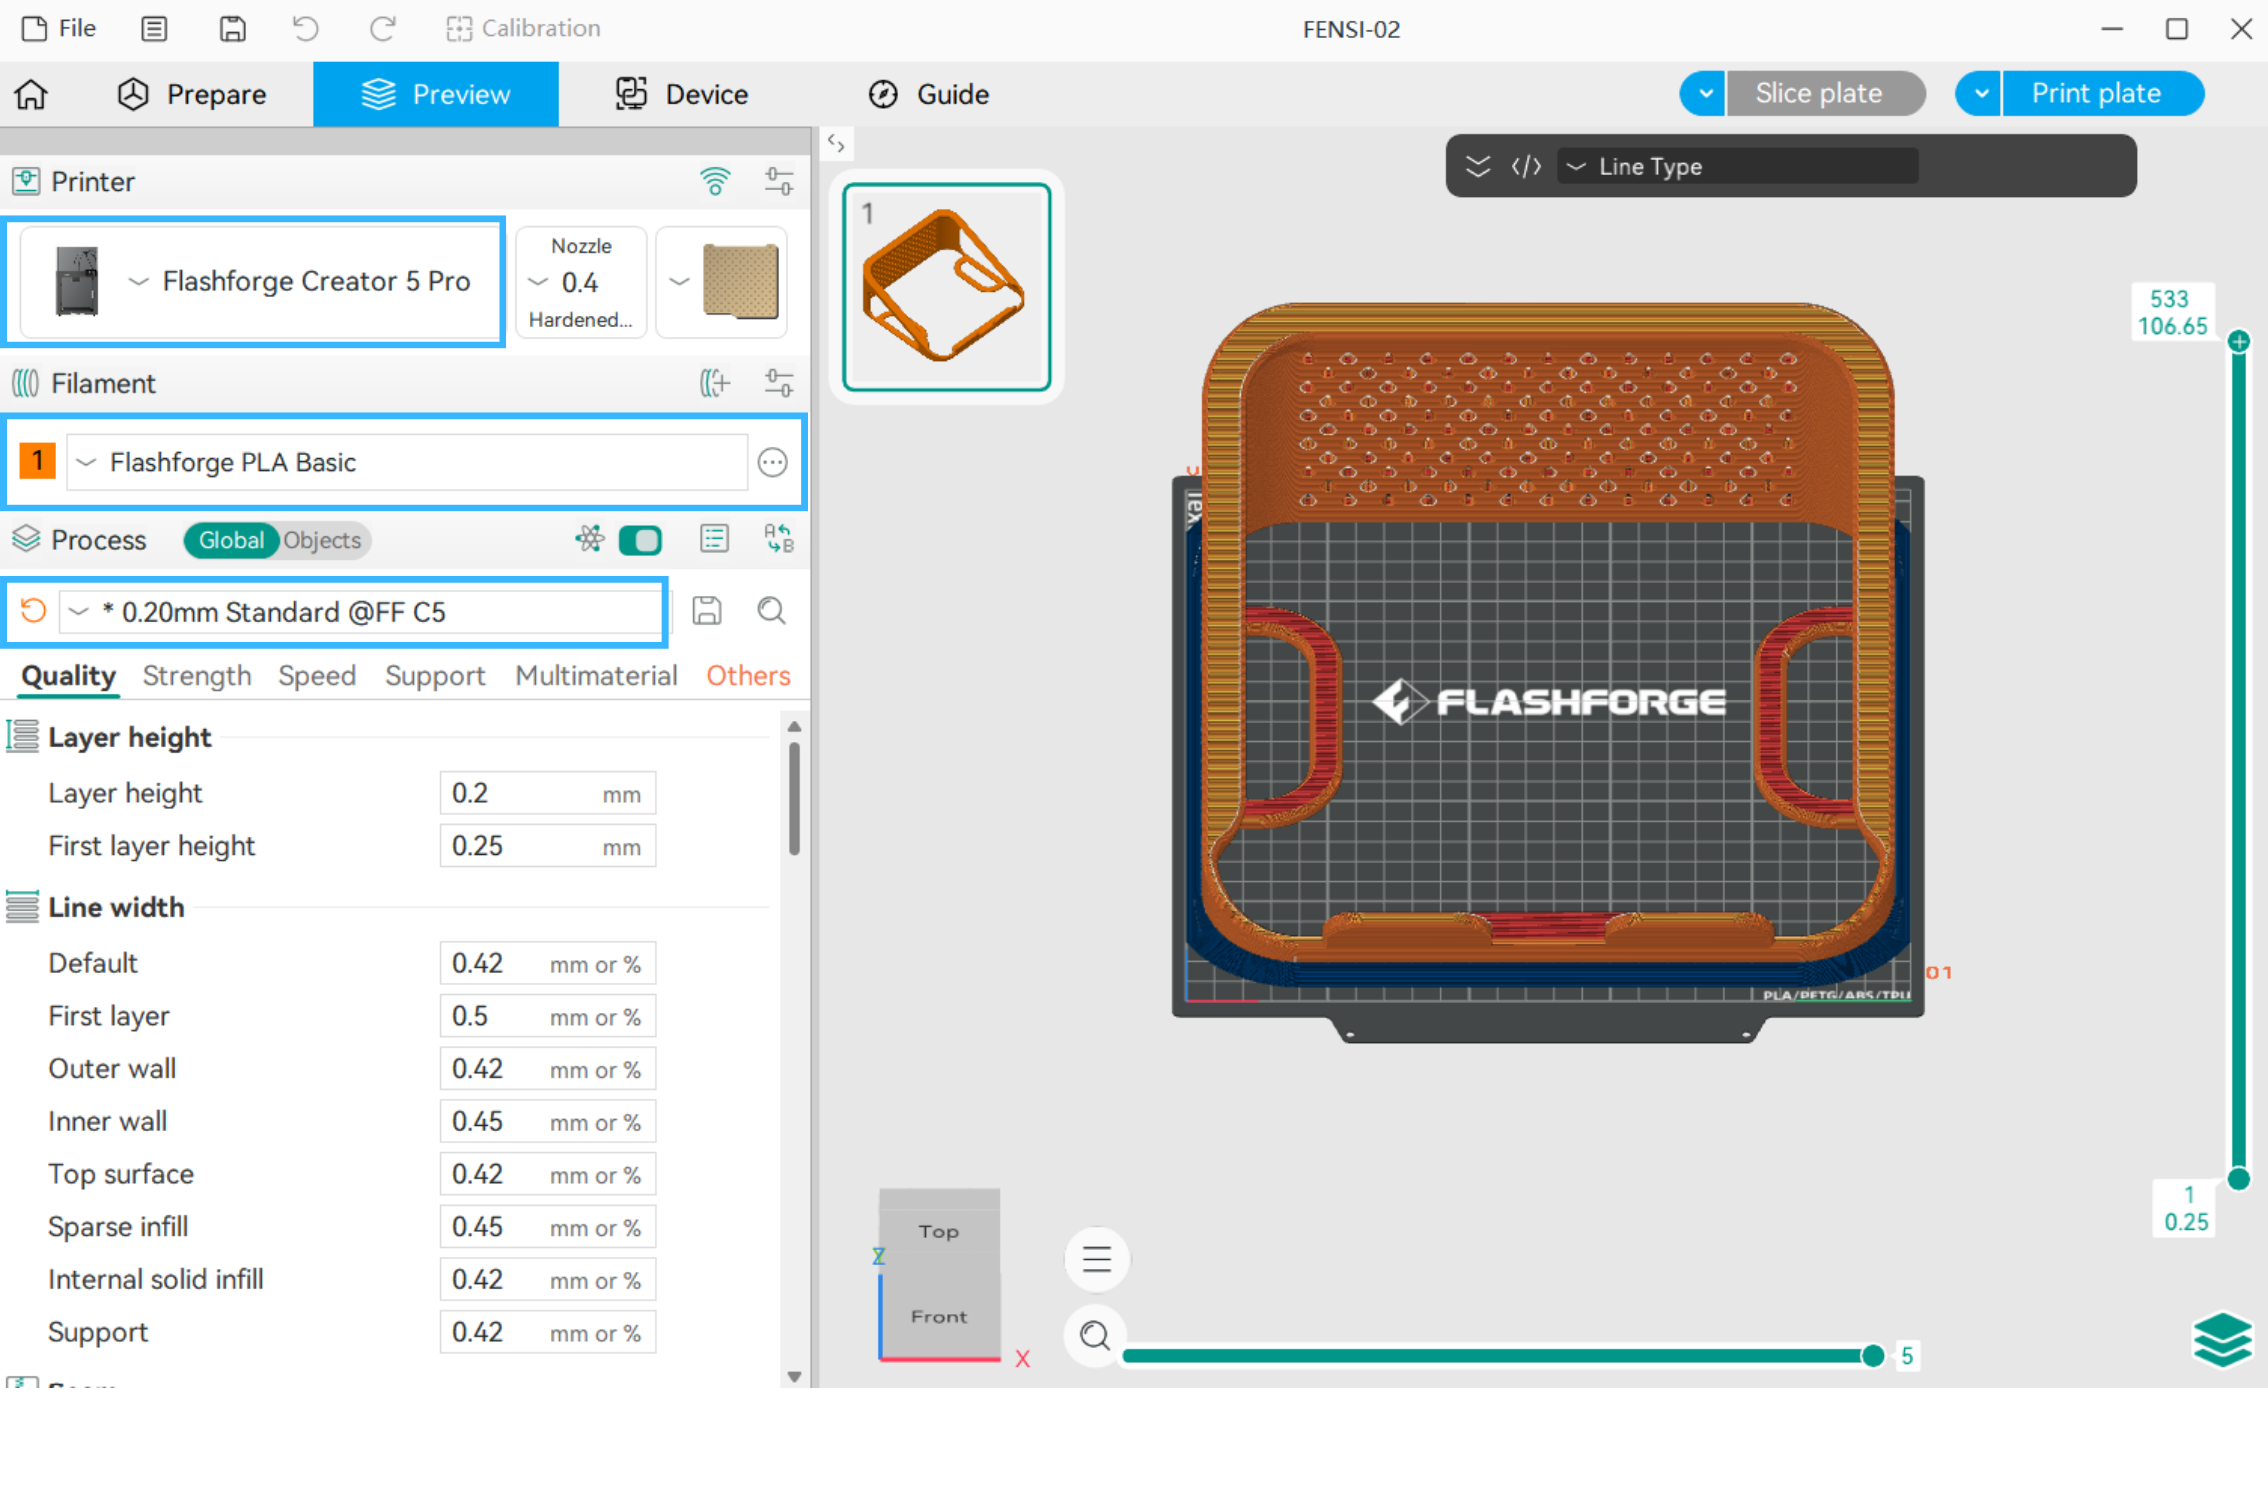
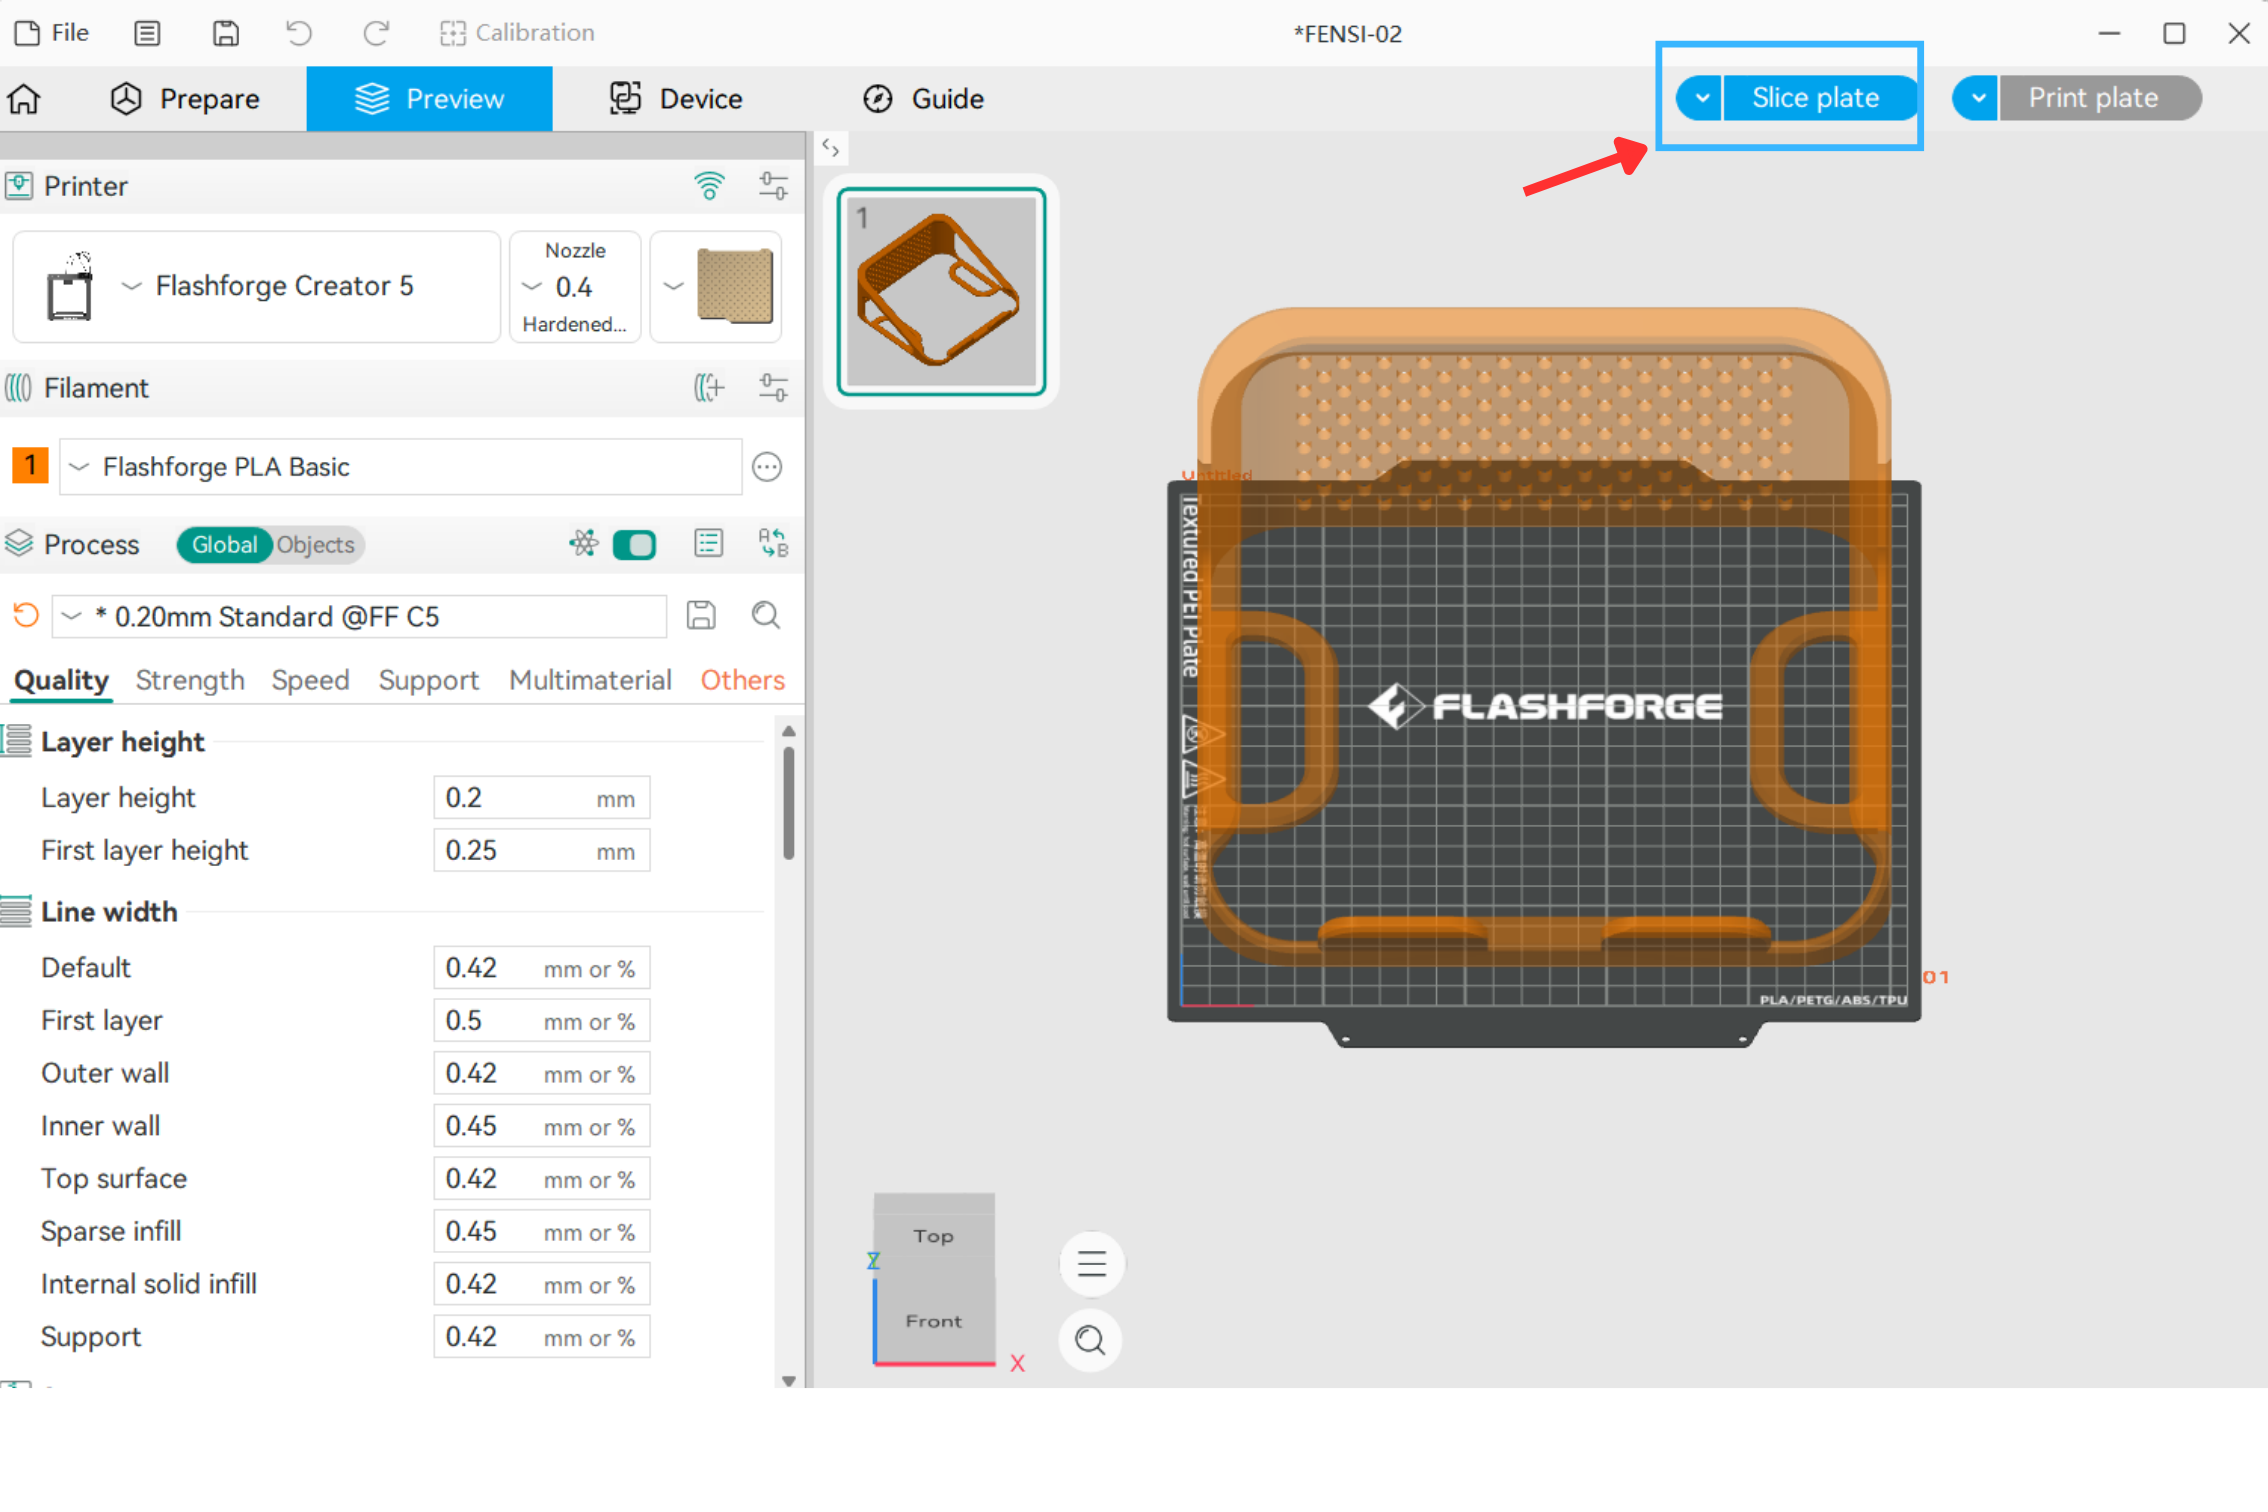
Click ‘Slice Single Disc’. Once slicing is complete, you can choose to print remotely or transfer the file to a USB stick for printing.
¶ Click the drop-down list
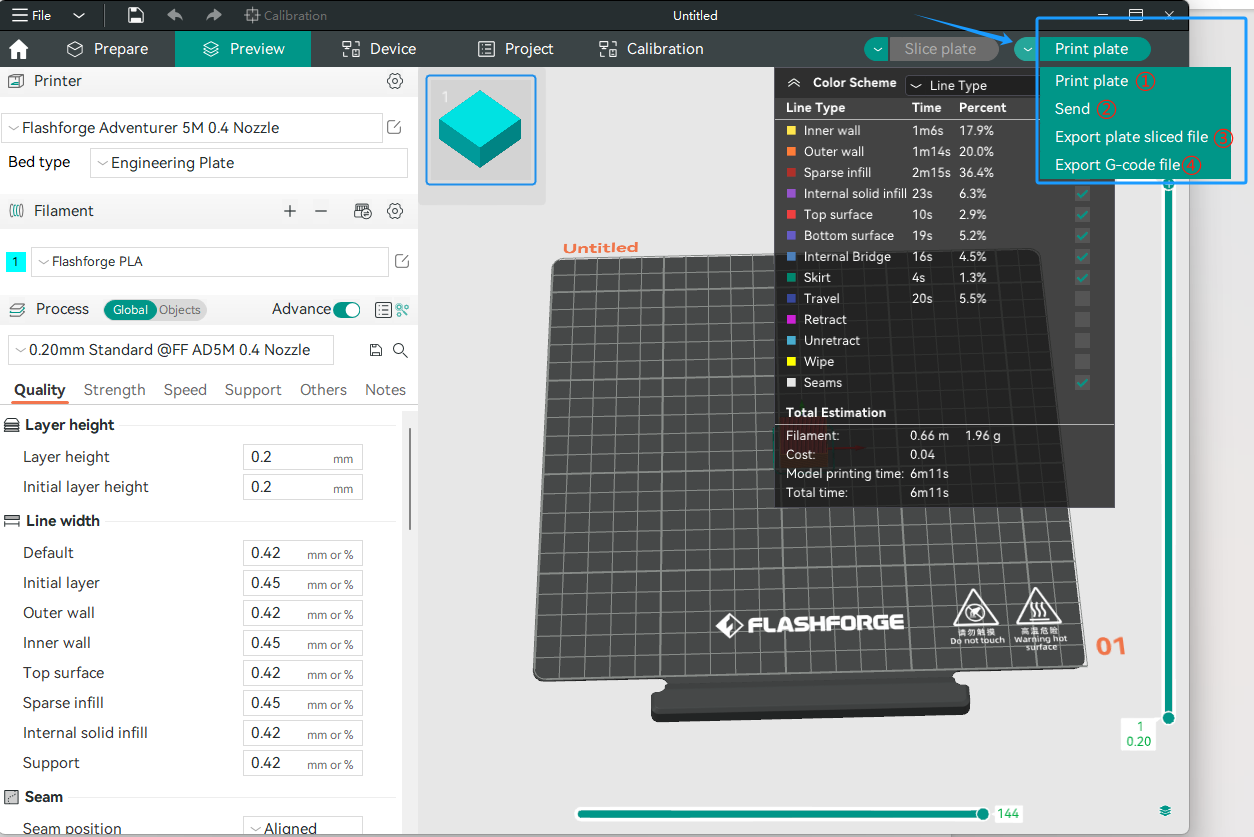
①Print single tray: Send the print job to the printer and execute the print command.
②Send: Simply send the print job and save it to the print queue; do not print it.
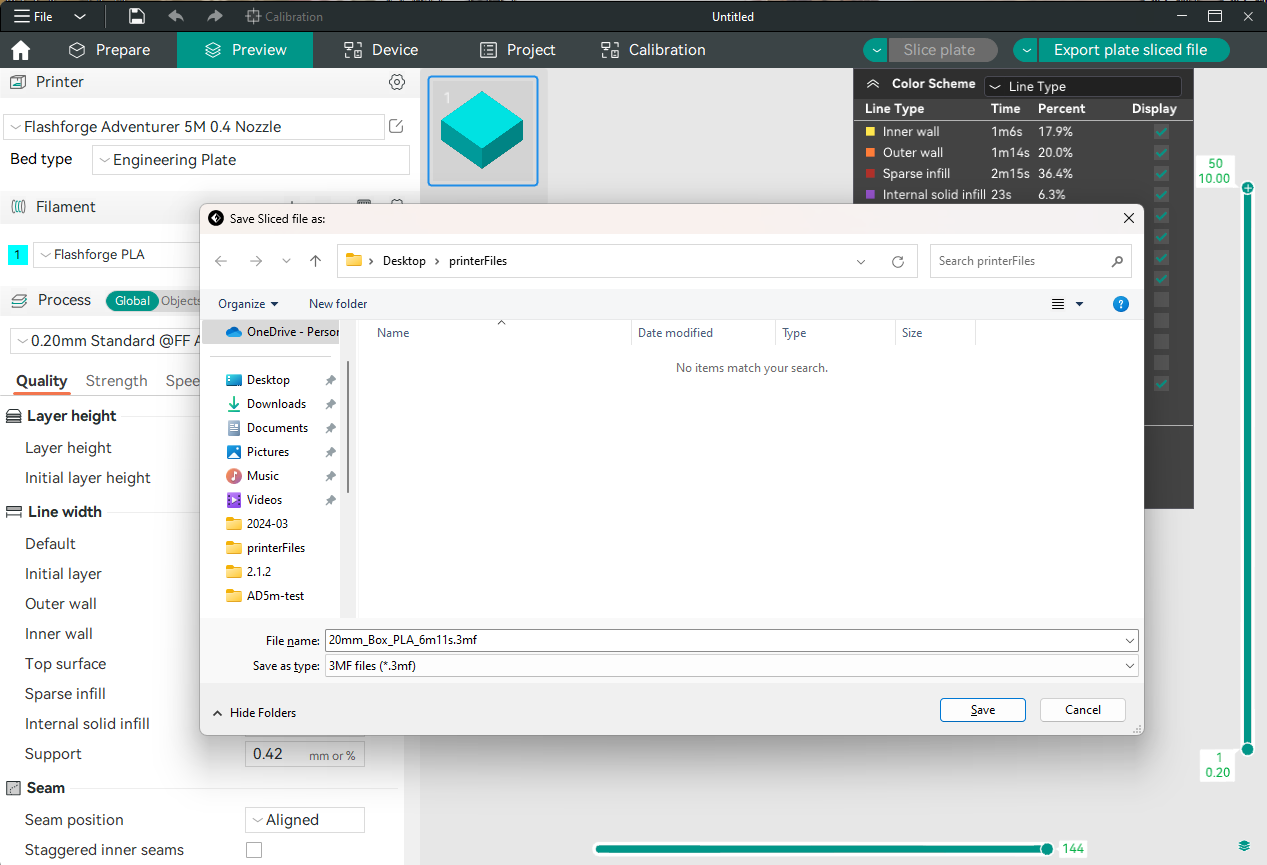
③Export single-slice files: Export the sliced files to your local cloud storage in ‘.3mf’ format.
④Export G-code file: Export the sliced files in ‘.gcode’ format to your local cloud storage.
¶ Printing Method 1: Remote printing
¶ 1. After slicing the model, click [Print plate] and select the printer to send.
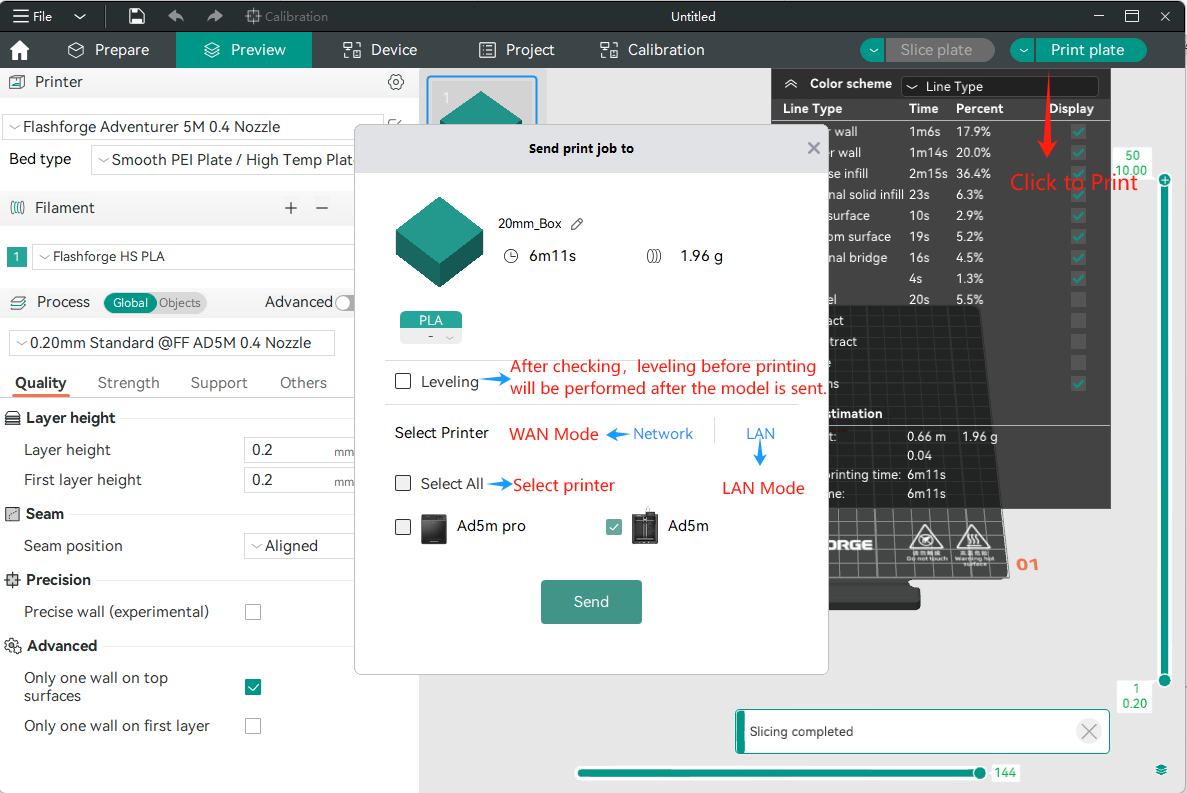
¶ 2. Click [Send] to send the model to the printer.
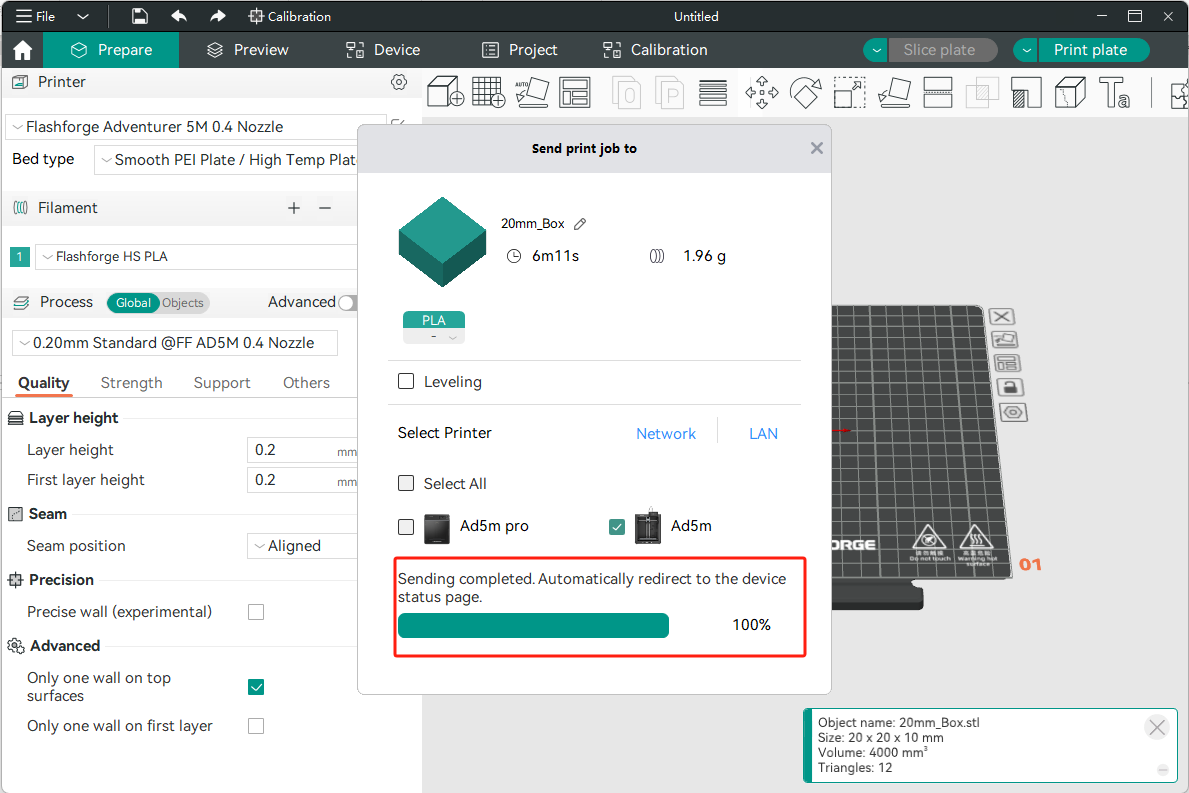
¶ 3. The printer receives the file.
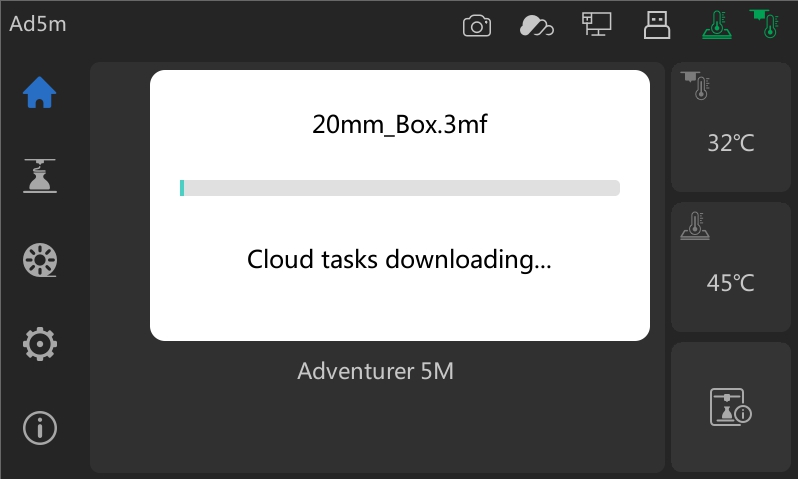
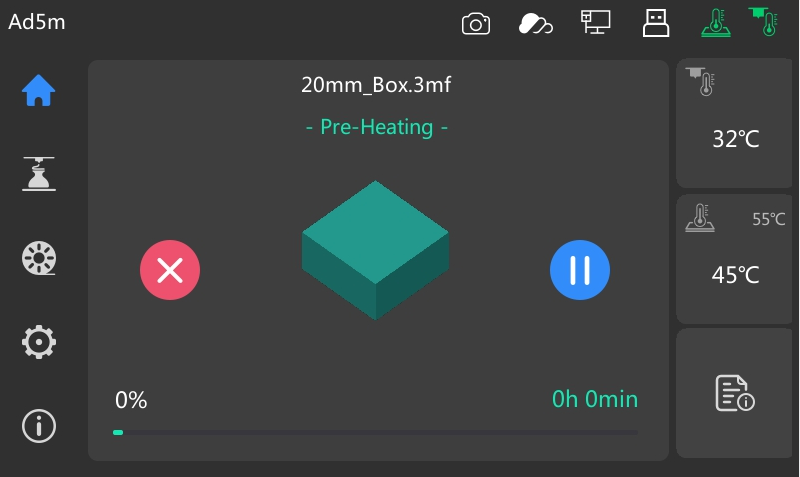
¶ 4.Once download is completed, printing begins.
¶ Printing Method 2: Export the file to a USB stick
- To transfer the file to a USB stick, click the drop-down arrow next to the print icon in the top-right-hand corner, then select [Export single-disc slice file]. Clicking this option will open a File Explorer window, allowing you to locate the USB stick. Once you have found it, click [Save] and the file will be transferred to the USB stick.